
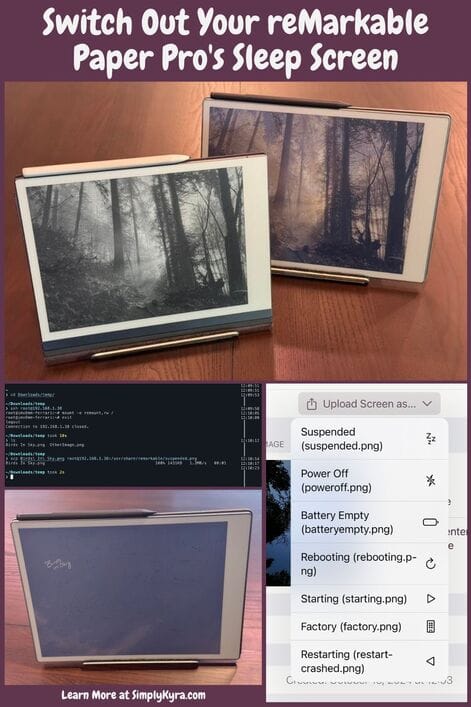
Switch Out Your reMarkable Paper Pro's Sleep Screen

I've been asked recently to make a post on how to switch out a reMarkable Paper Pro screen image and I thought that was a great idea. Here's all the information you need to do so along with links back to more information from previous posts that still apply.
Before beginning I wanted to mention that I've shared a reMarkable Paper Pro connection tutorial post previously along with several reMarkable 2 tutorials. As such I will be linking to subsections of those posts in case you need more information about any of these steps. Previous tutorial posts that I link to include:

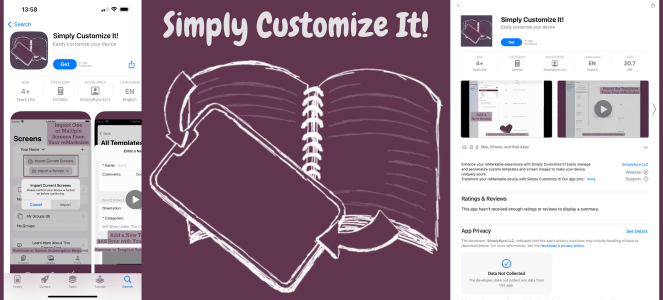
Simply Customize It!
Before going into this tutorial I wanted to share my app Simply Customize It in case you want a simpler way to do this. Through the onboarding process, which you can exit and return to at any time, you can test the connection to your reMarkable and set up your own sleep screen image. It does have a subscription but each one gives you a one week (monthly subscription) or one month (yearly) free trial. For up to date information about the app check out:
That said to use the app you'll still need to set your reMarkable Paper Pro into developer mode and turn on WLAN. I touch over that below but you can find more information about this at Learn How to Access Your reMarkable Paper Pro Through the Command Line.
Warning
Before continuing I need to warn you that setting your reMarkable into developer mode will reset it and you'll have to do the introductory onboarding steps again. I have a Connect account so I was able to re-download all of my files once I was logged in again. Additionally, to turn developer mode back off, you'll need to do a software reset. The steps can be found through reMarkable Support here though I haven't tried it. Images of these steps can be found under Warning at the before-mentioned post.
Steps
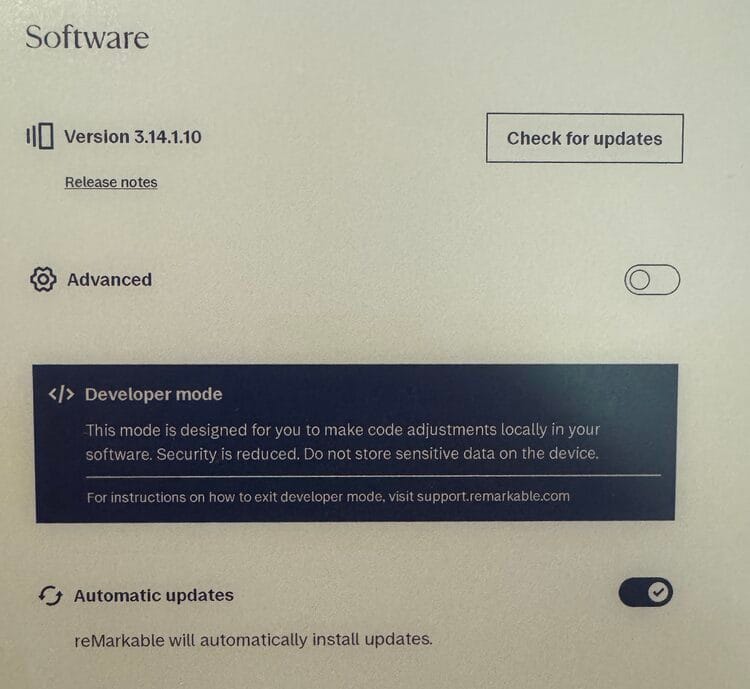
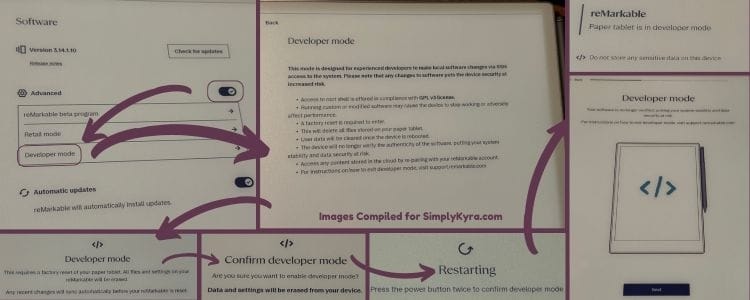
1. Turn on Developer Mode.
To do this you'll need to press Software Version in the General Settings section, toggle Advanced on, and press Developer Mode. From there you'll be brought through warnings and confirmations before the reMarkable restarts and you're brought through onboarding again. Once in, if you return to the same section, you'll see an area under Advanced letting you know to go to support to turn off Developer Mode.
For more information and photos about this step check out the Turn On Developer Mode section of my previous post.
2. Find your login information
Now that developer mode is turned on you can find your login information. To do this you'll need to go to the GPLv3 Compliance section on your reMarkable Paper Pro (Settings > About > Copyright and Licenses)
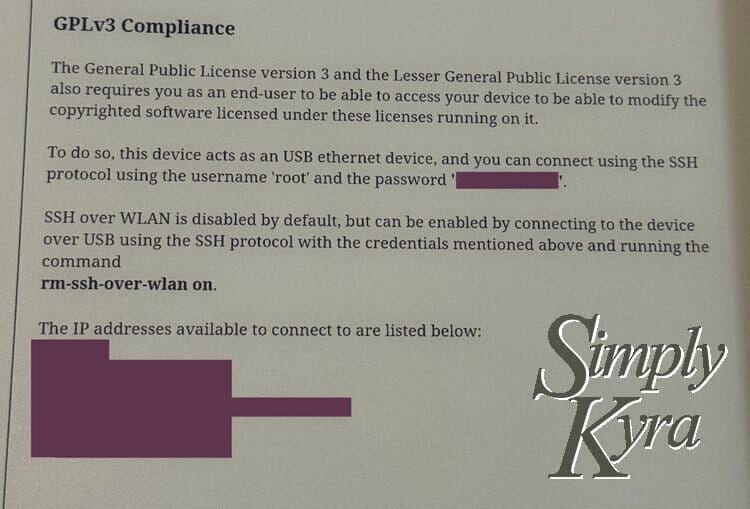
root to the left. The list of IP addresses are under the bottom patch of purple. I've only ever used the top one. For more information about this step check out the Find the Login Credentials section of my previous post.
3. Connect to your reMarkable
To connect to your reMarkable you will need to physically plug in, via USB, from your reMarkable Paper Pro to your computer. From there, on your computer, open the terminal, type in ssh root@ipaddress, and press enter. After putting in your password and agreeing to the authenticity you're in.
❯ ssh root@192.168.1.42
root@192.168.1.42's password:
The authenticity of host 'host (host)' can't be established.
This key is not known by any other names.
Are you sure you want to continue connecting (yes/no/[fingerprint])? yes
Warning: Permanently added 'host' () to the list of known hosts.
root@host's password:
root@imx8mm-ferrari:~# exit
logout
Connection to 192.168.1.42 closed.
For more information about this step on my Paper Pro check out the Connect via SSH section of my previous post. Additionally, if you go to my original post about connecting to my reMarkable 2 you can get more in depth steps on each part along with additional tips like skipping the password by using a public key and creating shortcuts.
4. Optional: Turn on WLAN so you don't need to wire in each time
If you don't want to have to physically connect the reMarkable Paper Pro to your computer each time you want to SSH in you can turn on WLAN allowing you to connect over your local area network. So, now that you're in, turn WLAN on by typing in rm-ssh-over-wlan on.
root@imx8mm-ferrari:~# rm-ssh-over-wlan on
running: systemctl restart dropbear-wlan.socket
ssh over WLAN enabled.
For more information about this step check out the Turning on WLAN section of my previous post.
5. Issue with readonly directories
Once connected I quickly realized the directories (folders) were readonly so I couldn't do any of the things I needed to do. To get past this, every time you SSH in and want to make changes, you might need to type in mount -o remount,rw /.
root@imx8mm-ferrari:~# mount -o remount,rw /For more information about this step check out the Getting Past the Readonly section of my previous post.
6. Optional: Backing up your reMarkable
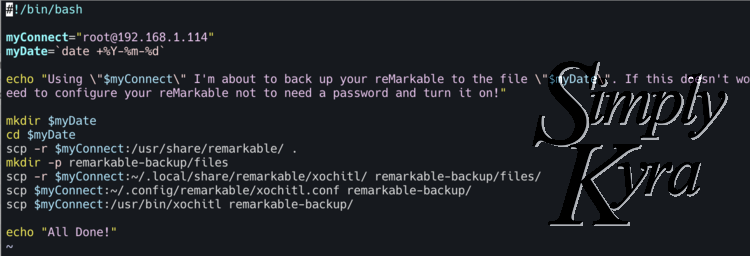
Before proceeding I recommend you back up your reMarkable in some way. In my original sleep screen post, under First Backup Your reMarkable’s Software section, I shared that you can backup all the files by putting them into an already created folder, in this case temp on my Desktop, using the following command with your credentials instead of mine:
❯ scp -r root@192.168.1.38:/usr/share/remarkable/ Desktop/temp/I later created a bash script to streamline this process and shared it here:
At that time, I still manually backed up my notebooks too just to be safe. Since then I've gotten out of the backup practice though I still run the script before I do anything too crazy. I also know that I have the Connect plan, old backed up templates somewhere, and the knowledge that the next reMarkable update may fix any problems when it upgrades.
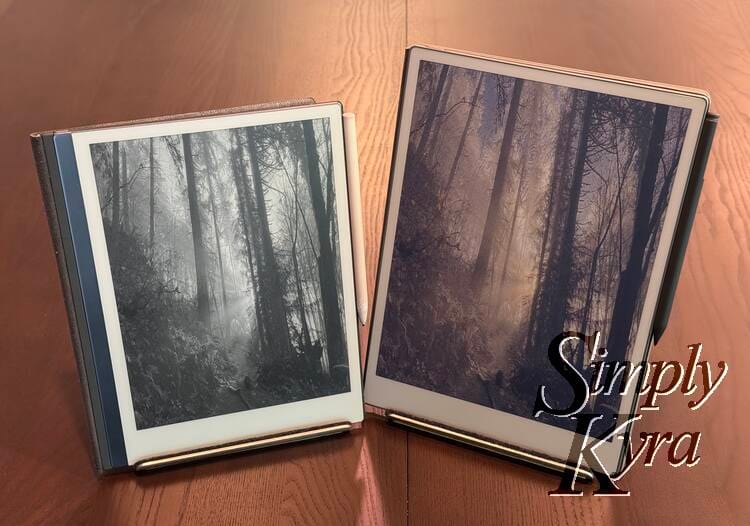
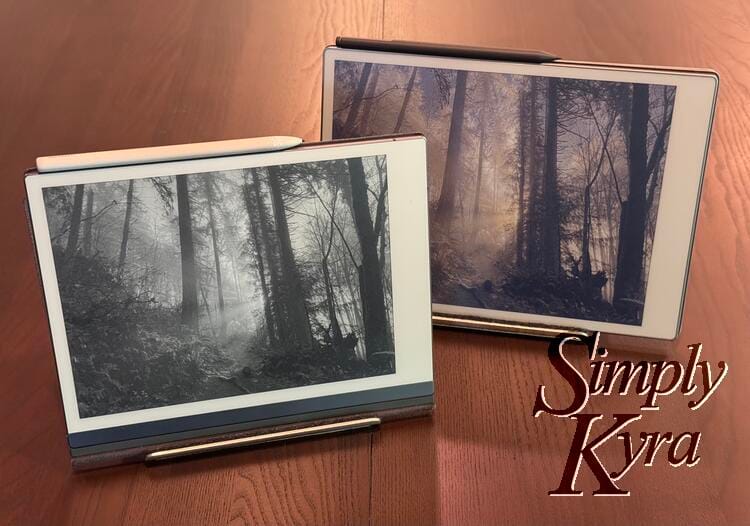
7. Find, create, or purchase the screen image you want to use
When I first started uploading a sleep screen image to my reMarkable it would be auto-resized to fit. Now the reMarkable no longer does that so you'll want be sure your image is 2160 pixels tall and 1620 pixels wide. In case you're working with multiple devices the older reMarkables are 1872 by 1404 pixels. Additionally, the image needs to be in a PNG format.
In the past I've used both Canva and Pixelmator Pro as I can create a canvas of the right size and add to it. That said, most recently, I simply choose a photo and use my app to resize then upload. You could also use your reMarkable itself to size your image by either creating it on the reMarkable itself or uploading a PDF containing the page you want to use. In either case just email the page to yourself as a PNG. For my past-self take on this check out the Create the image section in my previous post.
8. Sleep screen on the reMarkable explained
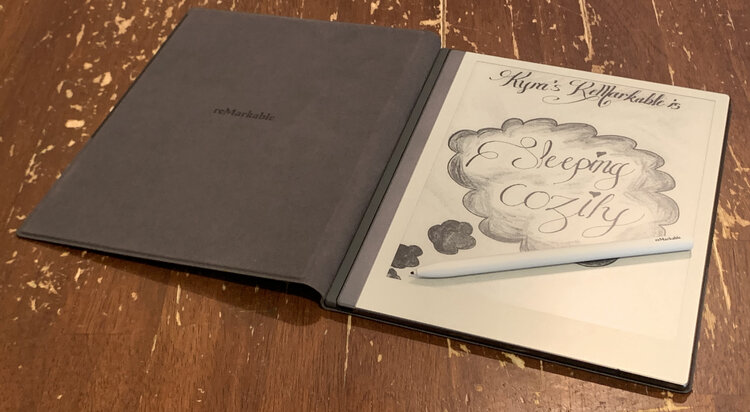
All of the reMarkables have a list of files they look for that are located within the /usr/share/remarkable/ directory. If you replace any of those PNG image files with something else it will show that image instead of the old one. If you rename the file it will not be able to find the required image and will instead use its backup plan. The sleep screen image used is called suspended.png and if I delete it the reMarkable Paper Pro says simply "reMarkable is sleeping" for its backup plan. The rest of these steps will assume you want to replace the sleep screen image but you could follow the same steps replacing the suspended.png filename with batteryempty.png, poweroff.png, etc to replace the other images.
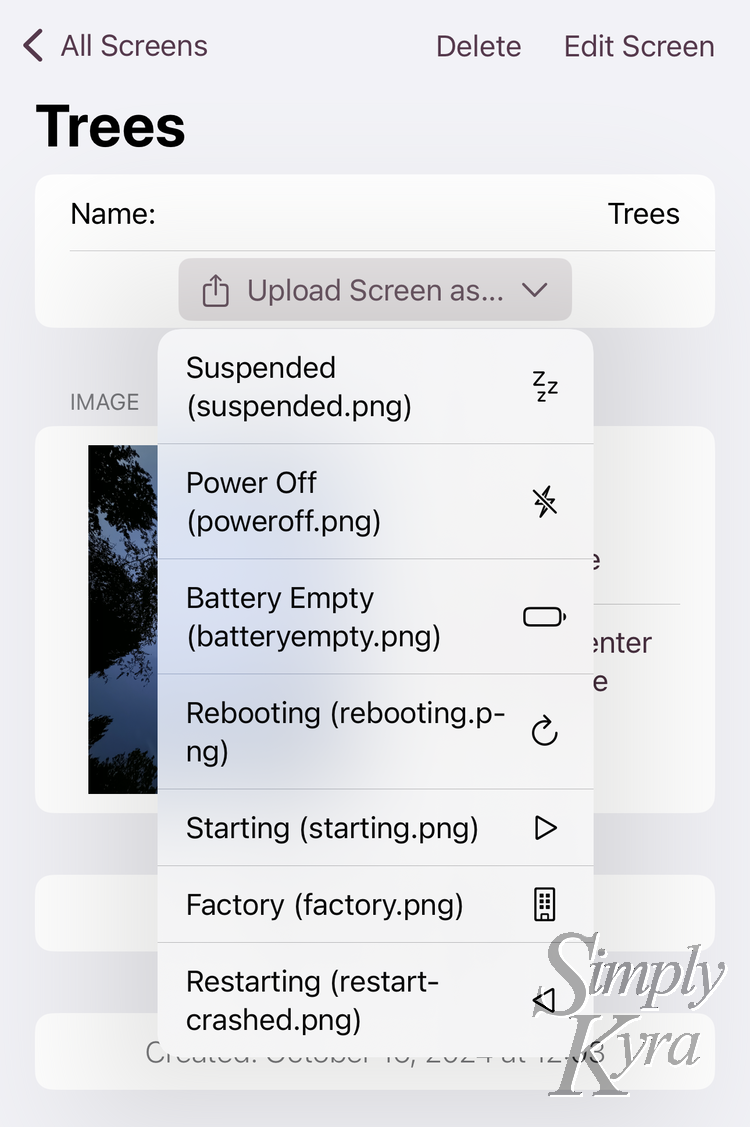
overheating.png. Also just a reminder. Custom images are not supported so when the reMarkable software updates it will be forgotten. Keep the images you use on hand so you can follow the same steps to upload whenever it's lost.
9. Open a terminal where your file is stored
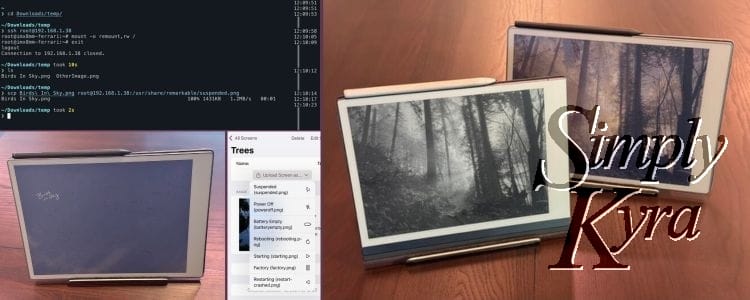
To upload the image to your reMarkable you'll need to use scp through your terminal. To open it you can search (command + space) for the terminal application and, once opened, it will start you off in your home directory ~. My image Birds In Sky.png, for this example, is located within the Downloads/temp directory so I need to change my directory location, using cd, to get there:
~
❯ cd Downloads/temp/

~/Downloads/temp
❯
You can then use ls to list your files and, just as an aside, if your filename has spaces you'll need to use a \ before each space. As an example:
~/Downloads/temp
❯ ls
Birds In Sky.png

~/Downloads/temp
❯ ls Birds\ In\ Sky.png
Birds In Sky.png
Additionally, you could execute the below scp command without navigating to that directory but you'd have to use it's pathway along with the filename so in my case I'd need to enter, if executing from the home directory, Downloads/temp/Birds\ In\ Sky.png instead of simply Birds In Sky.png.
10. Upload the image to your reMarkable
Using the same credentials as when using SSH to access your reMarkable you can now upload the file. Just a heads up I used a public key so it no longer asks me my password to connect (learn more here) if you haven't you will be asked to enter it before the upload can happen.
To do this we will be using Secure Copy Protocol (SCP) which is a way to securely move files to or from two remote computers which in this case is your computer and your reMarkable. Here's a How To Geek article with more information if you wand to dive in deeper.
Using scp we can upload and replace the suspended.png image in one go. Using my credentials (replace the host with your own) and my Birds In Sky.png image my command would be: scp Birds\ In\ Sky.png root@192.168.1.38:/usr/share/remarkable/suspended.png. This means copy scp the first item Birds\ In\ Sky.png and put in on the reMarkable root@192.168.1.38 in the /usr/share/remarkable/ directory as suspended.png. Since that image already exists it will just replace (stomp) the old one.
With the reMarkable Paper Pro the directory we replace the image in is readonly by default unless you've run the mount command (section 5 above) since the last restart. As such, to demonstrate, this terminal shows me attempting to upload the image, failing, using ssh to connect, running the mount command, exiting, and trying to upload again:
~/Downloads/temp
❯ scp Birds\ In\ Sky.png root@192.168.1.38:/usr/share/remarkable/suspended.png
scp: dest open "/usr/share/remarkable/suspended.png": Failure
scp: failed to upload file Birds In Sky.png to /usr/share/remarkable/suspended.png

~/Downloads/temp
❯ ssh root@192.168.1.38
root@imx8mm-ferrari:~# mount -o remount,rw /
root@imx8mm-ferrari:~# exit
logout
Connection to 192.168.1.38 closed.

~/Downloads/temp took 26s
❯ scp Birds\ In\ Sky.png root@192.168.1.38:/usr/share/remarkable/suspended.png
Birds In Sky.png                                                                                                                               100% 1431KB   1.9MB/s   00:00

~/Downloads/temp
❯
In the old reMarkable at this point you'd need to restart your device to see the new screen image but now, because of the mounting step, we don't need to restart and can simply press the top button and see the new screen immediately.

For more information about this step and confirming whether it worked check out Moving the image to the reMarkable, Confirmation, and But Did It Work sections of my previous post. That said, these steps are for the reMarkable 2 that didn't need the mounting step.... though you can use it on the previous reMarkable devices too.
I don't have a Mac
I did all of the above steps on my Mac computer. It's been years since I've used a linux machine or Windows so I can't attest to any minor differences you might find. That said, if you have a linux machine it should be the same. On Windows the equivalent to terminal would be Command Prompt (uses dir instead of the ls above) or PowerShell. I've also heard of people using WinSCP too. Most of this tutorial can help you but anything specifically on the Mac terminal may be slightly different but I'm hoping this can get you started. Good luck.
UPDATE: Just came across a how to for Windows on Reddit by EfficiencyExternal9. Figured I'd link it in case it can help anyone.
Custom Studio GHIBLI sleep screen
by u/EfficiencyExternal9 in RemarkableTablet
And there you go. Whether on the reMarkable, reMarkable 2, or reMarkable Paper Pro you can have custom sleep screen images.
Hope you’re having a great day! And feel free to comment below with any tips or questions.
UPDATE: December 2025
Sleep Screen Overlay
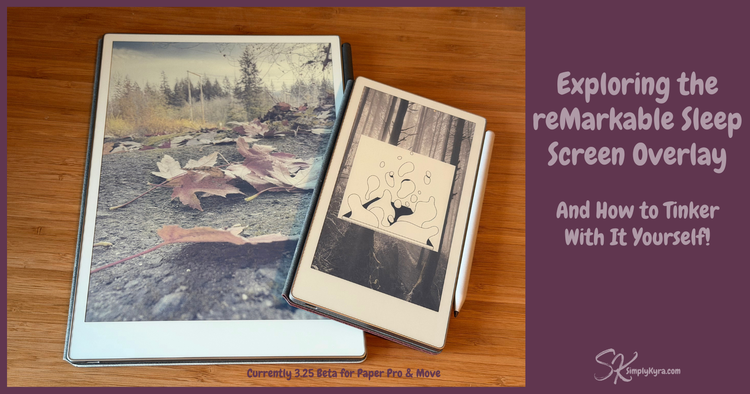
I've noticed with the 3.25 beta on the reMarkable Paper Pro and PP Move that an overlay how appears over the sleep screen image. Wrote up what I discovered here.
If you’re interested in getting any of my future blog updates I normally share them to my Facebook page and Instagram account. You’re also more than welcome to join my email list located right under the search bar or underneath this post.
Did this save you time?