
Kids' Play Kitchen
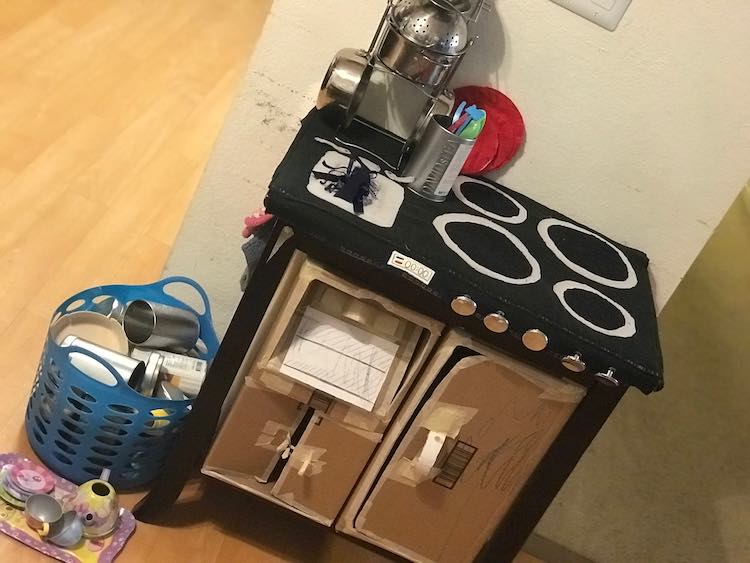
Years ago, when we were gifted our first set of cooking-related toys, I converted a cardboard box into a stove and oven combo for Ada to play with. The box slowly broke down so later on I decided to create a larger kitchen set by taking an old end table and converting it, by adding cardboard boxes to the center, making a fridge, oven, and cupboard. I then covered up the top of the end table with paper and marked it to make a stovetop. The kids loved it at first but over time it started getting ignored and the paper (a.k.a. top of the stove) was partially ripped off. I started wondering how I could change it to make it better and ended up coming up with this sewn replacement for the ripped paper. I still remember how excited the kids were when they first saw it. While Ada was cooking up a storm she excitedly stated that “this is what real chefs use”.
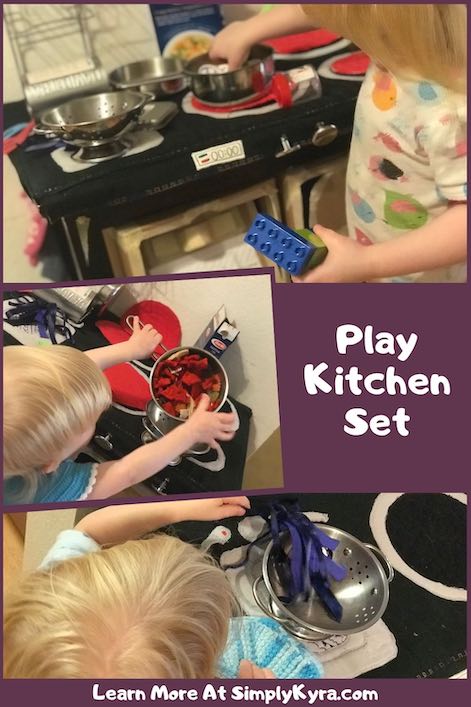
I actually made this a year or two ago but haven’t shared it until now. Back in 2018, for the twelfth week of the 52 week sewing challenge, I made play food and while I was taking photos of the kids cooking and plating the pasta and tomatoes I realized that I’d have to hide the stovetop in the background since I hadn’t posted it yet. Over time I realized the drawer knobs I added as dials for the burners and oven were falling out and taking the grommets along with it causing gaping holes in the fabric. I decided to wait to post the kitchen set, and put off going over the photos, until I figured out a way to save the knobs or come up with a different sort of dial. Since then the kids have stopped playing with the kitchen set and so I stopped trying to think of ways to fix it. Thus these photos sat, unorganized, on my hard drive waiting for me. I’ve finally decided to share them with you, even though the knobs haven’t been fixed, just in case any of this can help you out.
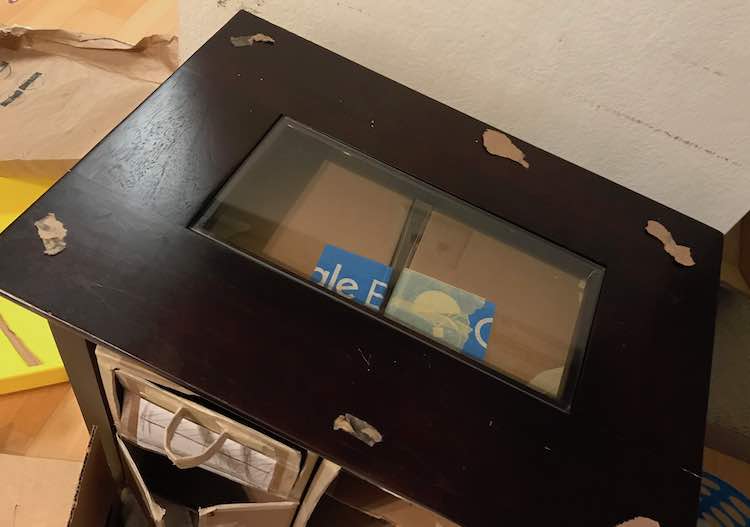
Once I was ready to start the project I removed the ripped paper and cardboard from the top of the end table. I was debating redoing the boxes below but stopped myself before I started removing them. I figured I’d work on the stove first and later (although Ihaven’t yet) tackle the ‘appliances’.
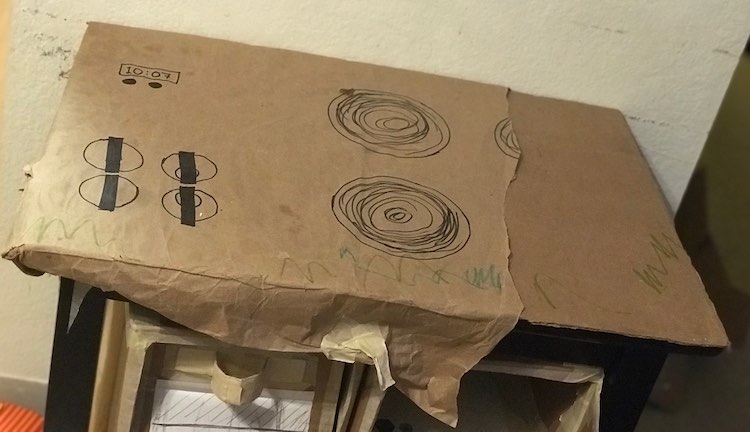
Once the top was removed I used the cardboard as a template to cut out a sheet of fusible fleece so the stovetop would have a bit more weight and extra cushioning. I knew I also needed two pieces of black woven fabric as I wanted to sandwich the fusible fleece. Originally, I knew I needed extra length and width for the top, black fabric, so I could fold the edges over and hide the fleece and the bottom black layer’s raw edges. At least this was the idea before I remembered I needed to add flaps to the side so the stovetop cover could wrap around the top of the end table. Luckily I cut both pieces of black fabric, top and bottom of the stovetop, slightly larger than the fusible fleece, and cardboard template, so I was able to fold over the edges on both of them.
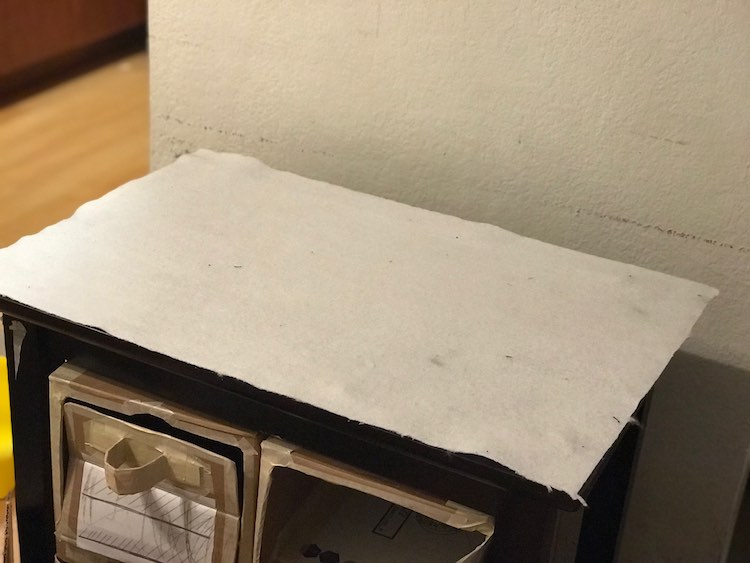
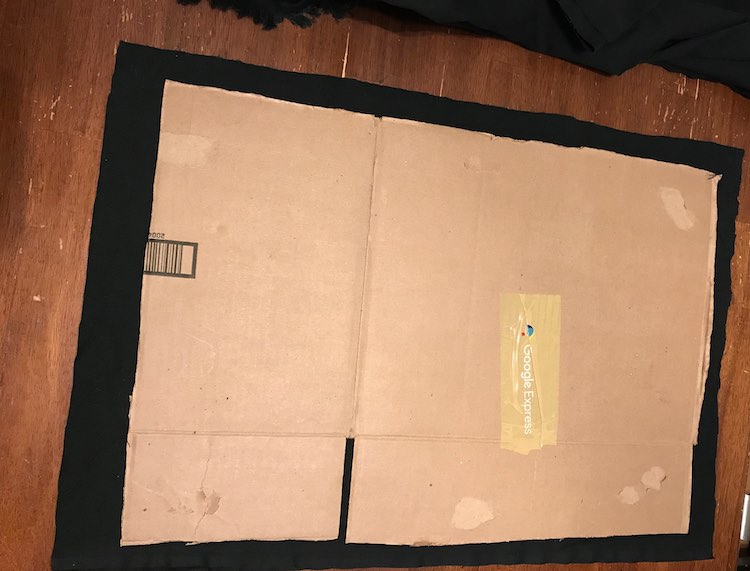
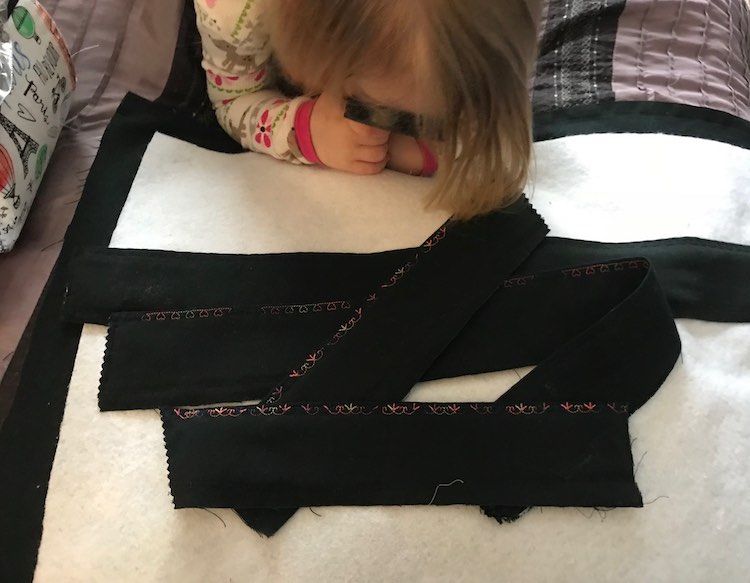
At this point I set aside the smaller piece of black fabric, for later, and used my iron to attach the fusible fleece to the center of the larger one as this was to become the top of the stovetop. At this point I also set it aside while I created the flaps I knew I needed to attach to all four sides of the stovetop cover. I wanted the flaps to be over two inches tall and match the length of each side. I also wanted the bottom edge to be finished, no raw edges, and also be strengthened with fusible fleece. I ended up cutting four pieces, one for each side, making them almost five inches wide. Two of these were cut longer, to match the longer edges of the end table, while the other two were cut shorter for either, short, end of the end table. I then went on to cut four pieces of fusible fleece of the same length of the fabric but kept them only two or so inches wide. After finding the center, lengthwise, of the black strips I used my iron to attach the fusible fleece right alongside that line. Once the fleece was attached I folded the black fabric in half, again lengthwise, so the fusible fleece was sandwiched between either side of the fabric. Using black thread on my sewing machine I finished the short edges so they wouldn’t unravel and then trimmed the excess seam allowance with my pinking shears to be doubly sure. I then took a multicolored thread, I had been hoping to use, and, using a decorative stitch, I topstitched along the folded edge holding the fold in place. After repeating this on all four flaps I set aside the pieces to be used later.
Before decorating the stove cover with the burners and sink I wanted to secure the edge of the black fabric so it wouldn’t unravel. I did this by going along all four edges and folding the fabric over so it would sandwich the edge of the fusible fleece. I left the corners for last so they naturally came to a fold, pointed straight up, once I finished the sides. I then squashed that fold down making it into a flat diamond shape and used a pin to keep it in place since that seemed more secure than using a sewing clip.
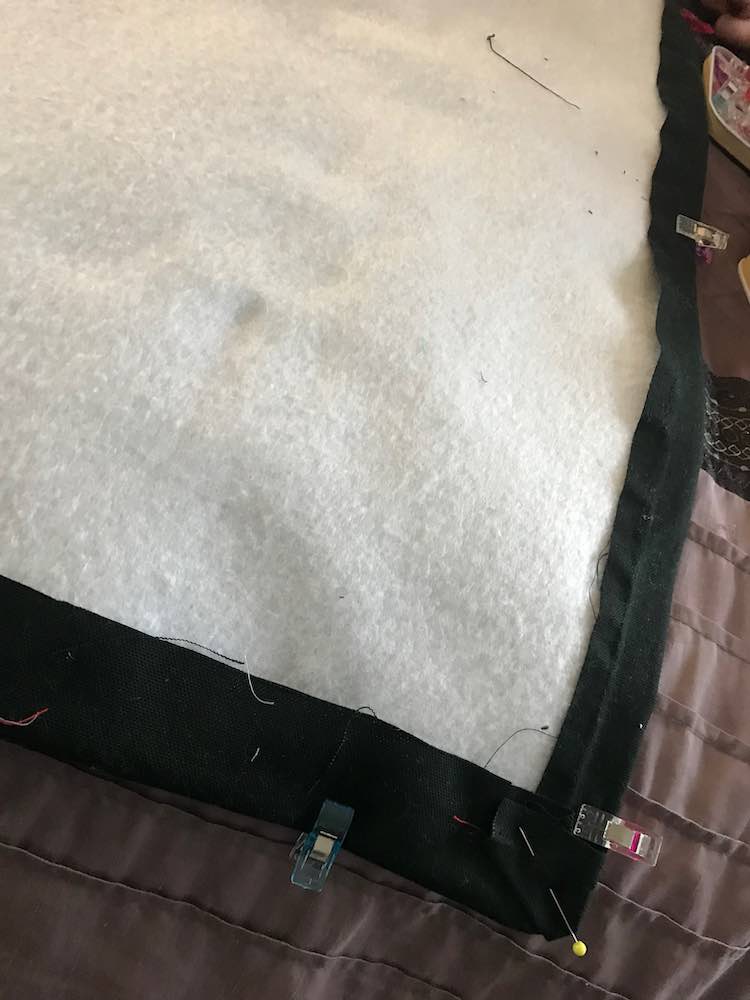
At this point you could topstitch along the outside to hold the fold in place but I chose to leave it clipped and unsewn while I worked on adding the burners and sink. Since adding the photos involved with these steps would’ve made this post way too long I decided to move the kitchen stovetop itself into it’s own post and continue on here showing you how I put the base together and attached it to the end table.
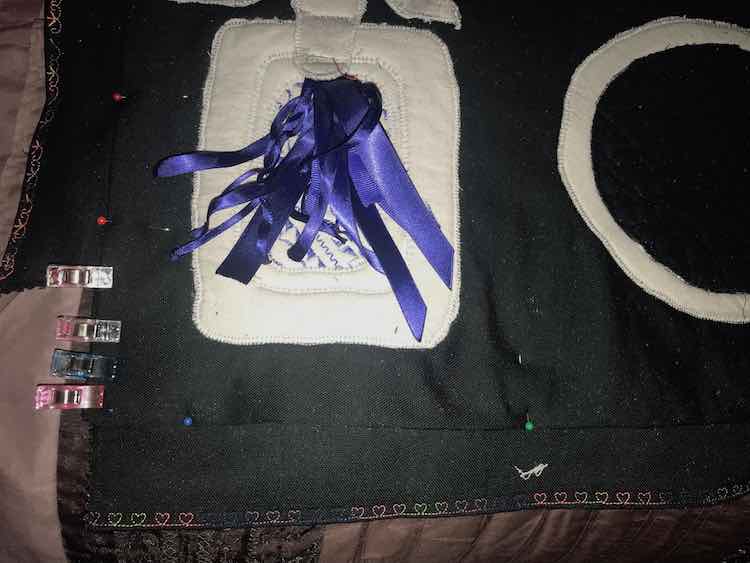
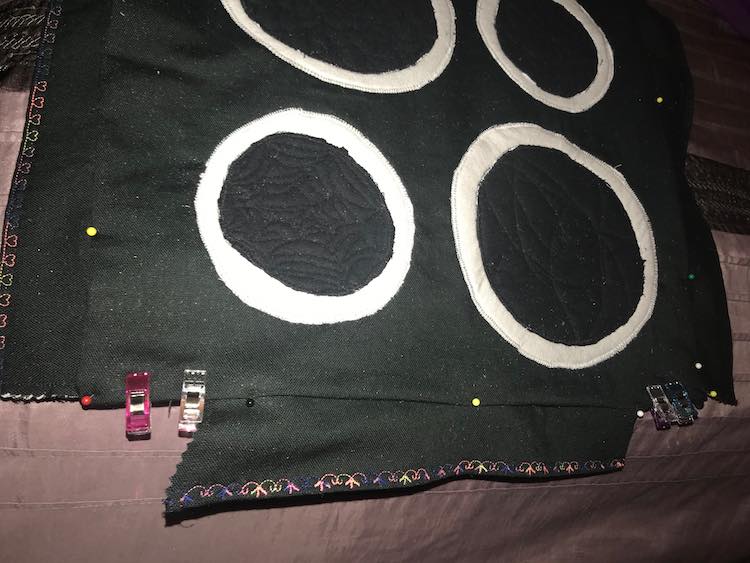
Now that the top was decorated I was ready to finish it off. I started by laying the stovetop cover on my bed, with the decorated side facing down, before placing each flap I made onto it’s matching side making sure to keep them wrong side up and overlapping the raw edges. My two shorter flaps ended up being way shorter than I had planned so I chose to center them making them an equal distance from either corner. Once they were laid out I grabbed the other black woven fabric piece I had cut and, after folding over the edges and pressing it so the raw edge would be hidden, I laid it overtop making sure they were wrong sides together. I then started by making sure each corner was lined up and clipped it in place. Once I got to where the flaps were I made sure they were securely tucked in, clipped their sides, and then pinned them in place since the clips didn’t reach. Once everything was secure enough I used my black thread and topstitched all four sides sandwiching the flaps in place and hiding the raw edges. Once I finished I thought it looked a bit plain so I switched back to my multicolored thread, and the decorative stitch I used before on the flaps, and topstitched it again making sure to follow beside my original stitching. I chose to not put the pieces together right sides together and sew it inside out as I wasn’t sure how flat the sides, with the fusible fleece, would be and I, instead, chose to assemble it how I wanted it to be and topstitched it in place. No need to turn it right side out and close any holes.
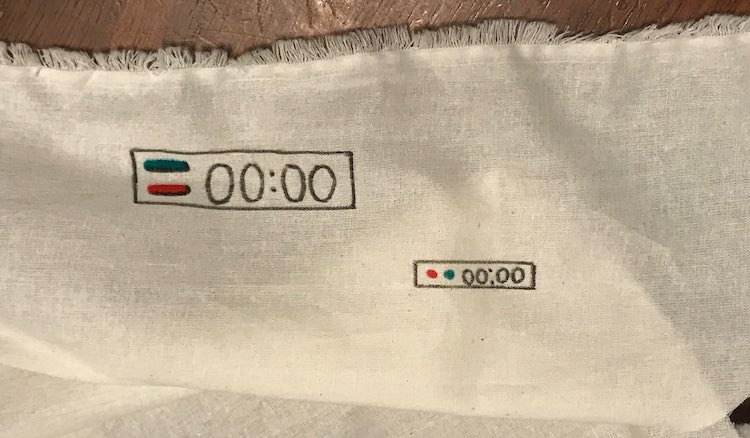
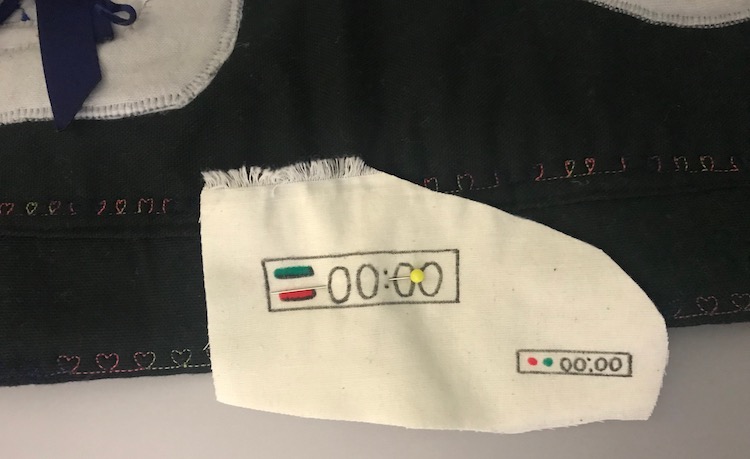
Once I finished sewing the flaps in I realized the stovetop was still missing a timer. Originally, I was planning on buying a cheap one and attaching it somewhere so the girls had a real working timer. However, I decided it would be simpler to make my own as they can then decide whether the timer is on, off, or chiming whenever they’d like. Plus less complicated parts means less chance it breaks. To do this I grabbed a scrap of white woven fabric I had on hand and used my fabric markers to draw a zeroed clock “00:00” on the fabric. I then added two buttons, one red and one green, to allow them to turn the timer on, off, or even reset the timer. I held my timer up on the front flap of the stovetop and realized it was much too small. I then created another timer ,a bit further over, making it bigger than the first. Once I finished and confirmed the size was good I grabbed my iron to heat set the ink. I then cut the timer out, pinned it to the front flap of the stove, and then blanket stitched around the outside to hold it in place and stop the fabric from unraveling. I’m so glad I went with this option because looking back I can see them setting random times on a cheap noisy timer and having it go off randomly at all points in the day and night.
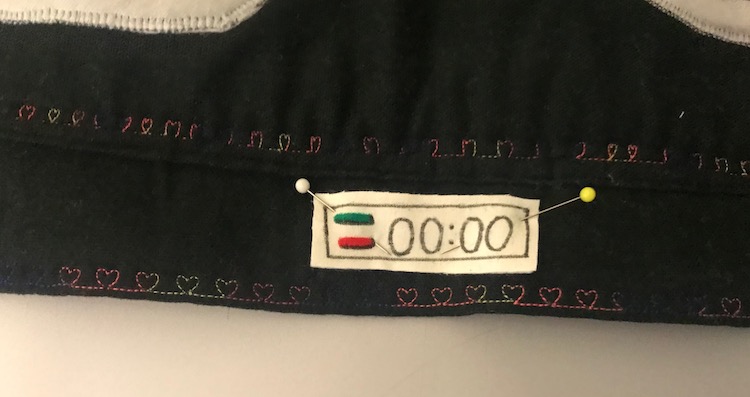
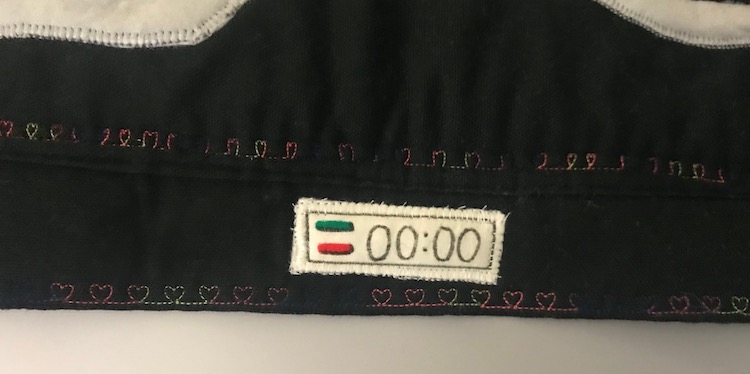
With all the items sewn to the stovetop the last step, securing it to the end table, couldn’t be put off any longer. KAMsnaps were a logical choice as I needed some way to allow the stovetop to be securely attached while also being easy enough for me to take it off if I needed to clean it. Since the side flaps were shorter than I had planned the flaps didn’t meet up and certainly didn’t overlap making this step harder. To bring the flaps together, and hold the stovetop on the end table, I decided to grab some woven double fold bias tape, I had on hand, to extend the flaps so they could meet and overlap. To get the placement and length right I figured it was easiest to put the stovetop on the end table and pin it into place instead of taking measurements and estimating. I wanted the front flap to be clear of any clutter so I knew the snaps would have to be on the side for each corner. To have the front and back flaps reach the sides, so I could attach them with a KAMsnap, I took the double fold bias tape and pinned it inside the front flap going from the top down to the bottom where it dangled out. I wanted the bias tape to cover the entire vertical space so there was a larger surface area to connect the flap to the bias tape making it more secure. I then pulled the excess tape from the bottom to extend around the corner so it reached the side flap and then used a pin to mark where they met on the bias tape. I then repeated this on the other three corners so there was a piece of double fold bias tape hanging from either side of the front and either side of the back flap. I then took this to my sewing machine and sewed each piece on.
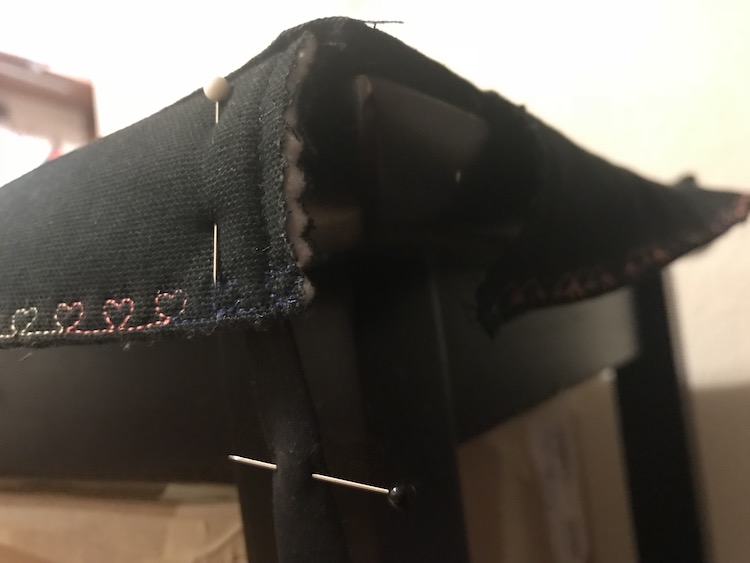
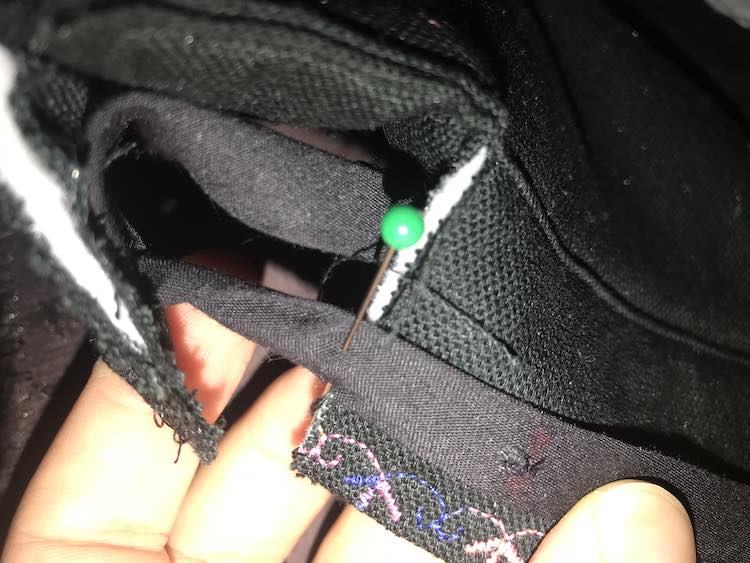
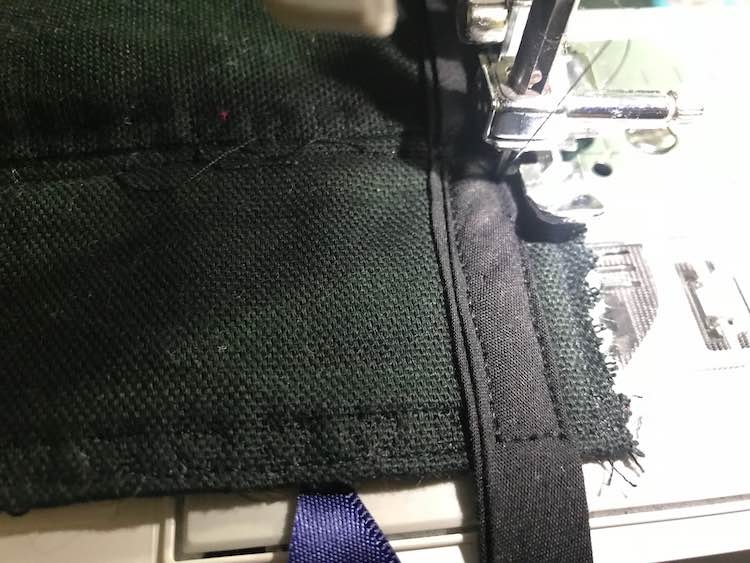
Once the bias tape was sewn on it was time for the KAMsnaps. For each corner I marked a spot on both the side flap and on the bias tape. I then grabbed my Crop-o-dile II to punch a hole at both spots. I next grabbed my snap press and pressed a black KAMsnap into either spot making sure one side had a socket, the other side had a stud, and they were on the proper side so the bias tape wouldn’t need to be twisted to be able to fasten them together later. Once the first corner was done I went on to add snaps to the other corners.
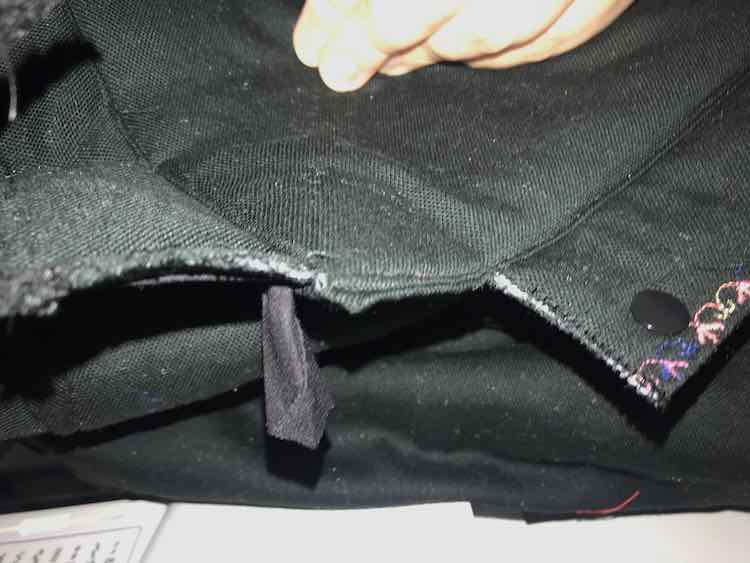
After confirming that the stovetop cover does still fit on the end table and can snap together to make it stay on securely I took it right back off. I used my Crop-o-dile again to punch five holes in the front flap, making sure they were even with each other, so I’d be able to add door knobs so the kids could physically pretend to turn the burners on and off. This it the part that hasn’t lasted. I had visited a local hardware store and came out with five 1 1/2 inch concave chrome plated knobs so the kids would have a knob for each burner and an extra knob to control the oven. I wanted to make sure the holes in the front flap would stay their proper size and not wear out so I attached a grommet to each hole before threading the knobs in.
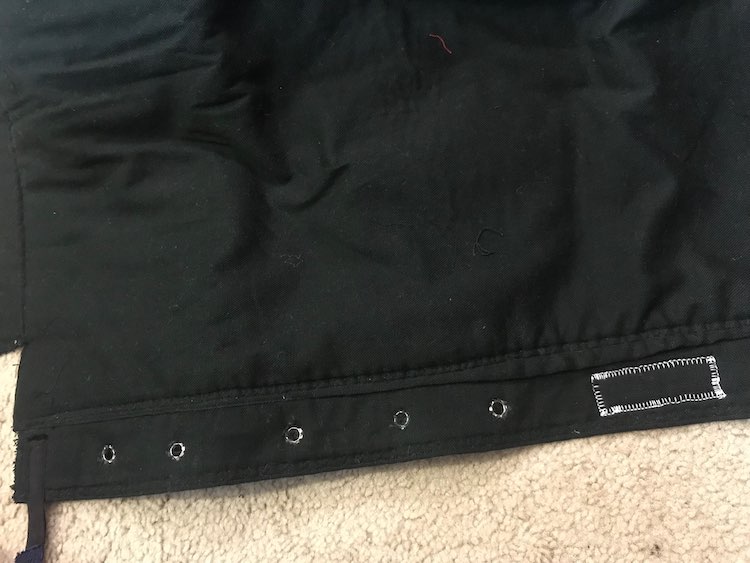
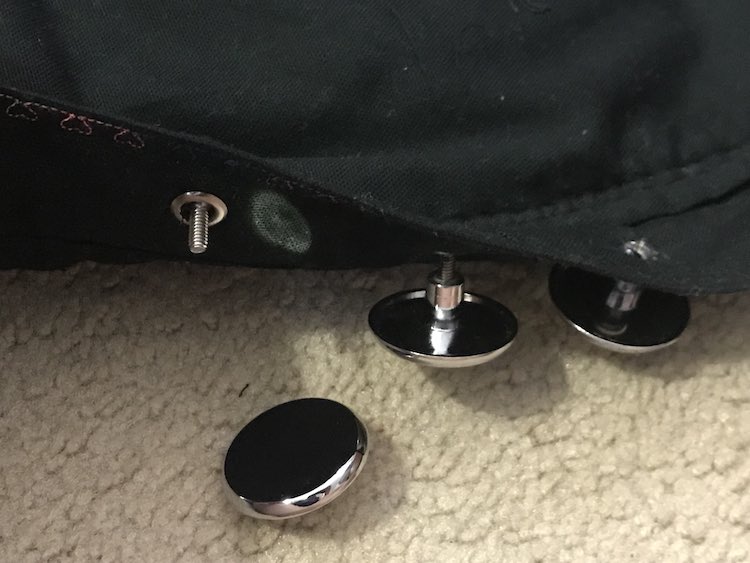
These knobs ended up being the one thing that didn’t work. I’m not sure if starting with smaller ones would’ve fixed all my problems or if they just weren’t meant to work. They were definitely too heavy so immediately started drooping down. Eventually their weight pulled the grommet out of the hole so there was nothing keeping them in anymore.
If I were to do this again I would love to go with smaller and lighter knobs although I would probably, instead, chose to make my own two dimensional knobs like I did with the timer. If I went with smaller knobs I would need to find out if there’s a different types of grommet that might work better with thicker fabric since these were going through three layers each time including the layer of fusible fleece. I could also see adding washers to the back of the knob if I could find ones with a small enough center hole to stay on yet still be large enough to help spread out the weight of the knob over a larger surface area and cause less stress to the grommet and stovetop.
And thus the stovetop was done. I was able to attach it to the top of the end table and secure it down with the KAMsnap-ed corners. I then put the kitchen set back in it’s normal position, set up the pots and pans behind the new kitchen sink, and laid the rest of the kitchen tools in a basket next to the kitchen set waiting for the kids to find and play with it.
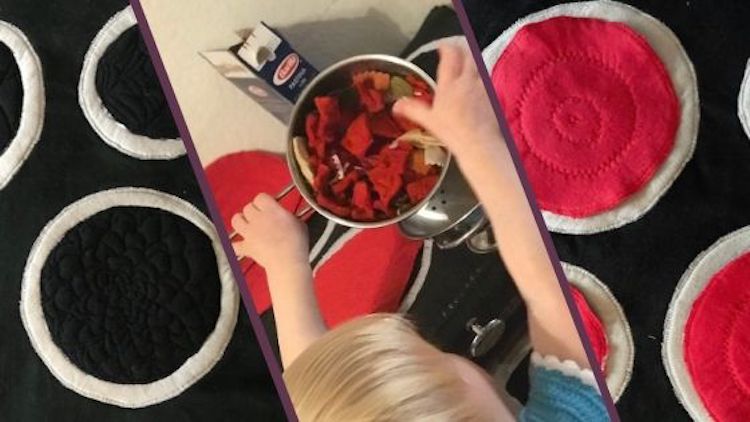
When I made the felt bowtie pasta and diced tomatoes we had a little photo shoot giving us more photos of the kitchen set in action.
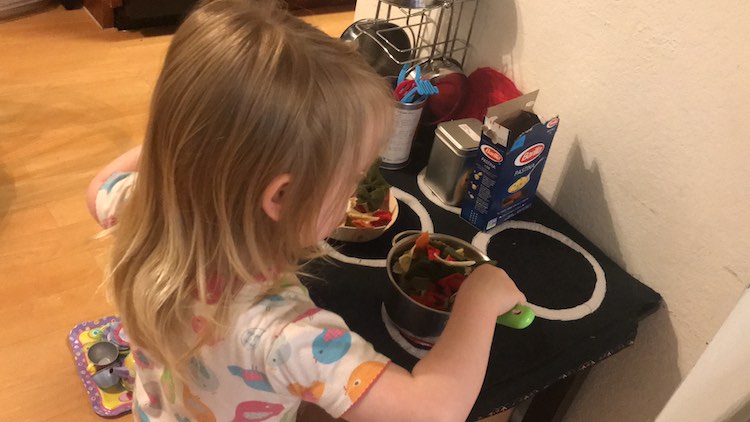
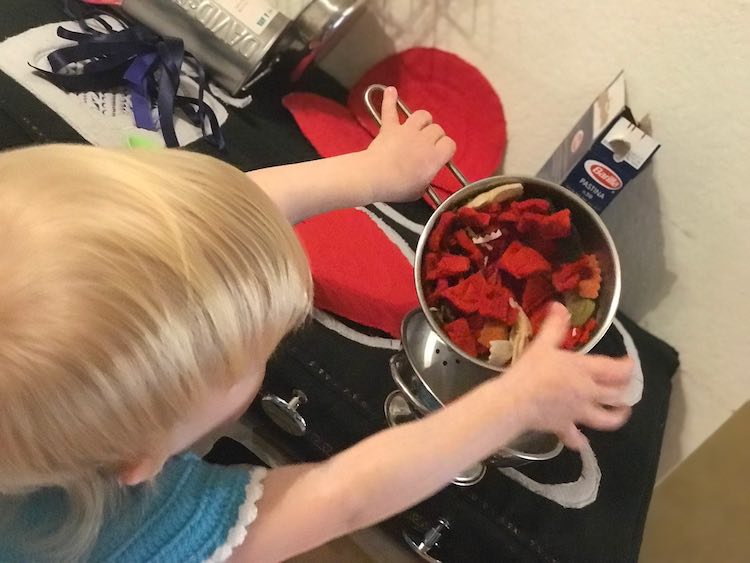
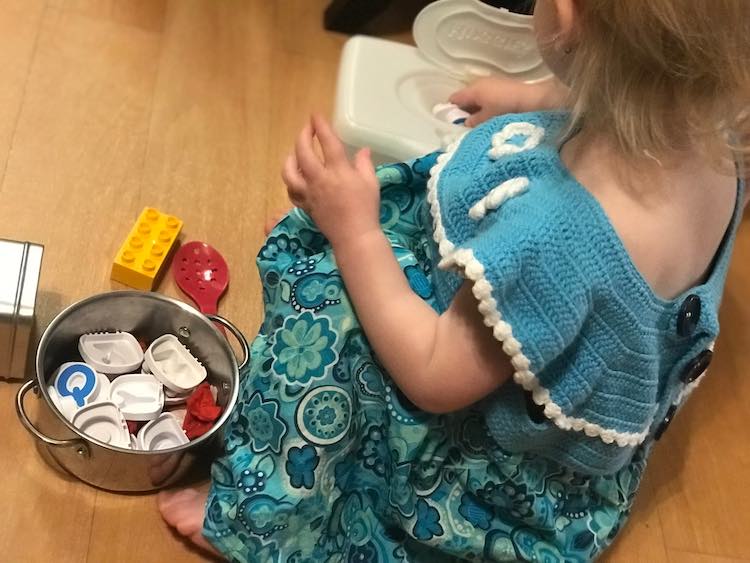
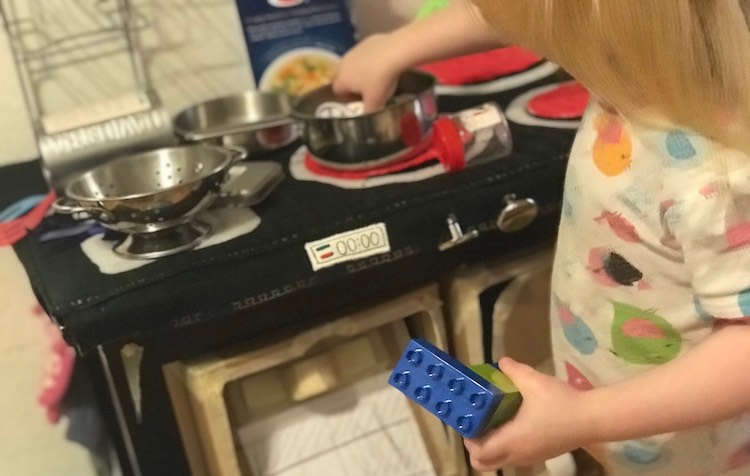
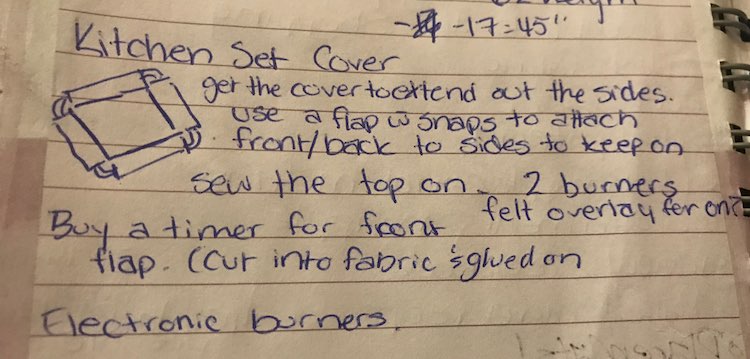
And the kitchen set was done… though over time the burner knobs did fall off. If you’re interested in my process I started this plan by writing out my ideas on a sheet of paper and added the odd doodle to illustrate my idea easier.
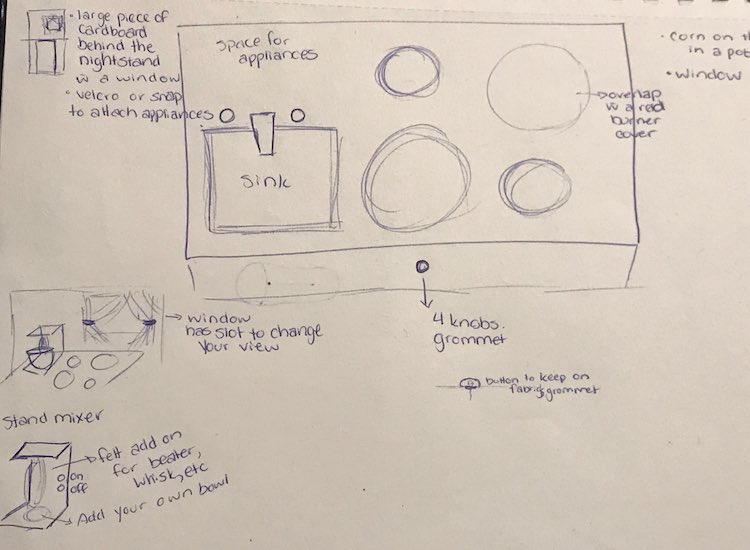
After I had the basic idea down I sketched out a better plan and added details, like four burners instead of two, as I drew it out. I had originally planned to extend the kitchen set piecemeal as time went on so the kids would be able to play with each piece as it was added and give me feedback based on what they wanted. With the kids losing interest in it, as they preferred vehicles and dinosaurs over the play kitchen, I never went further on the extra steps beyond sketching them out. I included this here in case you’re interested in making your own and this may help you.
I’m not sure if you noticed but behind the sink I had an empty space that worked perfectly to hold the Melissa & Doug stand of pots and pans. I hadn’t planned ahead to use that spot for the pots as I was instead picturing using that spot to add removable countertop appliances. I was thinking about adding one or more KAMsnaps or VELCRO® to that space so the bottom of the appliance would be secure enough to play with but once the kids got tired with it I, or them, could switch it out for another one… and then easily switch back again. The one idea I sketched down below was a stand mixer with felt loops hanging down from the top to simulate a whisk or beater. The kids could use a bowl, or one of their pots, placed at the base and pretend to mix the contents up with that whisk. If I made that and it worked I was going to go on to make other items like a coffee maker or a toaster… though I hadn’t gotten far enough ahead to figure that out yet. I was also thinking about adding a sheet of cardboard or, more long-term, a thin sheet of wood behind the end table allowing me to attach the top of the appliance to the ‘wall’ behind the kitchen set. This meant I wouldn’t have to make the appliances free-standing as they’d be attached at the back and base. The right side of the backdrop, above the stove, would have a window and curtains so the kids could look ‘outside’ while cooking. I was debating making the window look glossy by using a slide in sheet or something so we could change out the image of the outside world easily and it wouldn’t be a static image that never changed. The background of the backdrop would’ve been decorated to look like a backsplash, wallpaper, or paint. I never got around to do this though.
Along with the above plans I was also was going to upgrade the cardboard box appliances below the stovetop. I started by sketching out the end table and measuring all of it’s points. I hadn’t decided what material I was going to use to create the shelves or boxes but I wanted shelves within the cupboard and fridge along with working hinges and knobs on the doors. I was going to try to make them exact enough that I could slide the built parts in and they’d be tight enough to stay put. Although I’d screw them in to be extra sure it wouldn’t move. After the inside was done I was going to add large baskets to the one side and smaller baskets on the other side for extra food storage. I wanted this to be a long lasting and robust kitchen set even though it was, originally, an end table.
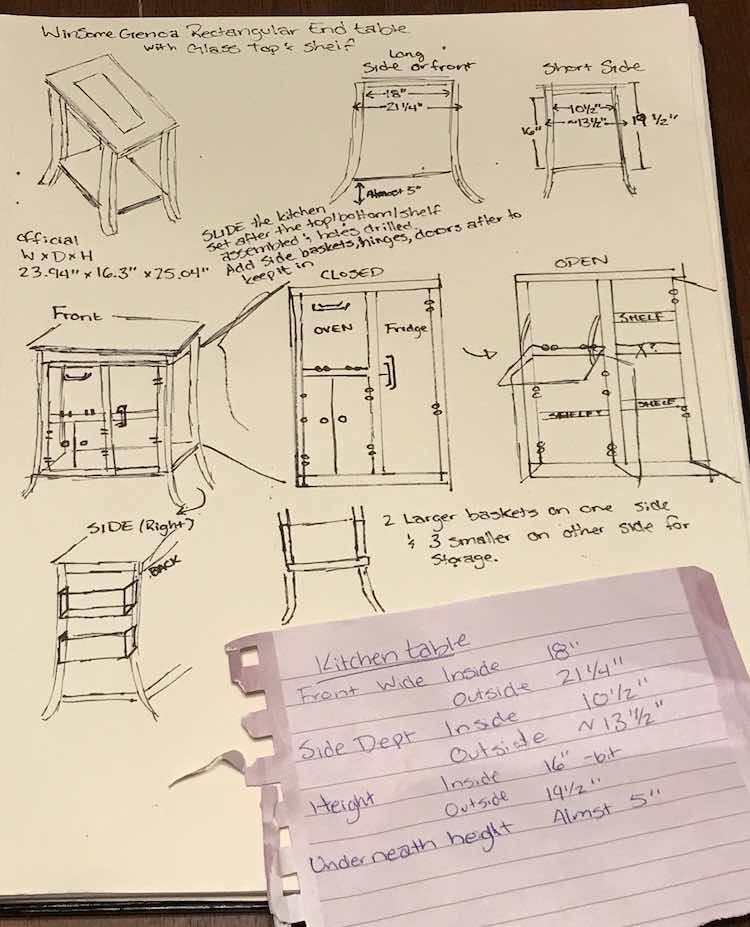
Once I finished making the appliances and cupboard more permanent and added the backdrop I was going to screw them together making it more secure and allowing it to be a standalone toy and not need to be jammed against a wall. I guess in that case I could eventually add something to the back of the backdrop to make it double-sided whether it was to extend their kitchen or as something else.
If you’re interested in a smaller kitchen set I previously posted about converting a cardboard delivery box into a oven and stovetop. It was small, simple, and quick to make although not too long-term with heavy play. At the bottom of that post I linked to two other, more permanent, mini kitchen sets using plastic containers. I’ve also seen homemade and store-bought play kitchens as a chair cover so you can fold it up when it’s not in use and easily set it up on a chair when you want to pull it out. I also remember seeing commercials for Sago Mini pillow playsets that you can use as a pillow and unfold it and lay it on the couch to play with as a playset. I haven’t looked into buying them as my kids already have this kitchen set they aren’t really using but Sago Mini does have a kitchen set, doctor’s office, and a dollhouse pillow playset.
I hope this helps you out whether you’re just looking around at kitchen playsets or starting your own upcycle. Feel free to share any comments below, on my Facebook page, or through Instagram. I hope you have a great day!
∞ Next Post: The Stovetop Details On My Kids’ Play Kitchen ∞
Did this save you time?

