

How I Sewed My Daughters’ a Simple Tooth Fairy Door Hanging

A while back, when Ada’s first tooth became wiggly, I wanted to come up with some way to make the tooth to coin exchange easier on Matt and I while also keeping the story alive for the girls. As they share a bedroom I knew there was going to be a much greater chance that one of them might wake up while we were trying to find an errant tooth under their pillow. The girls share a bunk bed so Ada’s top bunk is much too high for me to easily search and Zoey’s bottom bunk has a space along the side and headboard that often loses toys so I saw the whole process, for either of my night owls, troublesome. This idea to make the overall tooth exchange process easier resulted in the final idea to have a special tooth holder hanging on the outside of their bedroom door thus decreasing the chance of a wake up in the middle of the night and making the tooth so much easier to nab last minute before bed.
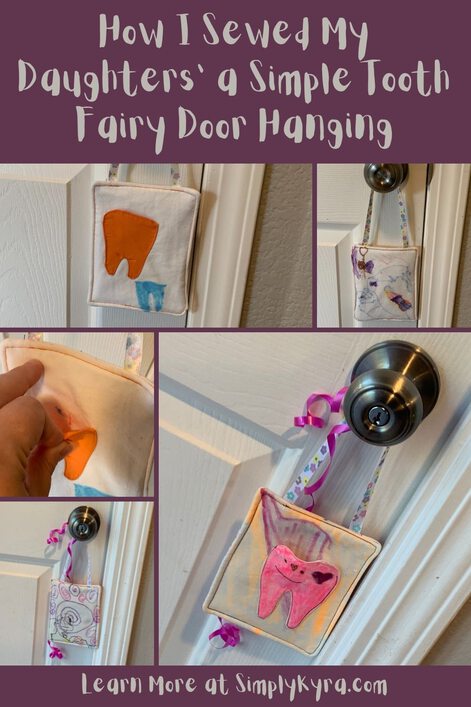
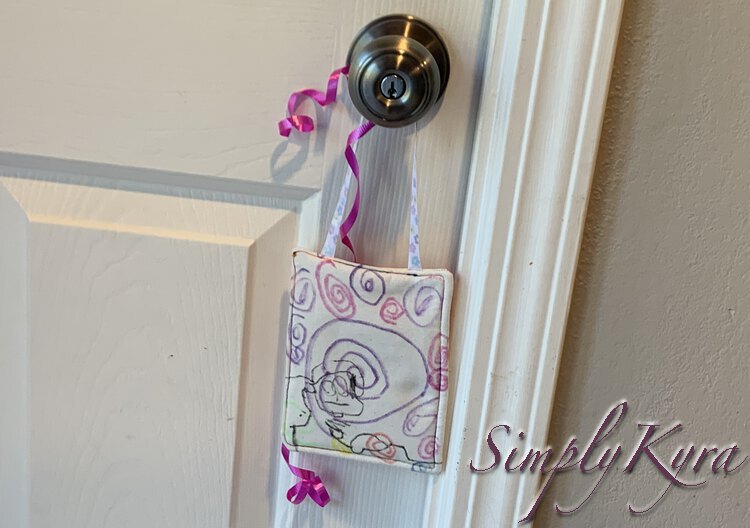
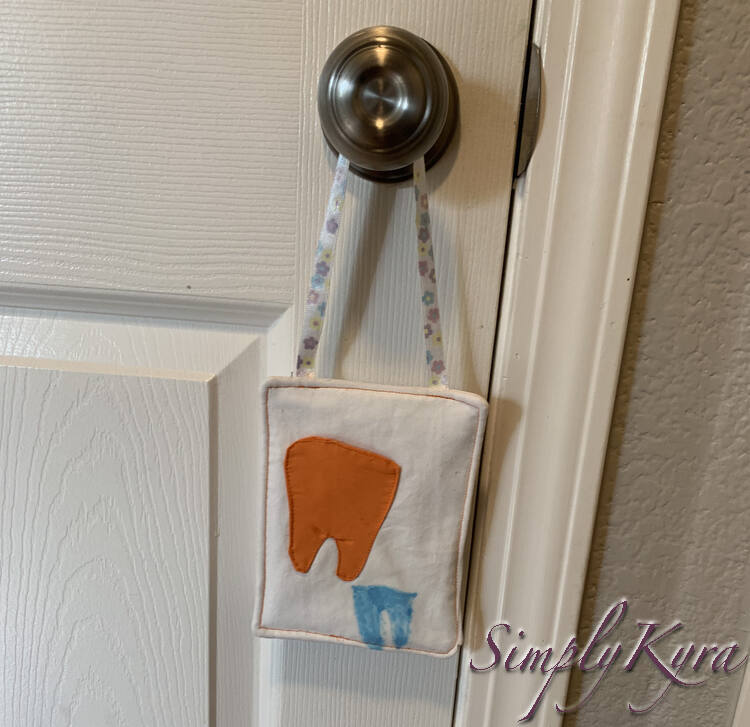
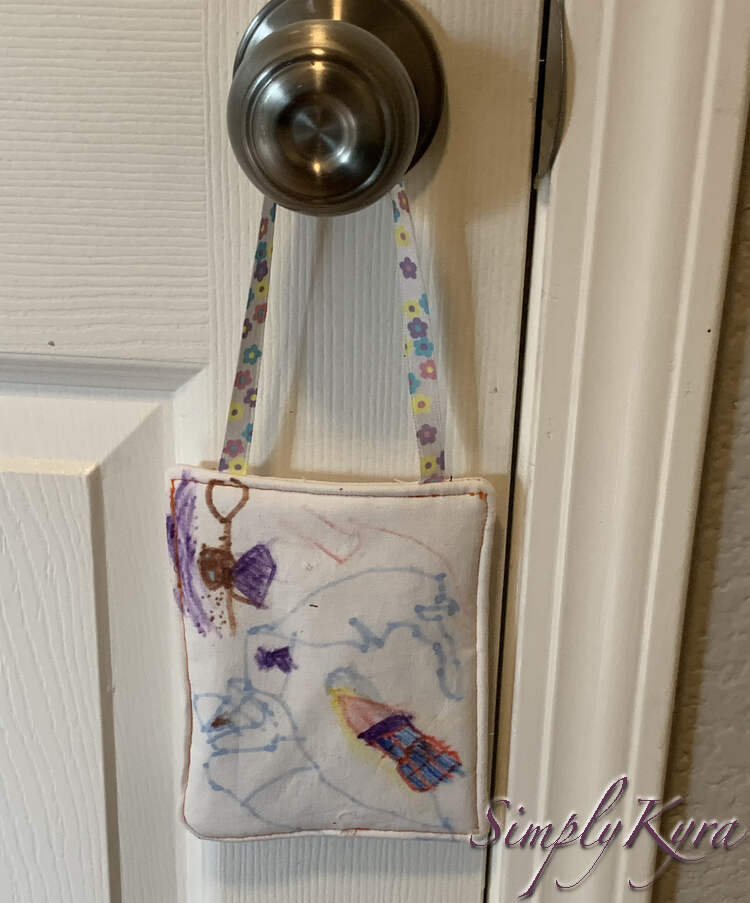
I made Ada’s tooth fairy door hanging a while back when her first tooth became wiggly. At that point I made sure to take lots of photos for my website but never got around to writing up this post. Just this summer; however, Zoey fell off of her bike hard enough to make one of her teeth wiggly and although, later, we were told it would naturally heal and stop wiggling I did promise her, in that moment, to make Zoey her very own tooth fairy door hanging. By the time her tooth healed the pieces were already chosen, cut, and were waiting for her to finish decorating. As such I have photos from making both tooth fairy door hangers below and I combined them together as they follow the same process.
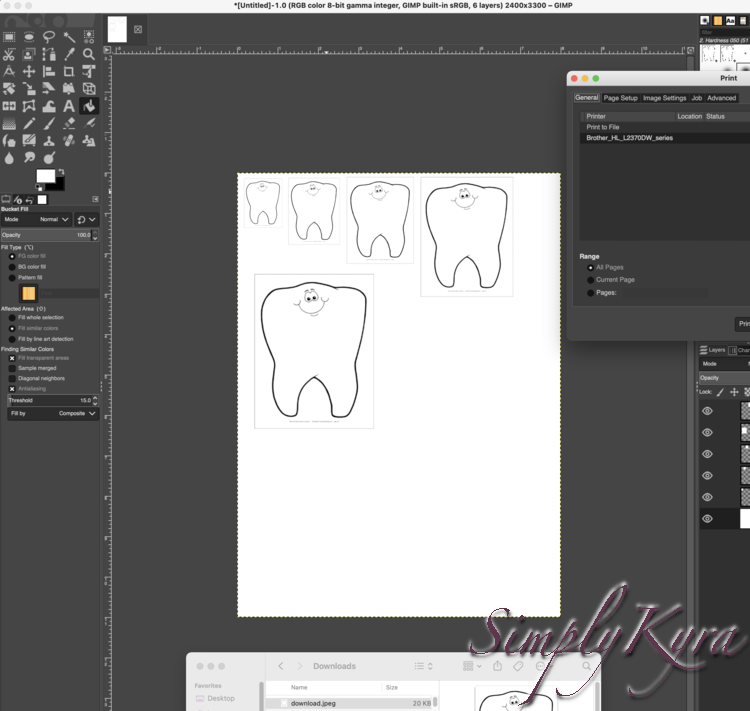
Finding a Template
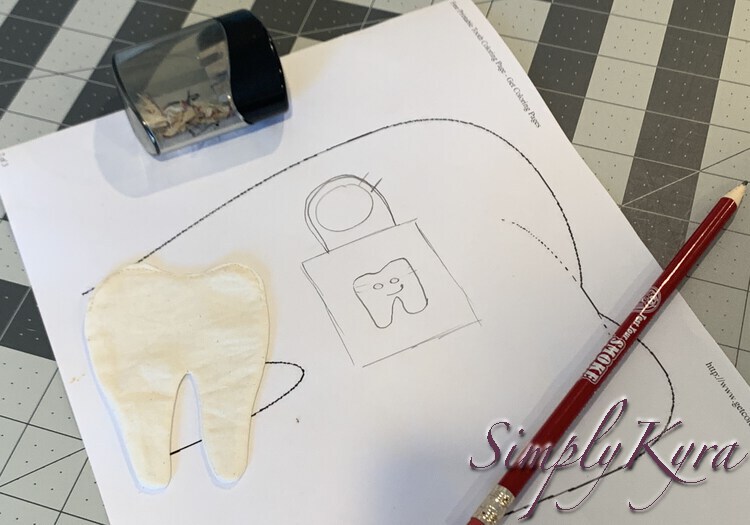
For both projects I started out by looking online for a tooth outline I liked. I unfortunately didn’t save the one I used for Ada and had to go back online to look again when it came time for Zoey’s. Anyway, both times I opened up my free Gimp IDE, created a blank canvas the size of my printer paper, and pasted the newly found image onto a new layer multiples times. I then took each layer and resized it so I’d have a variety of sizes and moved them around so they wouldn’t be overlapping one another. I did this as it seems simpler to get all the computer work out of the way before printing rather than printing, resizing, printing, resizing, again and again, until you have the proper sized template.
Making the Tooth
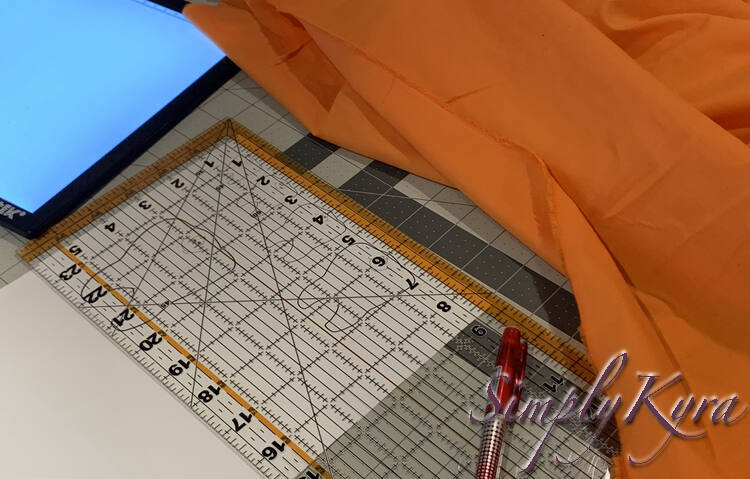
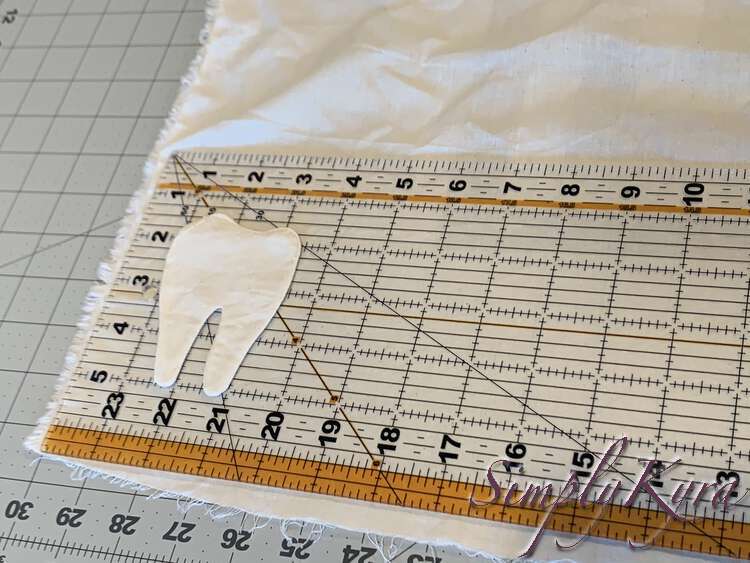
For Ada’s, once I choose one of the printed teeth, I grabbed some white fabric, plugged in my light box, lined up the layers, and traced the tooth onto the wrong side of the fabric using my disappearing ink pen. For Zoey’s I was a bit more particular on which size of tooth I should use as a template as I wanted her final tooth fairy door hanging to be a similar size compared to Ada’s. As such I grabbed my quilting ruler to quickly compare the printed teeth to Ada’s final one, picked a similarly sized one, and then, like before, traced it out onto the wrong side of the fabric. This tracing step was also harder than before as Zoey wanted an orange tooth rather than a white one, like Ada’s, and so it was much harder to see the tooth template through the fabric even with the bright light box underneath it all. I ended up giving up the tracing and laid the fabric beside the tooth template so I could copy it instead.
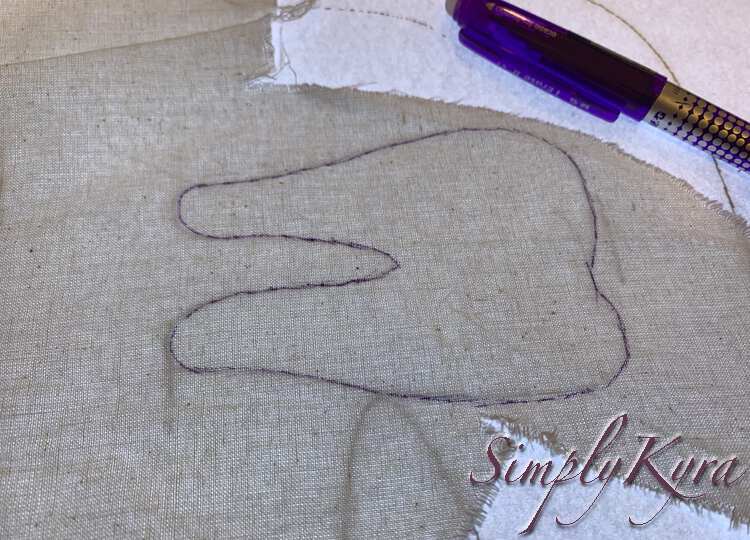
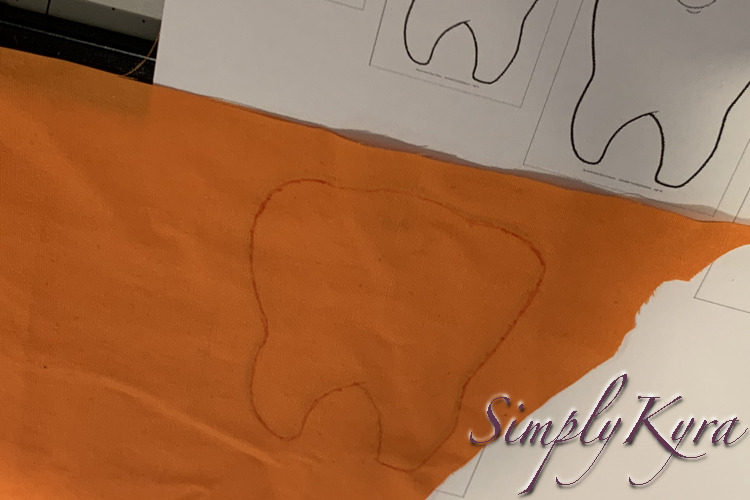
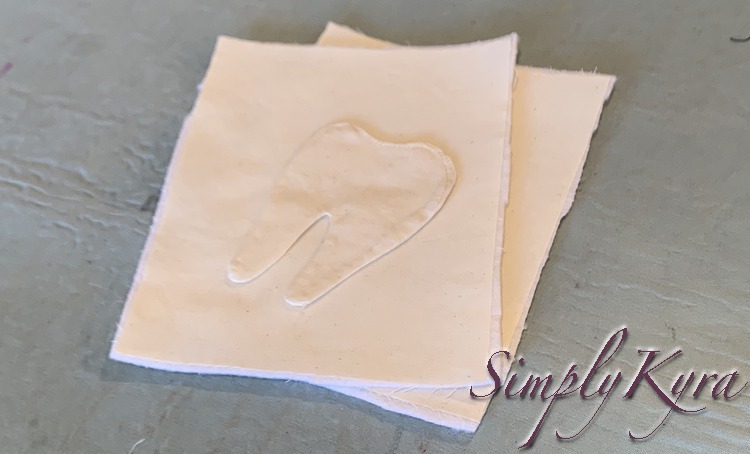
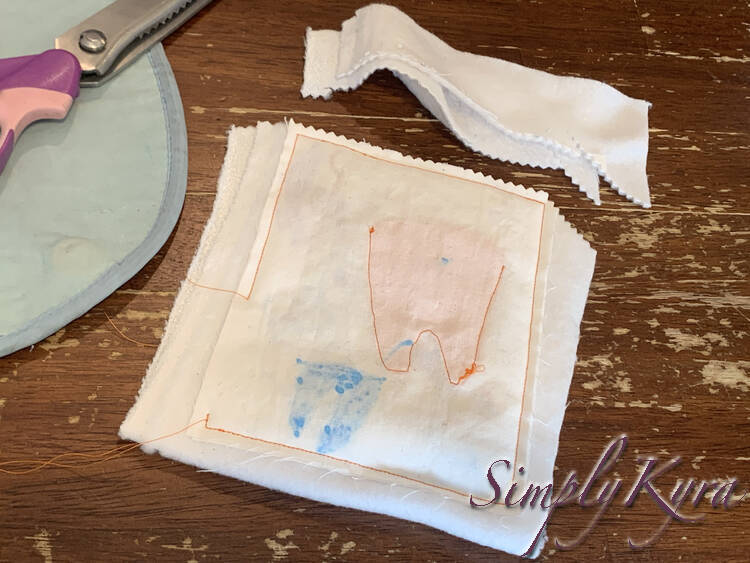
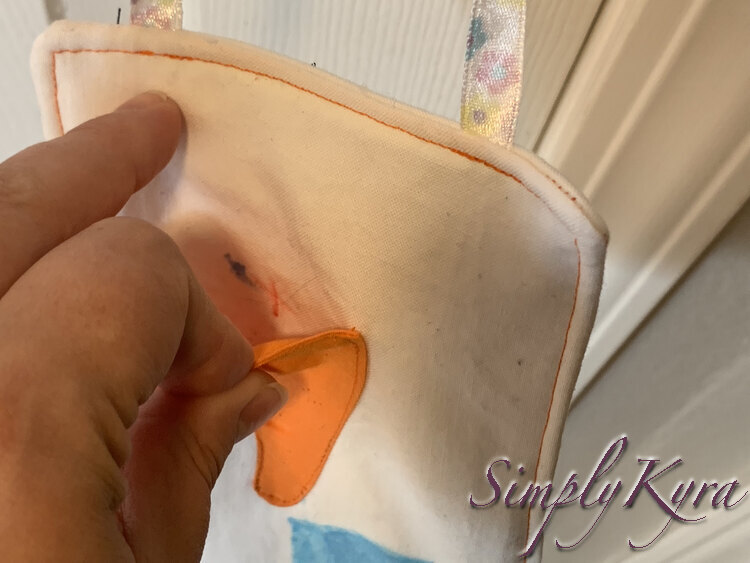
I traced out the tooth shape onto the fabric as I wanted to put a tooth pocket on the girls’ fabric door hanging to hold their newly freed tooth and, later, the newly gained coin. Since the tooth is a weird shape I knew it would be hard to finish the raw edges of the pocket if it was made from a single layer of fabric. As such, once the tooth outline was drawn with the disappearing ink, I knew it was time to sew a stand-alone tooth shape. For Ada’s I took another small remnant of the white fabric, placed it right sides together with the drawn tooth, clipped it in place, and sewed along the outline making sure to leave a space along the top to turn the tooth right side out later. I chose the top as it had an area that looked straight enough to easily fold closed later and long enough to turn the tooth right side out. Plus if I topstitched the tooth, so the top matches where I later sew the sides and bottom to the main fabric, the hole would also be sewn closed without any extra effort.
With Zoey’s larger piece of orange fabric I simply folded it in half, at the edge of the tooth, making sure the drawing was on the outside and the right sides of the fabric were facing each other. After that the steps were the same as Ada’s as I clipped the two layers in place and sewed along the inked lines making sure to keep an opening at the top to turn the tooth right side out.
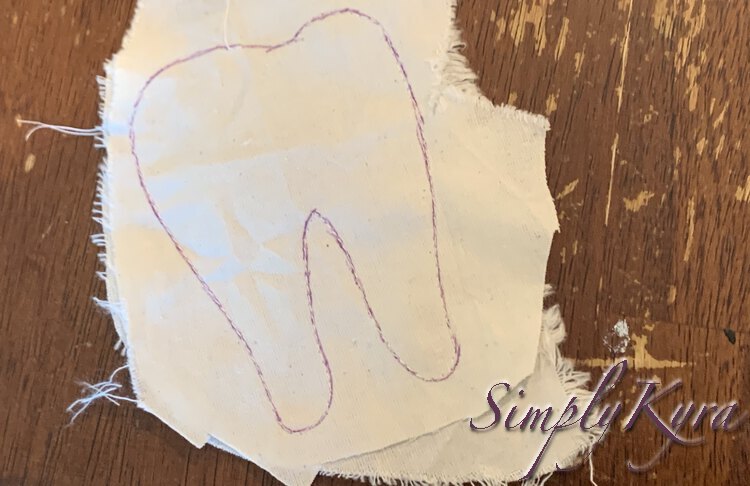
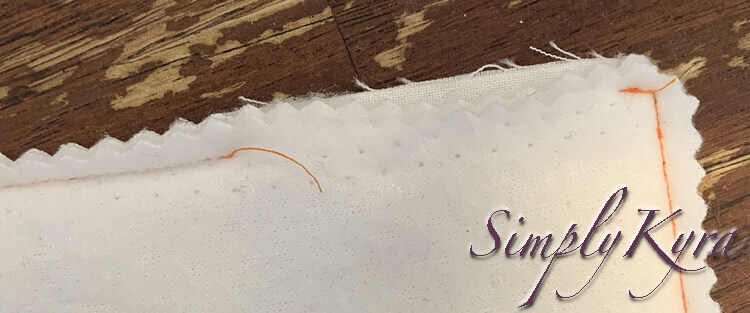
Once the fabric layers were sewn together I used my pinking shears to trim the excess fabric around the tooth making sure there was a bit more seam allowance left around the opening so it would be simpler to tuck within when turned right side out later. I knew I needed a smaller seam allowance along the stitching so the finished tooth would have less bulk within it. With Zoey’s I also took the time right now to press the tooth to make the ink disappear under the iron’s heat while Ada’s previously made tooth wasn’t pressed until after the tooth was turned right side out so it would lay flat.
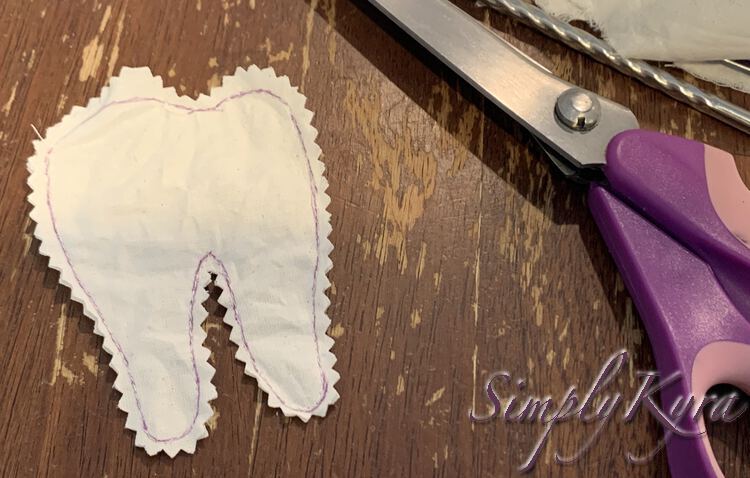
With the seam allowance trimmed it was time to turn the tooth right side out. In both cases I grabbed one of my metal chopsticks to do the deed. Once the tooth was fully right side out I switched to how I used my chopstick and now ran the tip of it along the inside of the seams so the edge would also be firmly turned out. I then folded the visible raw edge of the opening and clipped the two folds in place so the tooth can now be fully finished.
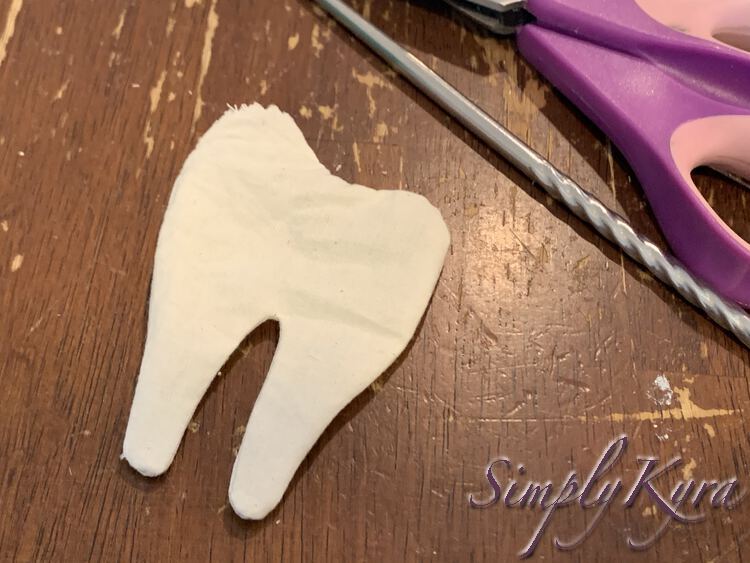
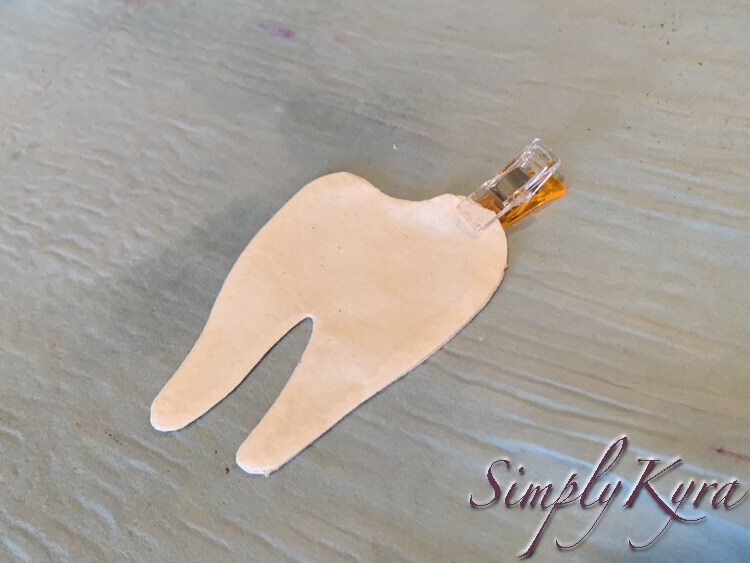
Once the raw edges were folded down and clipped into place I took the tooth to my sewing machine to topstitch along the very top of the tooth and, thus, close the hole. I didn’t topstitch around the rest of the tooth as that’s where I’ll be sewing the tooth to the main fabric later on, yet I did need to topstitch the top anyway as that’s where the opening to the pocket will be and I wanted it to match the rest.
The Rest of the Pieces
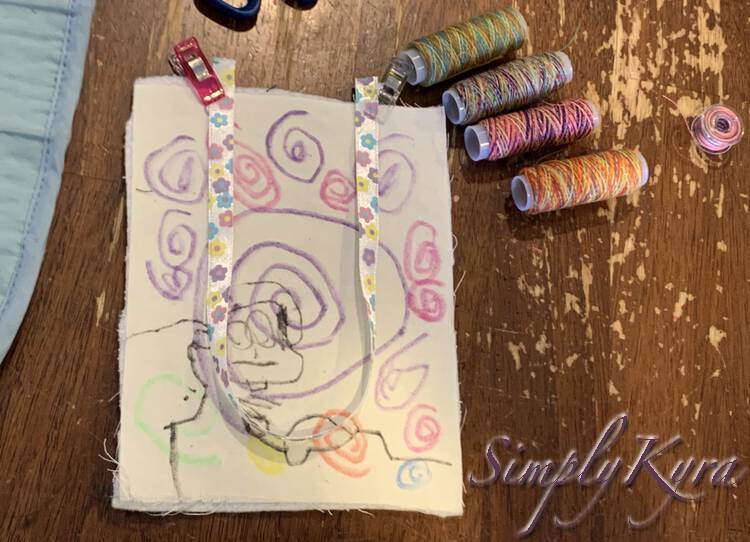
Ada’s was the first tooth fairy door hanging I made so at this point, after essentially completing the tooth, I had to stop so I could fully plan out how I wanted to proceed. Once I had a plan written down I continued on by measuring and cutting out the two required pieces of white fabric and two pieces of matching interfacing needed to make the final item. I chose to include interfacing so the final hanging item could be thicker and feel more cushioned. I then pulled out all of my ribbon and had Ada, and later Zoey at this point, choose a ribbon they wanted to hang it with and I cut a piece that would fit the height needed.
With Zoey’s door hanger the pieces looked less organized at this point. For hers I had used my iron earlier on to make the ink disappear so once I turned her tooth right side out I decided to skip the ironing step and just lay it flat, later, when sewing the tooth to the fabric. I also didn’t need to stop to figure out the fabrics measurements as I used my previous photos of Ada’s to determine how large I should also cut Zoey’s. Zoey had also decided to have a white one background so I cut two five by six and a half inch rectangles for hers just like Ada’s. Then I deviated from before. Rather than cutting out two matching pieces of thicker interfacing I saw a soft strip of fabric with the right width that I could use to stuff the door hanging with instead. It had no glue to hold the layers together like the interfacing before so I chose to leave it uncut and later, after folding it and sewing it into the door hanging, I could trim the excess away.
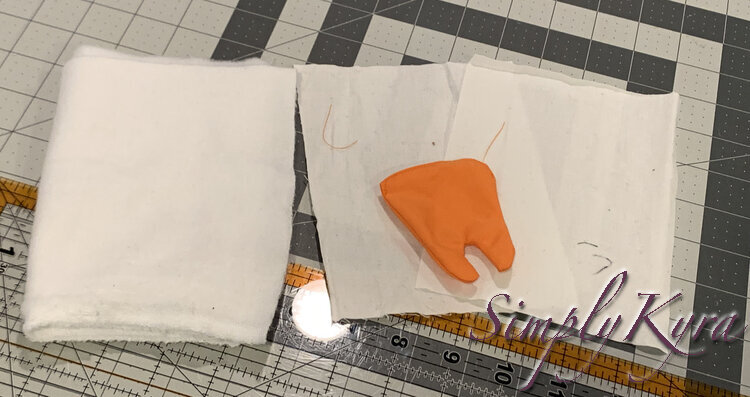
As a quick aside I think this was leftover selvage from some double sided minky toddler blanket topper fabric I used to make two afghans with.
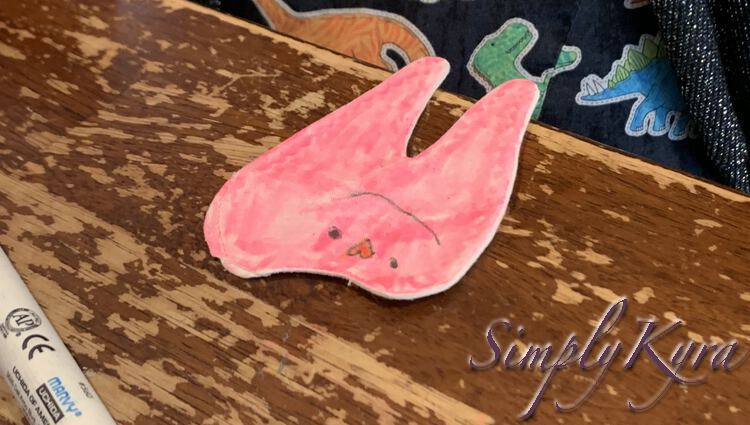
Coloring the Pieces
Regardless of interfacing or batting once the pieces were prepped I stopped the process so the kids could take their time coloring all the visible sections of fabric with my fabric markers and thus truly make their tooth fairy door hanging their own. Both kids took several days before declaring they were done as I didn’t want to rush them or make them work on it when they weren’t feeling it. Zoey at one point completely lost interest and then picked it back up when Ada started coloring her face masks for school. This project was why Zoey only colored her face mask pouches and not the masks themselves when we made our face mask command center for school.
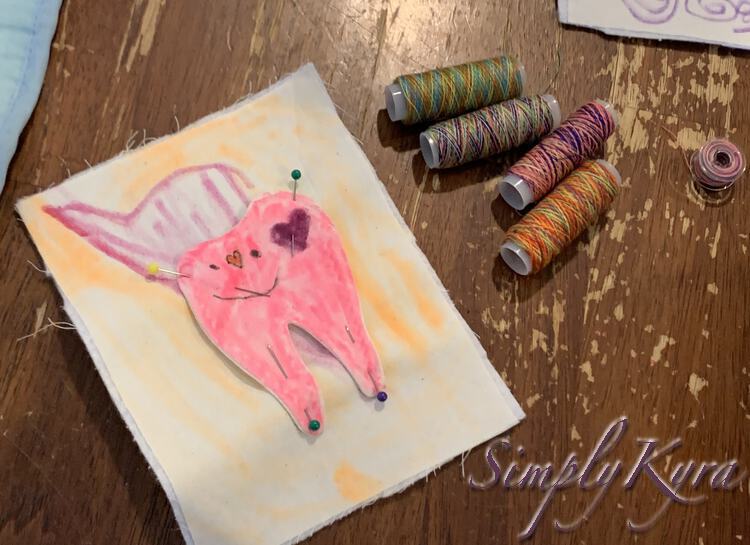
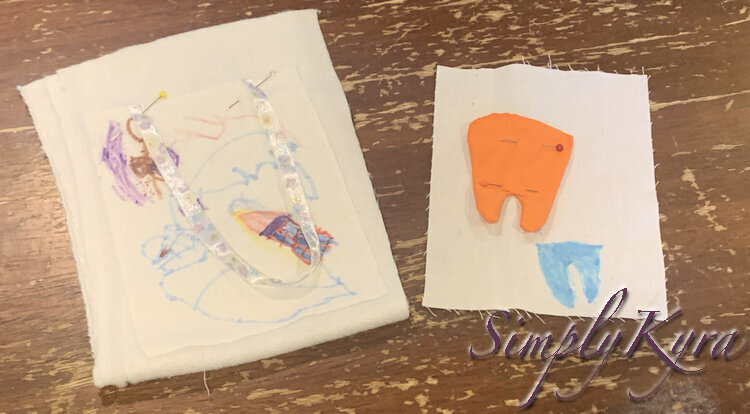
Once Ada finished coloring all of her white fabric pieces I took them all to my pre-heated iron to set the ink and attach the interfacing to the back of the two larger pieces. Then I had a few more questions for Ada so she could have a truly custom piece. First I pulled out all of my threads and ribbons so she could choose how it would be sewn together. She ended up going with a variegated thread and a flowered ribbon to hang the piece up with. Next she chose which rectangle was the front and which was the back. Then, on the front, she choose where the tooth should be positioned which I quickly pinned into place before cutting some of her chosen ribbon off so I could pin it to the top of the back piece.
Other than the interfacing itself Zoey’s process was the same as Ada’s was so long ago. I already knew which rectangle was for the front as she had carefully added an X to be hidden within the tooth. I had her place the orange tooth on the fabric which I quickly pinned into place while she chose her ribbon, same flowered one as Ada, and her thread, she went with orange. I then had her decide which way the back went, pinned the ribbon to the top of it, and folded the soft selvage to act as a multilayer stuffing.
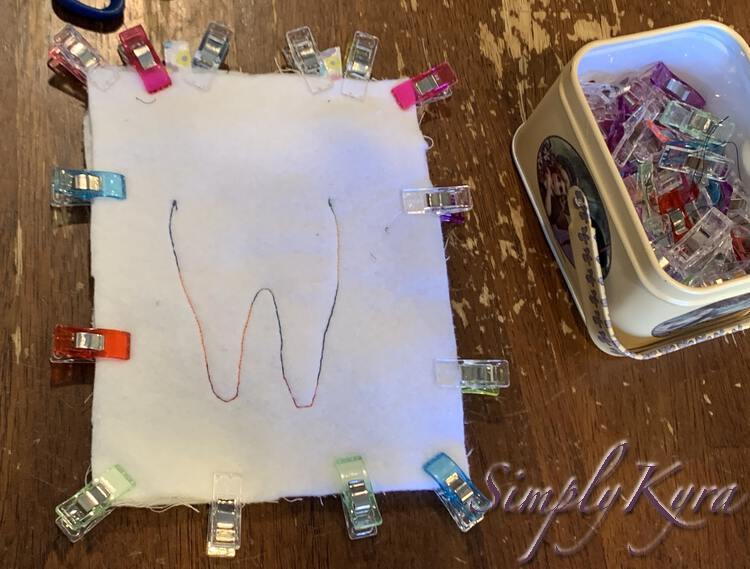
I then took the front piece to my sewing machine and sewed around the sides and bottom of the tooth creating a little pocket.
Putting It All Together
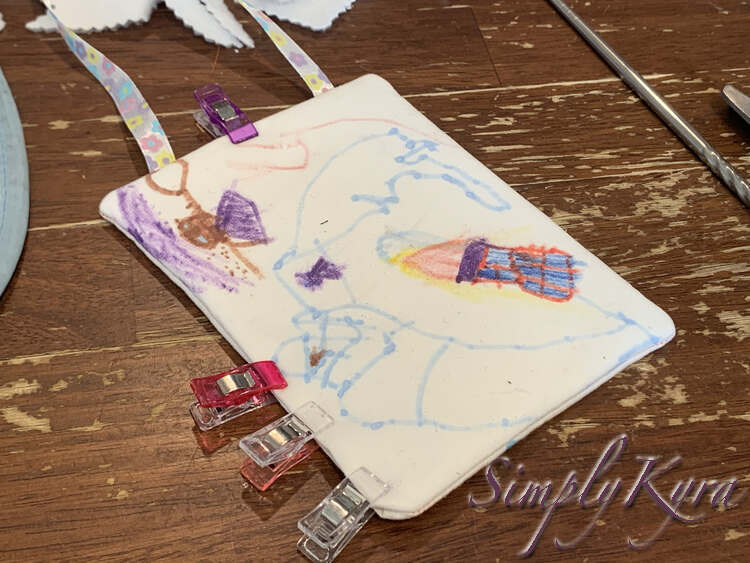
Once the tooth was sewn on and all the pieces were decorated it was time to put it together. I started by putting the two rectangles together, facing one another, with the tooth and ribbon sandwiched between. I then used my sewing clips to clip the two together while making sure that the ribbon was secured at the top and away from the sides and bottom so the loop itself doesn’t get sewn down.
I made sure to start sewing with an open straight space behind the needle so I could easily leave an empty space to turn the tooth fairy door hanging right side out. I also made sure to backstitch when going over the ribbon ends to make sure that the ribbon would be secure later on. Once I was done sewing around the rectangle I trimmed the excess threads and seam allowance. I did this so there would be less bulk within the door hanging. I also made sure to leave a bit larger of a seam allowance at the opening so it would be easier to tuck inside later on.
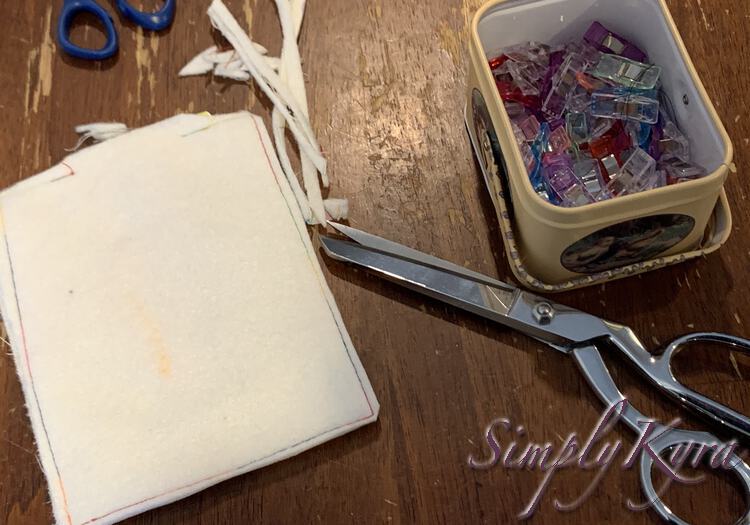
I then turned the tooth fairy door hanging right side out, using my chopstick to push out all of the corners, tucked the raw edges inside of it, and then pressed the entire thing flat while carefully not ironing the ribbon just in case it might melt. I then used a sewing clip to keep the opening in place and brought it over to my sewing machine to topstitch around all four sides. I chose this to easily close the opening, keep it flat, and add more of the chosen thread around it. Instead I could’ve hand stitched the opening closed but I was too lazy and liked this way instead.
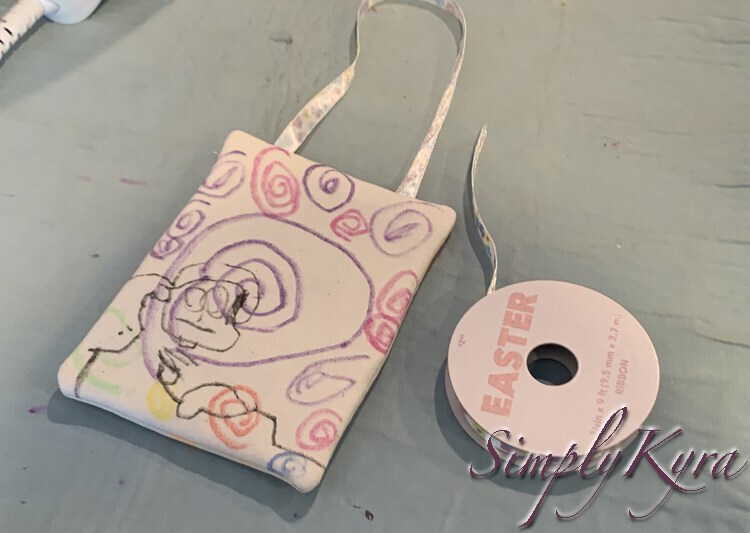
And once I stitched around it we were done!
The Final Item
The girls absolutely adored their customized tooth fairy door hanging.

Lost?
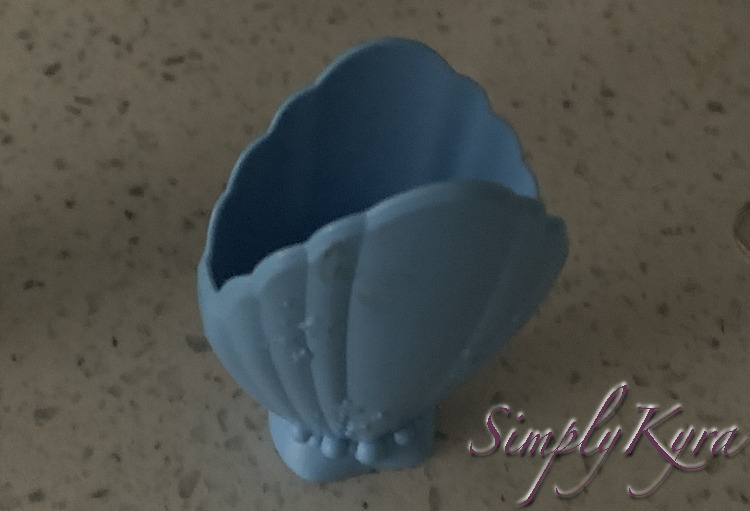
I loved this idea as we never had to sneak into the kids’ bedroom and quietly look for the tooth. That said you could always come up with a simpler method than this. When Ada’s second last tooth became wiggle she started carrying her tooth fairy pouch around with her wherever she went, just in case, and then lost it a couple days before her tooth finally fell out. She was worried about what to do if it fell out so I quickly tried to come up with another idea we could use instead and remembered her toy mermaid on the shelf by her bed that’s stored in a blue plastic shell. I quickly grabbed the shell and told her she could put her tooth in the shell when it finally fell out and put the shell on the bathroom counter so the tooth fairy can easily find it. It worked and as it was still lost with the last tooth it was used again. Who knows if the door hanging will be found before the next tooth or if all the trouble was for naught as the simple shell is now the new tooth holder.
So whether you spend time planning, creating, or buying a solution or just repurpose something you already own at the last minute it will work out. Either way we can hear her rush out of the bedroom in the morning to see what’s there and we don’t have to go sneaking once they fall asleep.
Do you do something similar? Where do you hide the tooth when it falls out? I’d love to hear from you in the comments below and then, if these get lost, maybe Ada or Zoey could use your method as a backup plan. I hope your week is going great. Have a good day!
If you’re interested in getting any of my future blog updates I currently come out with a new one every Wednesday and share them to my Facebook page and Instagram account. You’re also more than welcome to join my email list located right under the search bar or underneath this post.
Did this save you time?