

Learn How I Created a Captain Marvel-Inspired Emblem for a Skirt

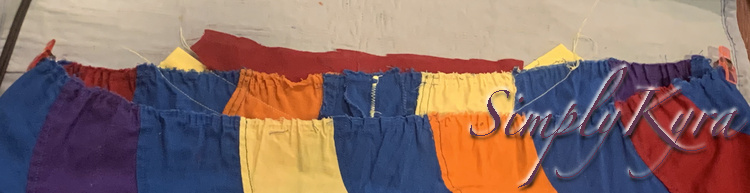
A month or so ago I took my daughter’s outgrown peppermint swirl dress, seam ripped the skirt from the bodice, patched a slit in the top of the skirt, and added a waistband resulting in a swirling and twirling skirt. In the process the skirt’s colors made me think of Captain Marvel’s logo which lead to me making Ada a Captain Marvel inspired skirt. I wanted to share with you just how I patched the skirt’s slit in case you also want to make a Captain Marvel inspired outfit.
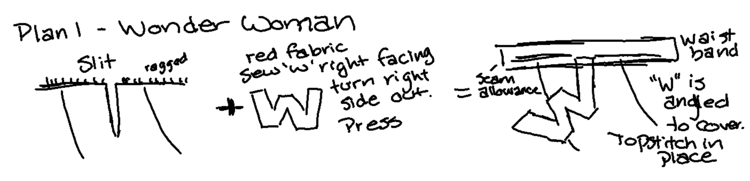
While converting the outgrown Peppermint Swirl dress into a skirt, using the free tutorial found on the Candy Castle website, I realized quickly that the skirt portion of the dress had a slit in the back from where the opening with the snaps started. I knew that the slit needed to be patched before I could add the waistband to the skirt otherwise there would be a small hole under the waistband. I wanted to find some way to securely close the slit and briefly considered simply sewing the slit closed but I couldn’t find the blue fabric I used before and I wanted that portion of the skirt to look like part of the design process rather than just a hasty fix. My daughter loves Wonder Woman so I looked online at her costume and logo for inspiration to design a patch for the skirt. Although I didn’t go ahead with my Wonder Woman idea I did want to share my preliminary idea with you in case you’d rather go in that direction. The below diagram shows how far I got before abandoning it for my next plan. Specifically, I was going to sew a red W and then angle it so one of it’s arms covered up the slit. I was then going to topstitch around the W‘s edge to secure it in place and then add the waistband according to the free tutorial. As the slit measured two inches tall the side edge of the W would need to be longer than that to fully cover the slit properly.
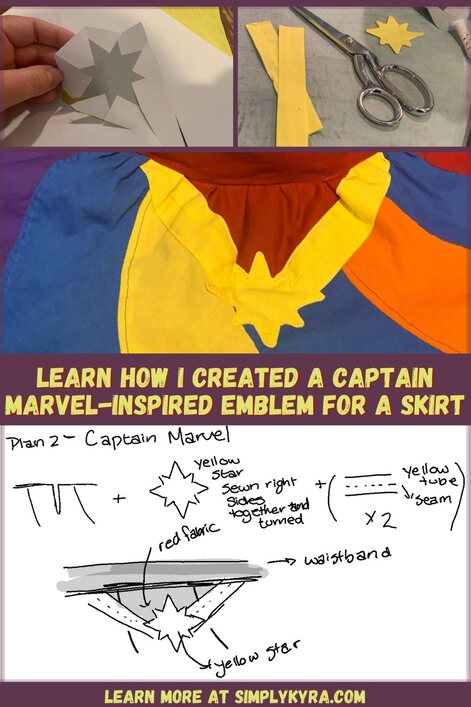
I wasn’t sure if I liked how it looked but then looking at the skirt itself I realized the swirls’ colors were similar to Captain Marvel’s outfit. I looked online to verify and then one thing led to another and I was recreating the center of Captain Marvel’s bodice on the top of Ada’s new skirt thus converting her too small dress into a Captain Marvel inspired skirt simply by trying to patch the slit. Specifically, the top of Captain Marvel’s outfit is red, the bottom is blue, and both parts are separated by a golden border with a eight sided star in the center. To recreate this I decided to make the waistband of the skirt red since the top of the logo is red. Essentially I assumed the multi-colored skirt itself was the blue bottom which was made easier as the slit itself was placed in a blue swirl. I then used my yellow fabric to create the border and star. Since I didn’t want this to take up too much space on the skirt I angled the border up more drastically than in Captain Marvel’s and decided to use red fabric above the star. This way the star didn’t need to completely cover the slit as the red fabric above it would also help cover it up.

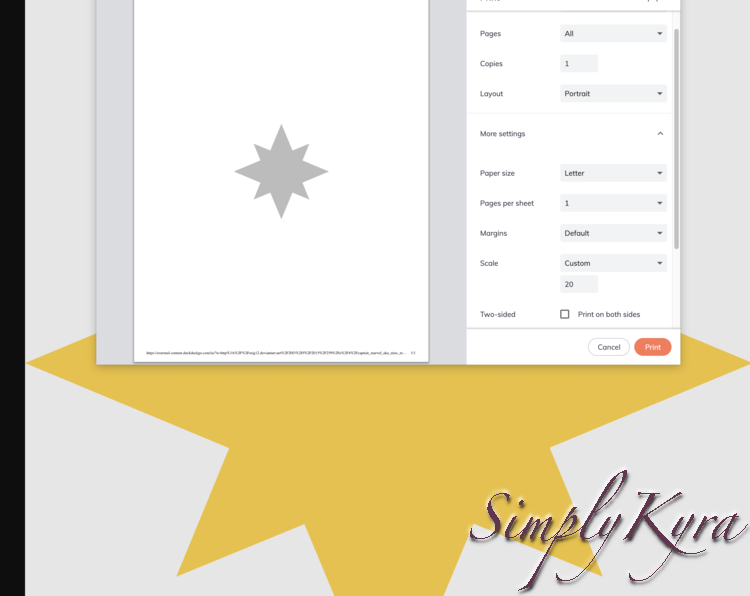
I knew the biggest and most complicated part of this design was the star so I decided to tackle that portion first by looking online for a simple template I could use. Once I found one that looked similar to Captain Marvel’s I printed it making sure to change the settings before hitting Print so the star would be small enough to use. Since the space above the star was also going to be covered I didn’t need the star itself to be over two inches tall like I had planned for the Wonder Woman W to be. Instead I went for the star to be about two inches, or a bit less, in height and later ended up placing the star below the slit rather than on it so the border strips would work.
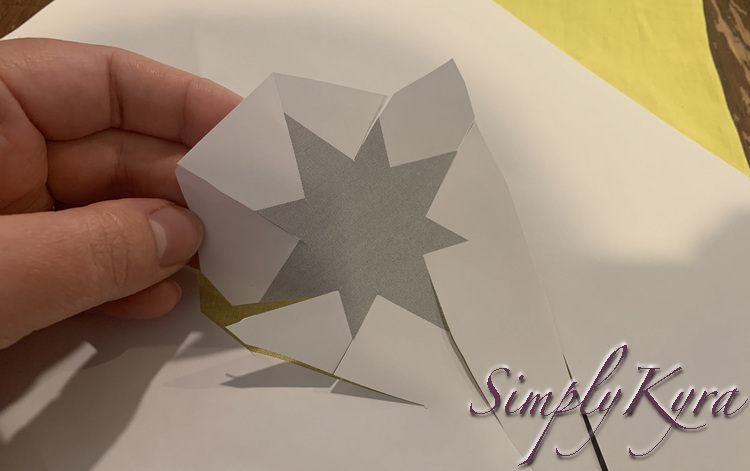
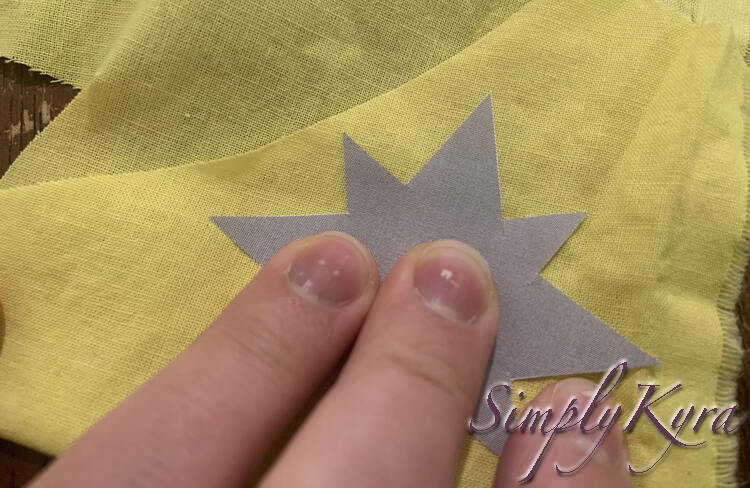
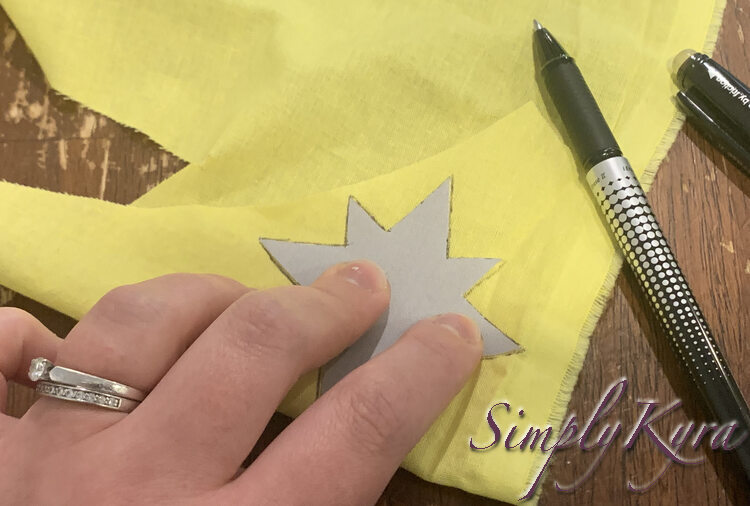
Once I had the star printed I cut it out using my scissors and then used the paper star as a template by placing it on the wrong side of my yellow fabric and tracing around it with a disappearing ink pen.
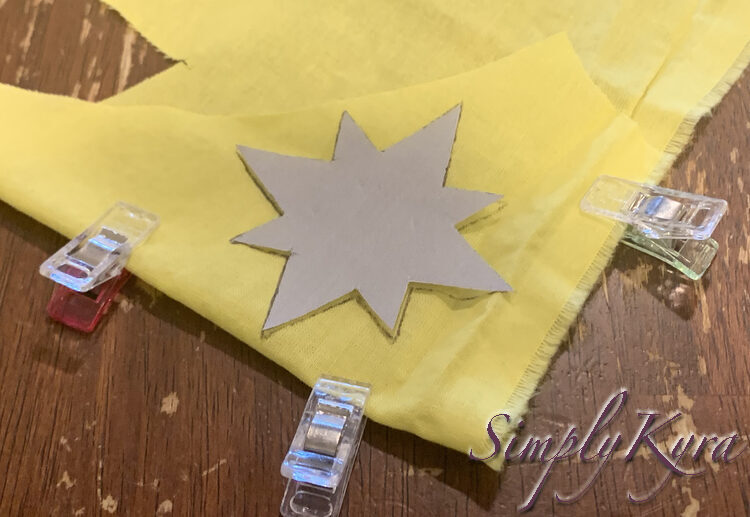
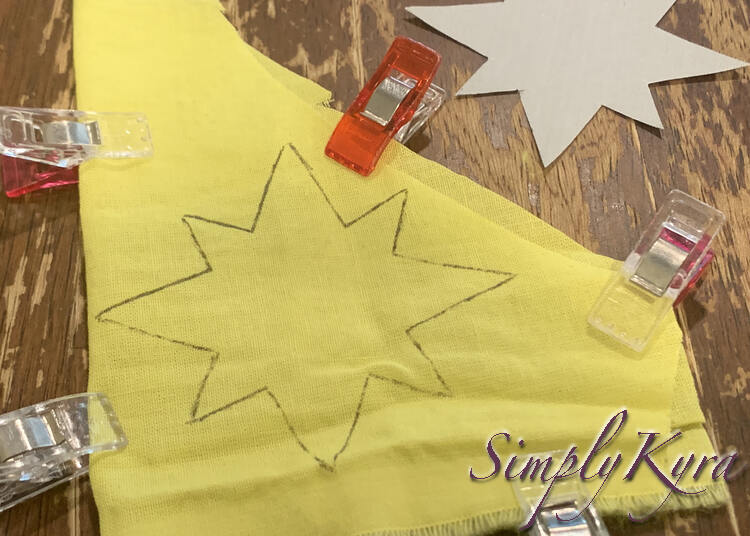
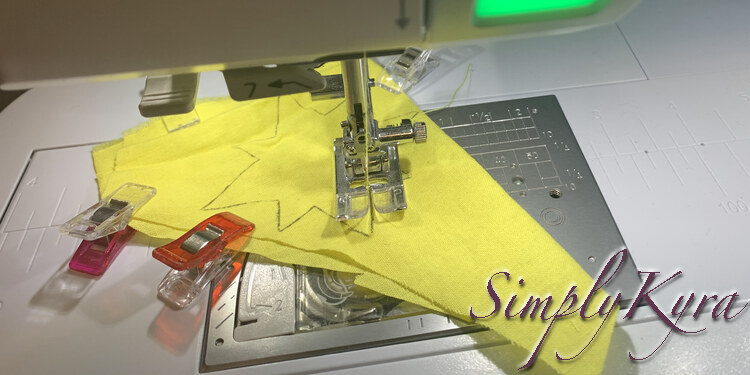
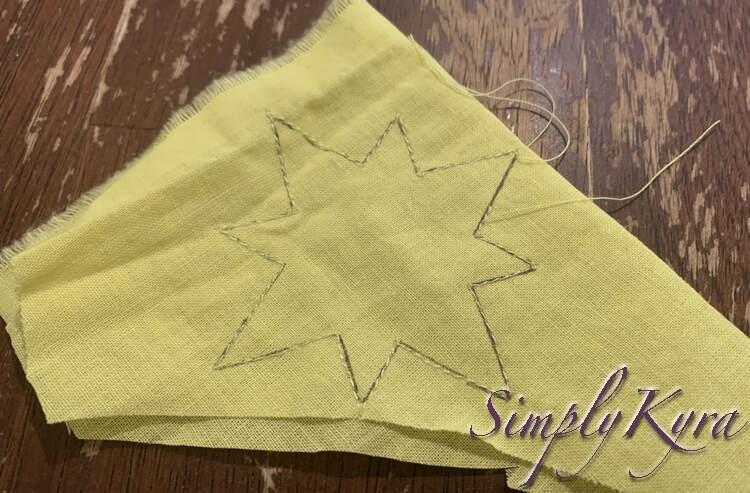
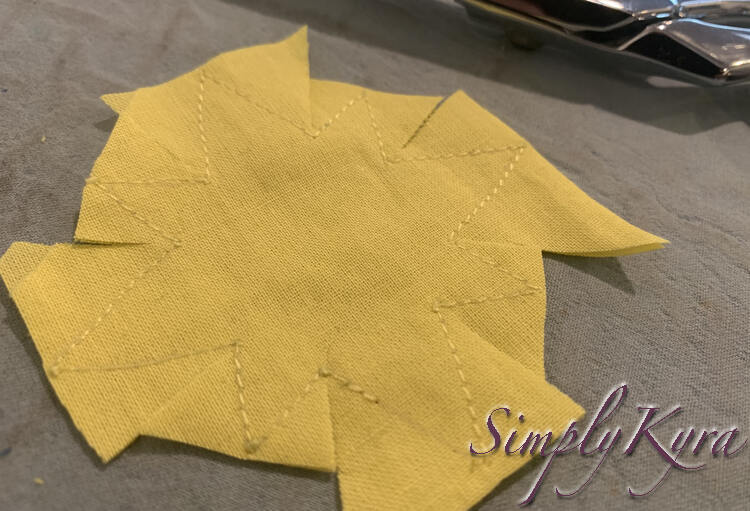
Once I had the outline marked I clipped the fabric in place so it wouldn’t budge and removed the paper template. I then took the fabric to my sewing machine where I sewed along the edge of the star making sure to stop before I got back to the beginning so there would be enough space, albeit small, to turn the star right side out afterward. I also made a point to stop my machine, lift my pressure foot, and pivot at each tip of a star point and divot between the points.
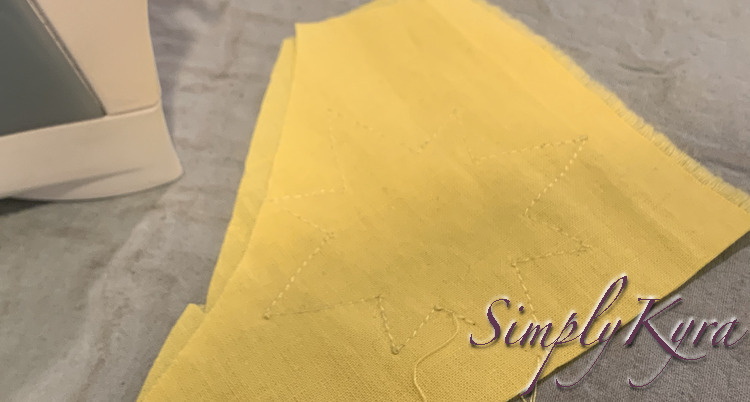
I next grabbed my pre-heated iron and pressed the fabric so the ink would disappear. This step could’ve been left for later but I wanted to confirm that all the ink had disappeared before the star was turned right side out.
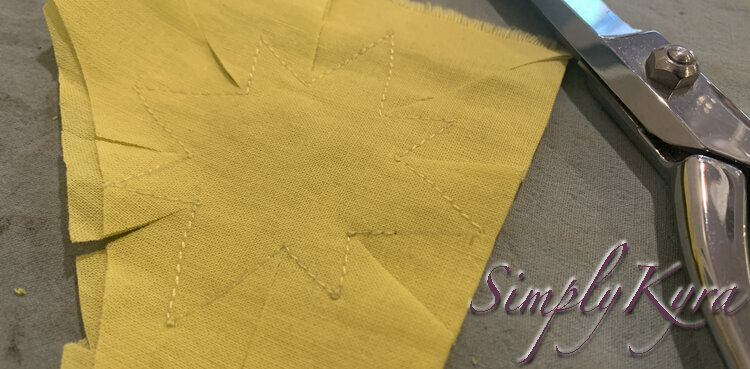
I then grabbed my fabric scissors and carefully cut into each star divot and then along the stitching so there would be less fabric bulking up the star once I finally turned it right side out.
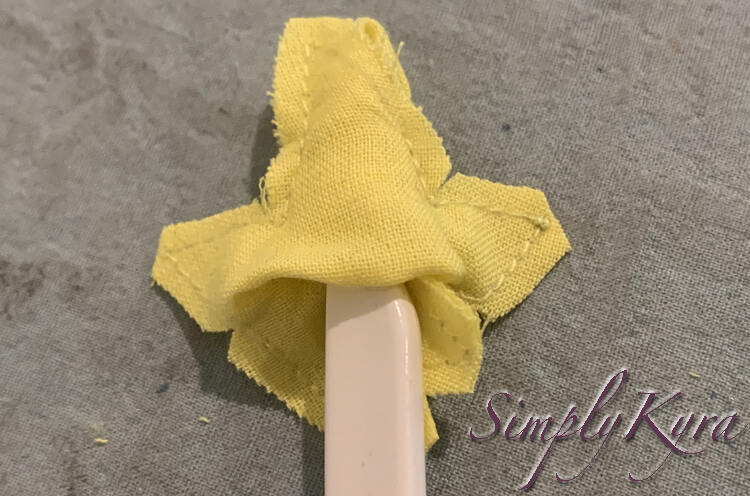
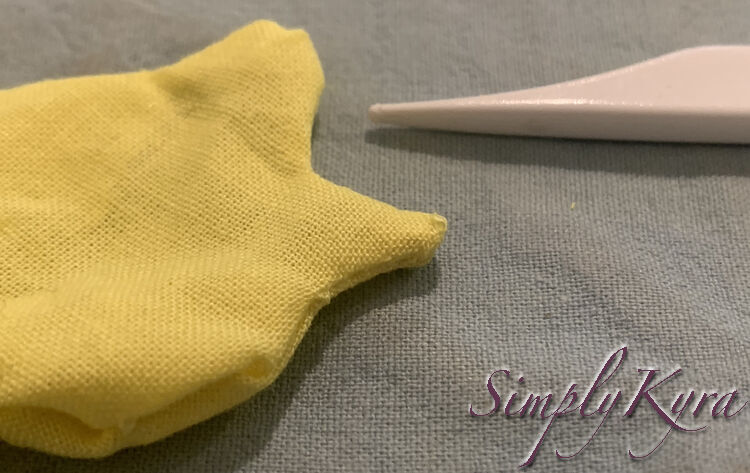
Finally it was time to turn the star right side out which was rather difficult. I ended up using the tip on my sewing machine’s lint brush to push the star’s points out but then switched to a metal chopstick when the lint brush poked through one of the star’s tips creating a small hole.
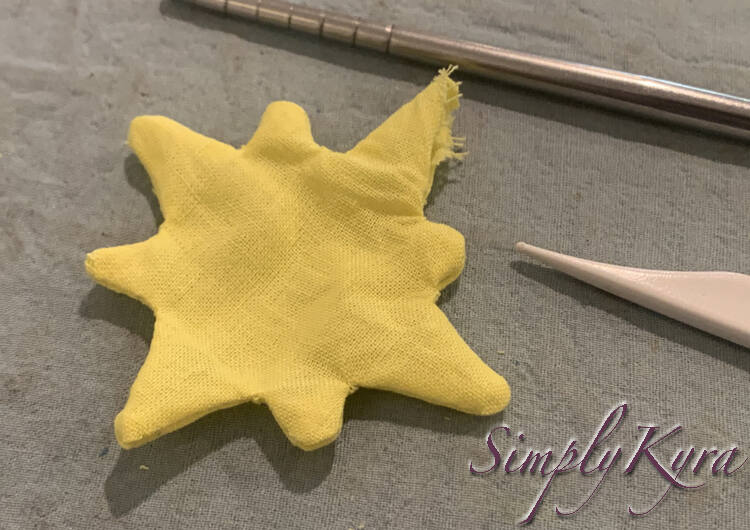
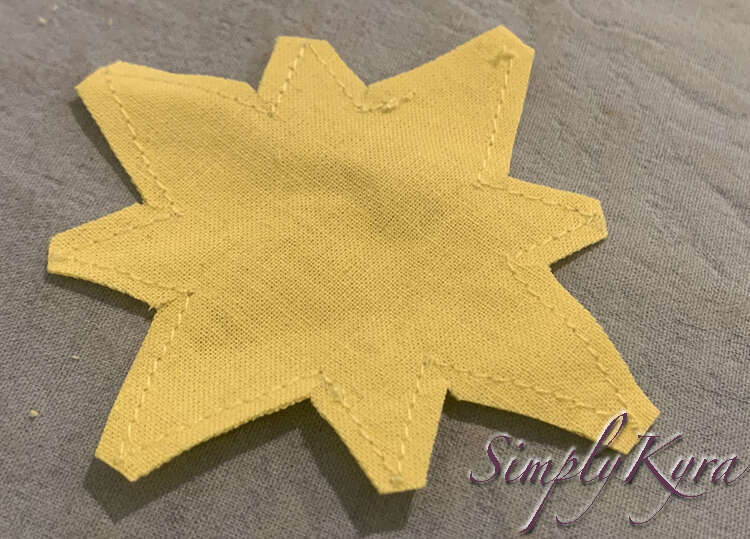
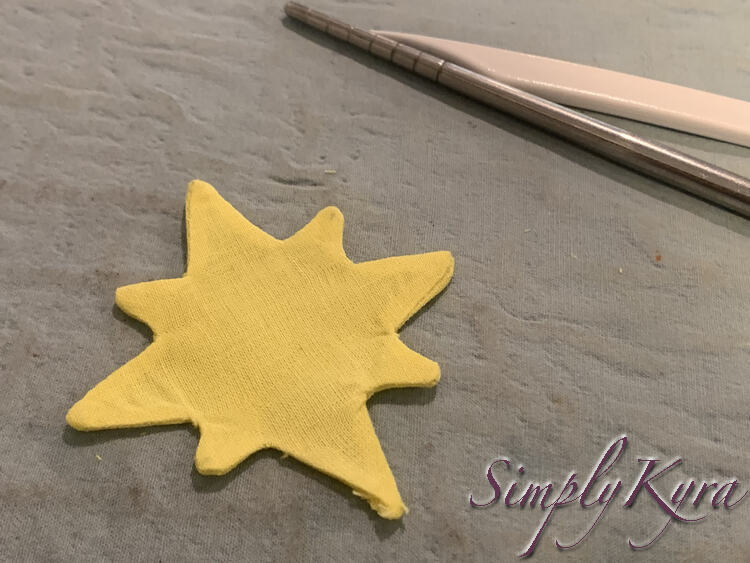
Once the star was fully turned out I attempted to fold the raw edge inside the star and pressed the entire star to hold the points and folds in place.
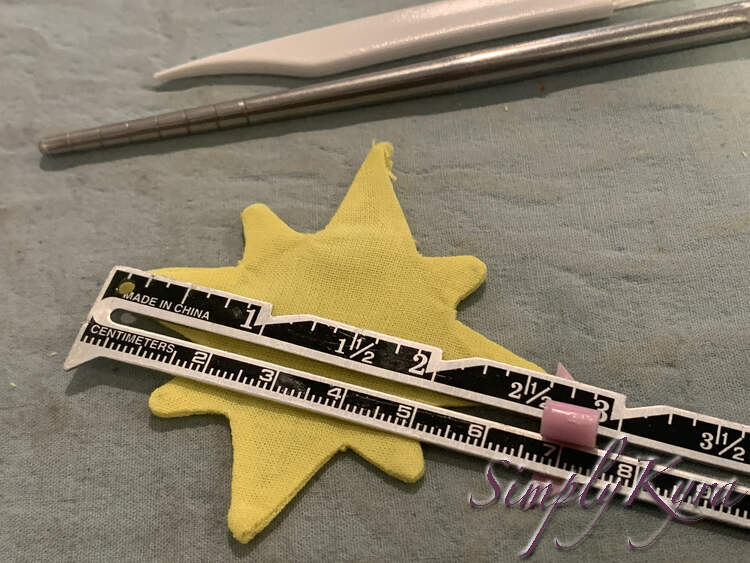
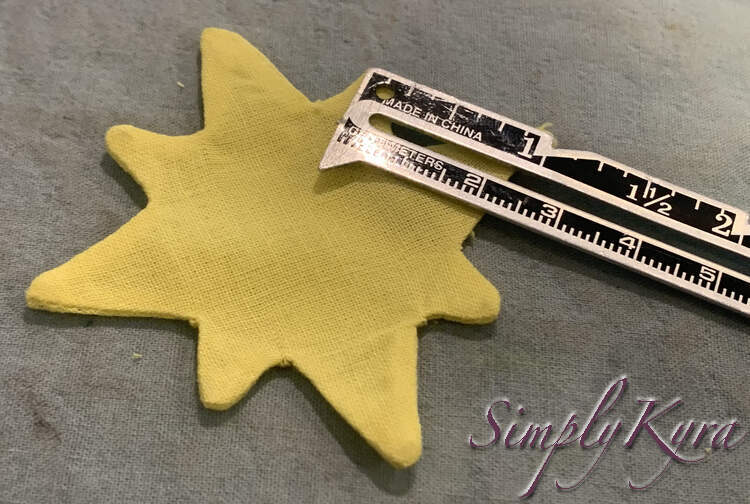
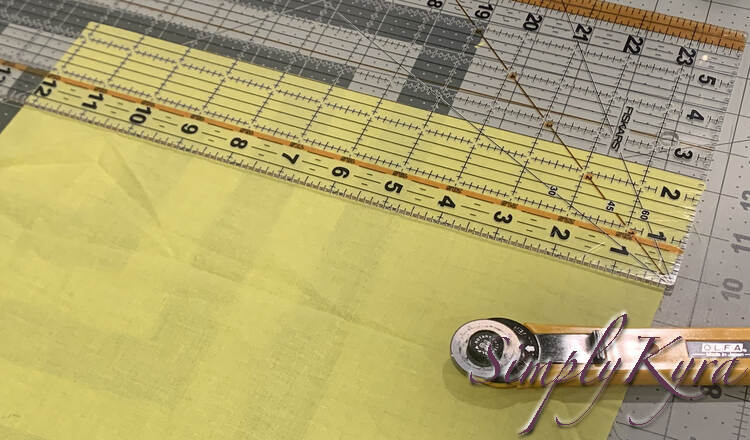
The next step was to use the leftover yellow fabric to make the golden border between the top and bottom part of the skirt. Captain Marvel’s outfit looks like it has two golden stripes close to each other. I considered duplicating this but I didn’t want to mess around turning a small fabric tube right side out or having to fold and hide the raw edges of a skinny strip of fabric. Instead I decided to go simpler and instead created a larger tube of yellow fabric and press it so the seam runs along the center of the flattened strip. This way it gives the illusion of being two skinnier strips with only the work of one wider one. To determine how wide I needed to cut my fabric strip, to make the yellow tube, I grabbed a ruler and measured the space between two star points. This space was one inch wide and as I knew I wanted my strip to be balanced between those two points I knew this meant my flattened strip should be one inch across when sewn.
Once I knew my strip should be one inch, after sewn and pressed, I was able to calculate the width of the fabric strip I needed to cut. Since there’d be a front and back layer I doubled the width I wanted (2*1") and then added half an inch to account for the quarter inch seam allowance (2"+1/2"). This brought me to a width of two and a half inches. The fabric piece wasn’t too long so I skipped calculating the length I needed the fabric strip to be and instead just cut the strip from the entire remaining length of fabric.
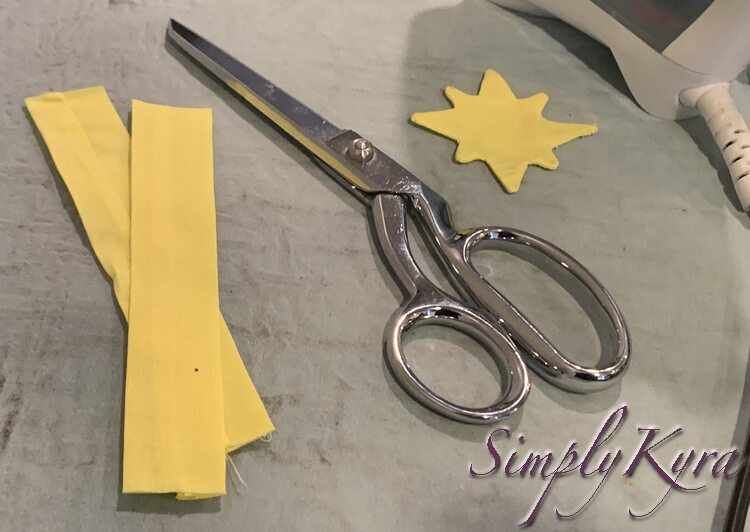
I then folded the fabric strip in half lengthwise, making sure the right sides faced each other, clipped it in place, and sewed along the raw edge with a quarter inch seam allowance. I then turned the fabric tube right side out and carefully pressed it making sure that the seam stayed centered on one side of the flattened tube. I then folded this in half to find my center point and cut across the strip so I’d have two equally long strips that could be placed on either side of my star.
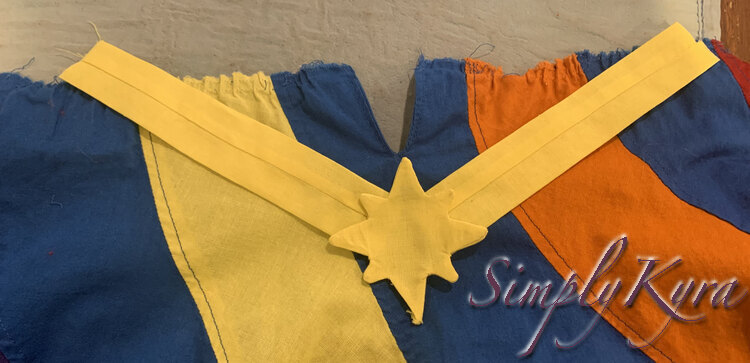
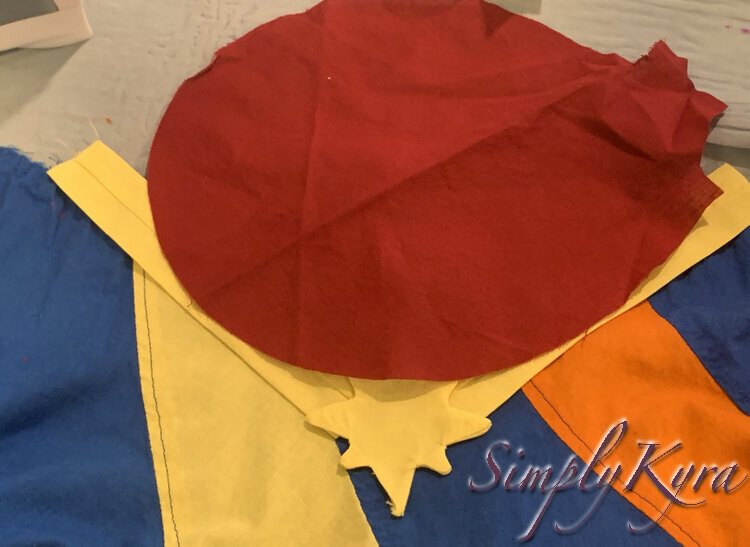
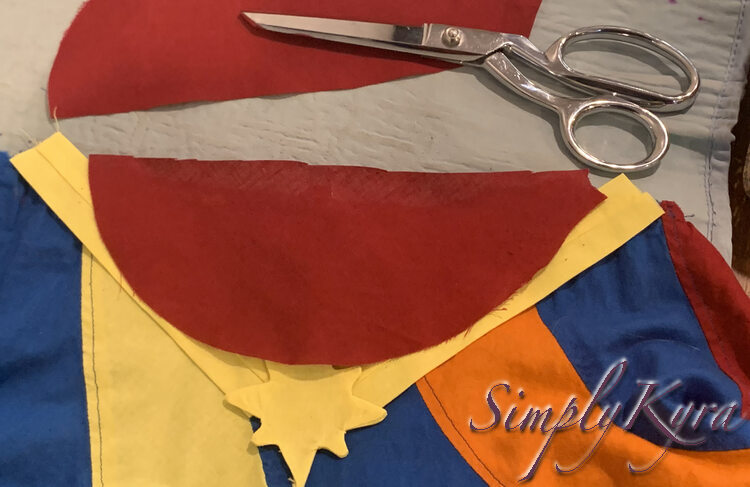
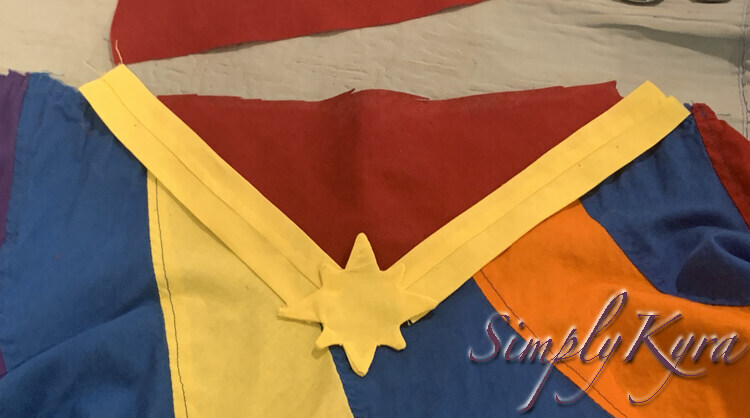
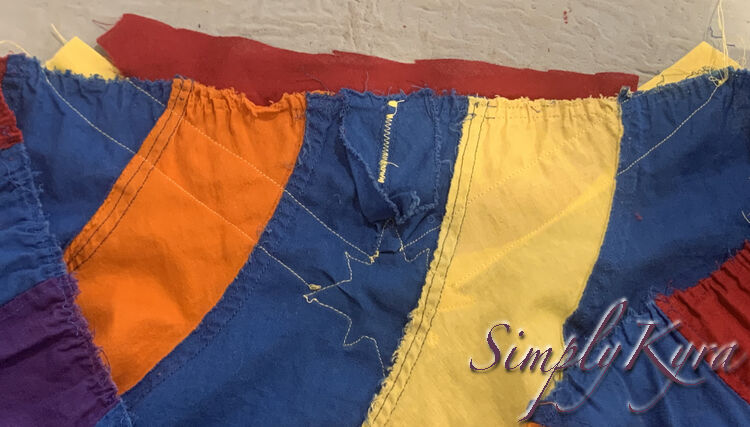
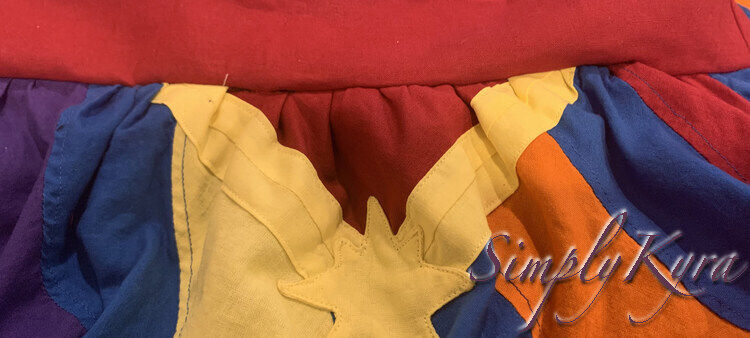
Finally it was time for the skirt itself. Earlier I had seam ripped the bodice from the skirt portion so I was left with a hemmed skirt with the slit remaining where the back of the dress used to be. I planned to make the new emblem the center front of the skirt, thus switching the skirt from back to front, so I laid out the skirt with the slit at the center top. I then placed the star and strips around the slit playing with how it was laid out before settling on my preferred placement. I chose to have the star right below the bottom of the slit with the strips overlapped behind the star and angled up so their raw edges overlap with the raw edge of the skirt. I then grabbed a scrap of red fabric and cut it to fit the space behind and between the star and strips so the slit will be fully covered up. I loved how it looked all laid out!
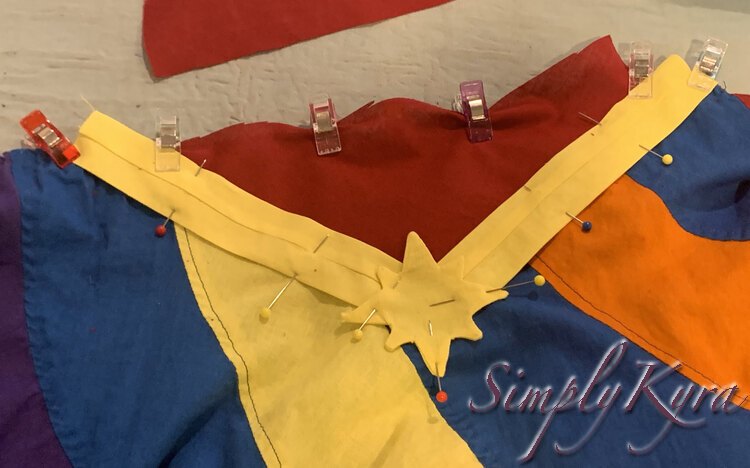
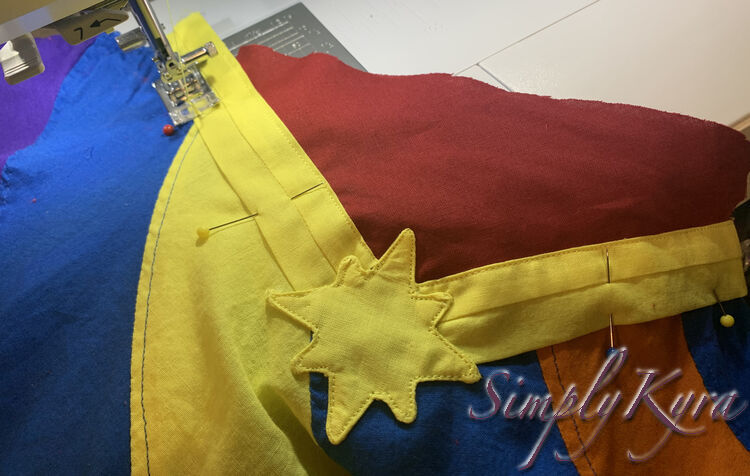
With the final layout decided I carefully pinned and clipped the layers in place so they wouldn’t shift before taking it over to my sewing machine. I decided to keep the yellow thread in my machine, from sewing the star and strips, and thus topstitched along the edge of the yellow fabric only. These stitches would also fix the red fabric, overlapped under the yellow, in place. I started by sewing along the top of either strip by starting at the top edge, sewing until I met the star, locking the stitch, lifting my pressure foot, moving my fabric so the needle is on the other side, and sewing up the other side of the strip to the skirt edge. I started here so the red fabric would be locked into place, along it’s bottom edge, and I could remove all the sewing clips keeping the top in place. With that done I sewed along the edges of the star locking both of the strips’ edges underneath. Finally I repeated my process from the top of the strips and secured the bottom edge by topstitching along it.
At one point in this process I realized the slit would gape open underneath the red fabric so I used a wide zigzag stitch to close the slit and keep it in place. I didn’t keep track of the slit’s facing while sewing so at one point I noticed it had bunched up under the star’s stitching. I left it as it was but next time I could see using some dissolving hem tape or something to keep the facing in place as I sewed and thus there would be no bunching.
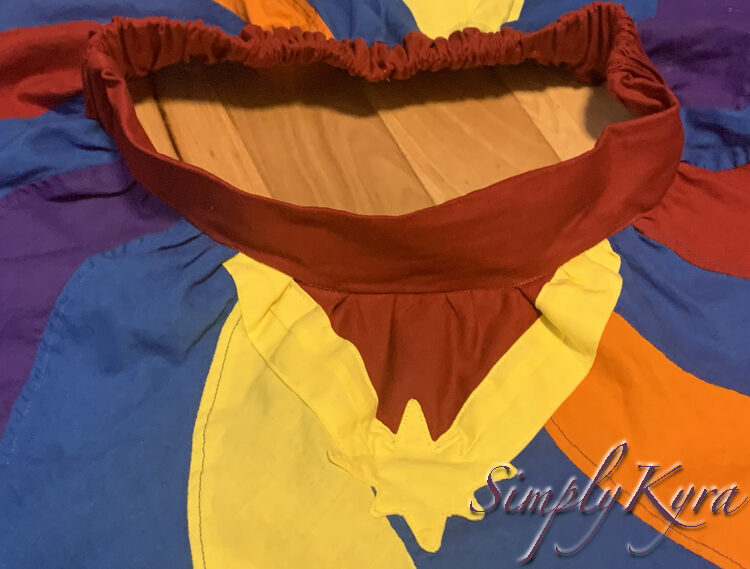
I then followed a free tutorial, found on the Candy Castle Pattern’s website, to add a waistband to the skirt. You can check out my previous post if you want more information about this process. And with that I was done! I love how the final Peppermint Swirl skirt looks and it wasn’t that much work since the skirt itself was already made, along with the rest of the dress, a while back.
And with that I had created a Captain Marvel inspired skirt using an old outgrown Peppermint Swirl dress, a free tutorial, and some fabric scraps. I love it! If you want more information about how I altered the free tutorial since I was upcycling the dress you can check out my previous post here. Have you ever upcycled a Peppermint Swirl dress to make a skirt? If so how did you hide the slit from the placket? Are you planning on using this Captain Marvel inspired idea? If so what do, or did, you plan to add it to? I’d love to hear from you in the comments below whether this post inspired you to make something or not. Hope you’re having an amazing day!
If you’re interested in getting any of my future blog updates I currently come out with a new one every second Wednesday and share them to my Facebook page and Instagram account. You’re also more than welcome to join my email list located right under the search bar or underneath this post.