
My Custom Queen-Sized Blanket and Pillow Set
Back at the beginning of 2019 I made an afghan for our couch from a toddler blanket topper and then, near the end of the year, I made both kids their own comfy blanket for their beds using custom minky which I backed with a Costco-bought blanket. Ever since that first afghan I’ve kind of wanted to make a custom printed epic blanket for our queen-sized bed so when I saw the Travelers round open at Moon Beam Textile Company at the beginning of this year I couldn’t pass it up and this blanket and pillow set was born. I now have a fantastically covered bed and I’m so proud of seeing it whenever I walk into the room!
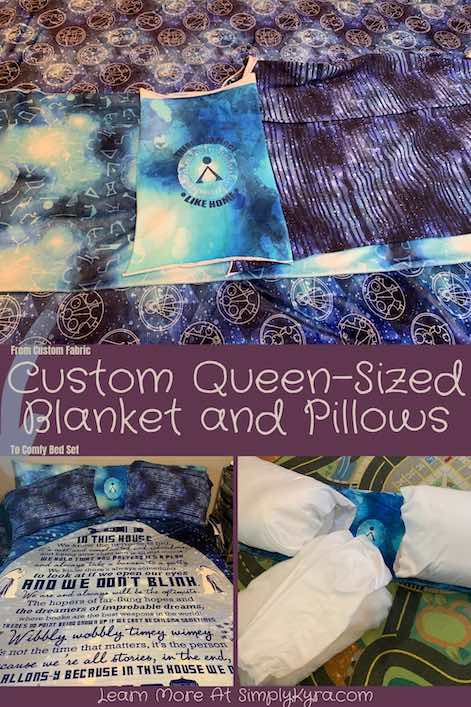
The Travelers preorder round opened at Moon Beam Textile Company back in January of 2020 and I wasted no time confirming the measurements of a queen-sized mattress top online so I could order the double plush Gallifreyan blanket topper. I, unfortunately, completely forgot I would need excess fabric at the bottom and sides of the topper so it could hang over the sides of our bed so I didn’t think to add more fabric to the order for our blanket. I, instead, went on to realize I wanted to make a matching pillow and since I loved the Stargate-themed fabric, I chose a toddler sized cotton spandex Home panel along with a coordinating minky portals fabric to my order. Since it was a preorder I had to wait patiently for the fabric to be printed and mailed out. It wasn’t until the fabric finally arrived that I swiftly realized my blanket-size mistake and had to wait patiently for the extra fabric to go on the website as retail so I could buy more. Once it was listed, in mid-May, I hopped on and chose a two yard pre-cut of a coordinating Gallifreyan double plush fabric so I could turn the blanket topper into a larger blanket using the same magic, at a larger scale, as my coffee afghan. I really wanted to use the striped coordinate, rather than the Gallifreyan, to edge the blanket topper but the stripes only came in cotton spandex; however, after thinking about it I ended up grabbing a yard and justified it as wiggle room for my blanket but in actuality it ended up being made into more pillows. I did end up using all of the fabric I bought and love how they all look together on my bed. With shipping the two orders together came to $185 U.S. so this definitely isn’t the cheapest option out there.
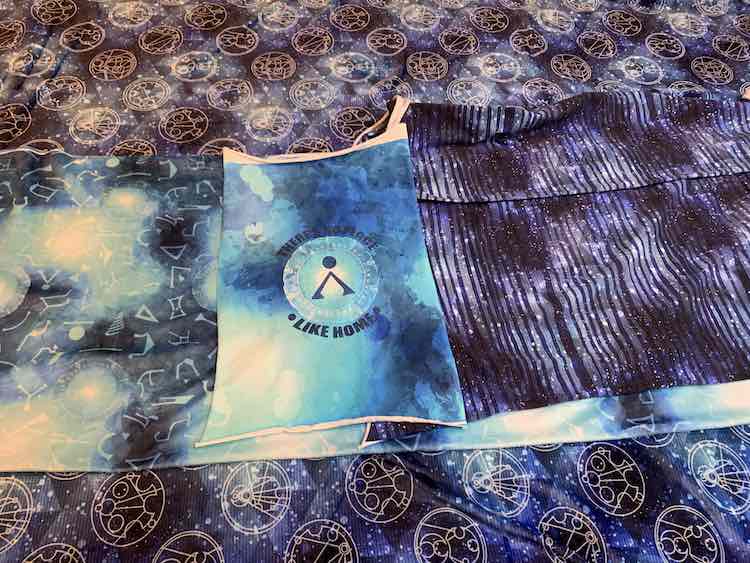
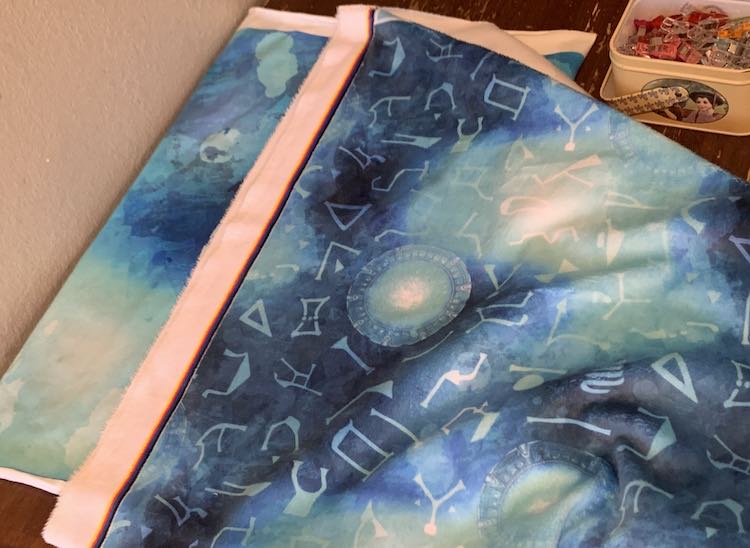
Since these are custom printed all the fabric is white on the back and along the front edges. The double plush fabric, bought for the blanket, is soft on both the front and back while the minky, for the coordinating Stargate fabric, is instead soft on only the front side and rougher on the back. The Stargate Home panel is a smoother non-fuzzy thicker cotton spandex (no name version of cotton Lycra). I made the mistake of last year buying the girls their blanket fabric out of minky and ended up having to back it with a Costco-bought blanket so the underside would be cozy.
The Blanket
The blanket was, I thought, the simplest part of this although I did end up with a skinnier and longer blanket than I had pictured. I started out by laying both the blanket topper and the two yard coordinate on the ground overtop of each other so I could easily confirm that they were the same size and thus confirm that using the same process used in the coffee afghan would work.
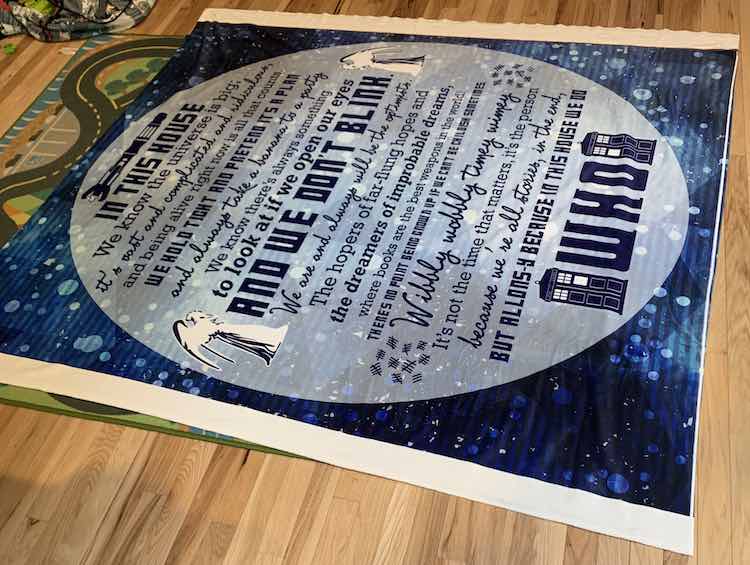
The blanket topper and coordinate are both two yards, or 72 inches, long. I then measured their width, from the blue sides edges, at 57 inches wide. To calculate how wide I should cut the side strips I used the following equation where X dictates the width of each side strip:
X = (Length of the Blanket Topper - Width of the Blanket Topper) / 2
X = (72 - 57) / 2
X = (15) / 2
X = 7.5 inches
Once I found the width I needed I was able to cut two strips of the matching coordinate along the length resulting in two strips each 7.5 inches wide by two yards long. I then took the leftover coordinate, folded it in half lengthwise, and cut along that fold to create two equal pieces. These last two pieces are going to be added, sideways, to the top and bottom of the blanket which is why I did the calculations to make the blanket’s total width match the two yard length of the blanket topper and coordinate. Since I cut the remainder of the fabric in half the top and bottom of my blanket will have equal amounts of the coordinating fabric. If, instead, I cut them at a different spot, say about one quarter over instead of halfway, there would be more fabric at the one end of the blanket compared to the other end.
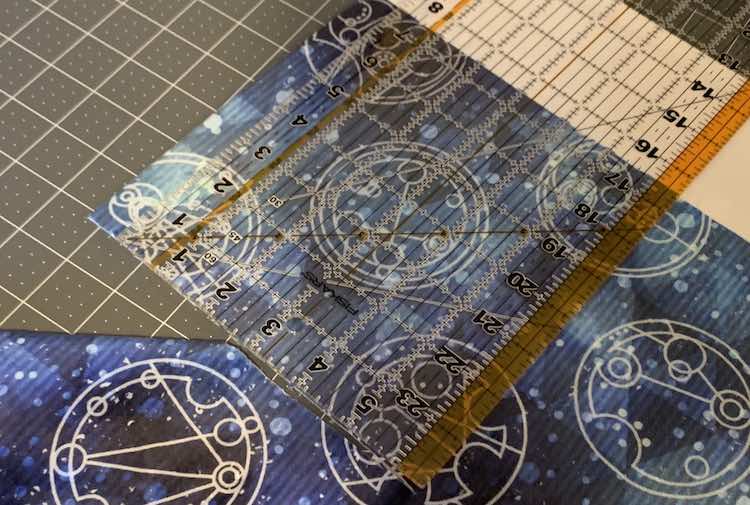
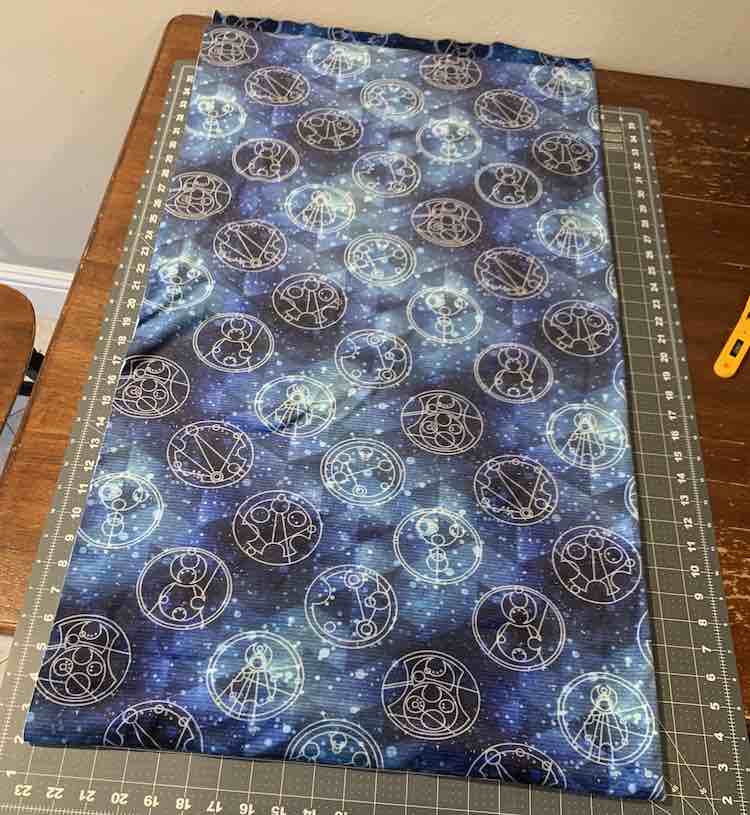
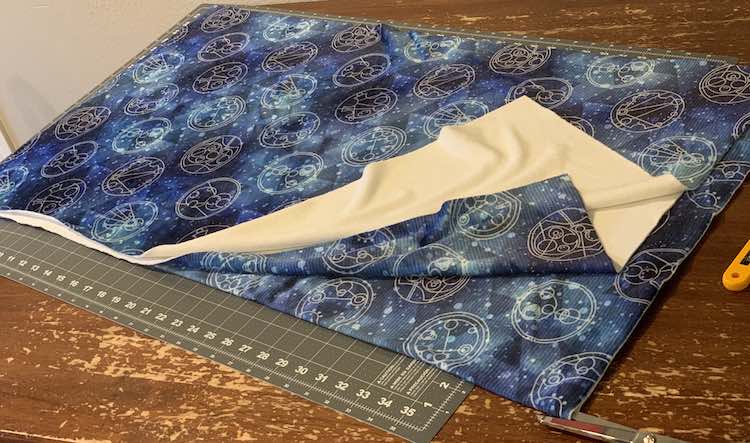
Once I had the two yards of coordinating double plush fabric cut into four strips it was now time to sew my blanket together. A year ago when I did this I used my sewing machine’s zigzag stitch but I’ve since upgraded to an awesome serger so this time around I serged all my seams. I started by clipping the 7.5 inch wide strip to one of the long edges of the blanket topper and then went on to clip the other strip to the other long edge. I next serged the sides on, removing the clips as I went, giving me a blanket with the width done. I tried the blanket on my bed and wished, a bit, that it was wider but still went ahead with the plan, without over-analyzing, as I wanted the blanket to be long enough to tuck under our toes and knew if I added more fabric to the sides I wouldn’t be able to make the blanket any longer than to the mattress edge. I then took the last two coordinating pieces, the wider strips, and turned them sideways so their length matched the blanket’s width. I then clipped one to the top and the other to the bottom of the blanket, making sure they were right sides together, before finally serging these last two strips on.
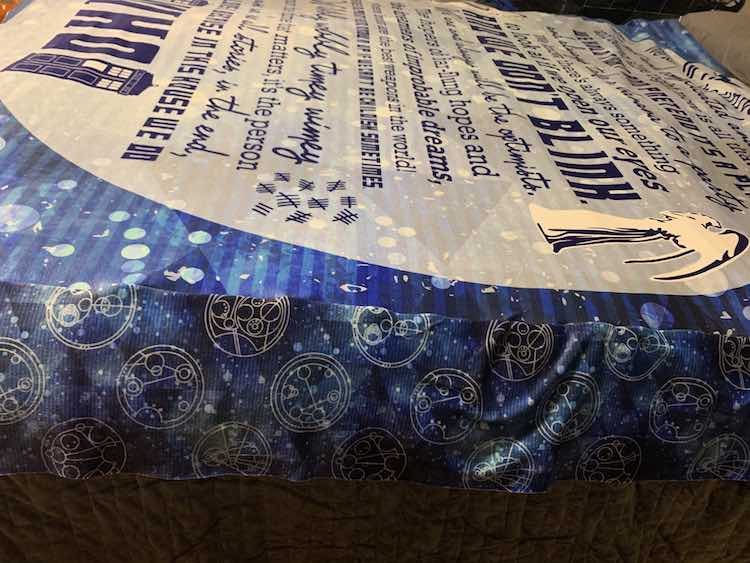
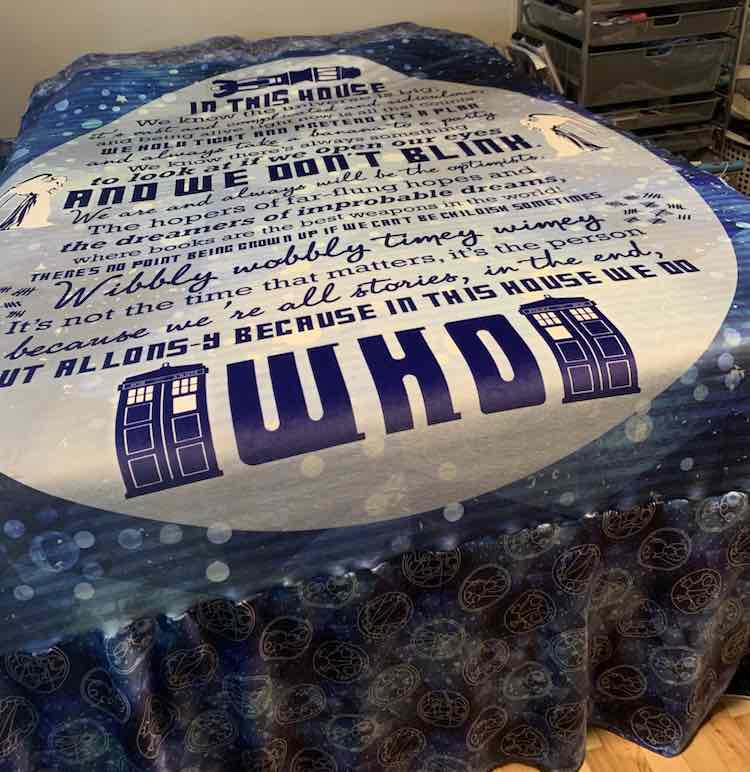
And with that the blanket was done!
Looking back the only thing I wish I could’ve changed was magically making the blanket wider and shorter. Unfortunately, if I had made the blanket wider, by cutting the initial strips wider, than the blanket would’ve been too wide to allow me to add the last two strips to the top and bottom since the blanket would’ve been wider than the two yards. I would’ve had to piece something together with the leftover fabric, thus maybe wasting some of it, or leave it without any additional length. This was why we used the calculations to decide the width of the initial strips. That said if I bought a three yard cut of the fabric, which wasn’t offered, I could’ve instead cut two 2-yard strips of the coordinate, wider than 7.5 inches, and then used the rest of the fabric to cut two strips that would’ve been more than long enough to cover the width of the blanket; as long as the width would’ve been kept to less than three yards. I would’ve been left with the remaining one yard of fabric leftover from cutting the initial two strips unless I had put it, somehow, towards my pillow covers.
The Pillows
I designed my larger Stargate pillow before I came up with a way to use the striped cotton spandex coordinating fabric but then chose to sew all three pillows at the same time so I could batch the steps together and make it simpler for me. Going into designing the pillows I knew right off the bat that I wanted to be able to wash the fabric easily so I needed to create pillow covers with my fabric rather than simple throw pillows so I could easily take the stuffing out. I looked online for pillow inserts, since I wanted to know what sizes I should aim for when creating my pillow covers, and quickly realized how expensive they truly are. I browsed through some blogs showing me how to create my own pillow inserts and stumbled upon the idea to just buy cheaper standard-sized pillows and alter them to fit inside of a pillow cover. Since I didn’t have any stuffing on hand that seemed to be the best idea so I justified doing a Walmart run and ended up grabbing three standard-sized pillows each for under $3. This way I could simply alter my cheaper and easier to replace pillows to fit inside of my finished pillow cover; rather than worrying about sewing my limited fabric to fit around a expensive store-bought insert. My next issue was how to design an opening in my pillow cover so I could easily get my insert in and out. I didn’t want to have any buttons, Velcro, or anything on the cover that might bug me when using the pillows so I started defaulting to creating envelope covers with my fabric but was leery of having the enveloping section gape open or of wasting some of my limited fabric on a, hopefully, hidden section of the cover. I instead pivoted and chose to use zippers but kept them hidden away on the back rather than putting them on a side seam or through the front where I could feel it. I had previously bought a three pound bag of assorted zippers from Wawak so instead of buying perfectly matching zippers for this project I instead went hunting through my collection and found three mismatched plastic zippers. I had made a point of not choosing metal zippers as I didn’t want there to be rough zipper teeth or a zipper pull that might catch and rip my fabric. Since the matching striped pillows include photos better showing you how I put my zippers in I wanted to share those with you first and then follow up by showing you my favorite one; the Stargate pillow. Finally, after that, I’ll go over how I created my custom pillow insert that perfectly fit into the Stargate pillow using the three standard-sized pillows I bought at Walmart for under $9.
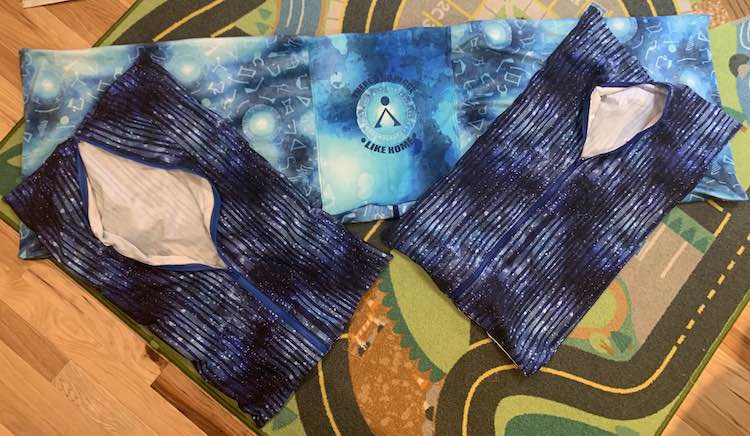
The Striped Rectangular Pillows
I quickly realized that I wasn’t going to be able to use the final yard of striped coordinating cotton spandex fabric on the blanket, but I promptly decided, since it matched, to instead turn the fabric into two coordinating pillows for the bed. I preferred the idea of two matching pillows and knew using the whole yard of fabric on a single pillow would’ve been too large plus having two pillows meant I could help frame the Home panel on the longer pillow behind them.
I started these pillows by folding the yard of fabric in half, lengthwise, and cutting along the fold so again I wouldn’t need to measure.
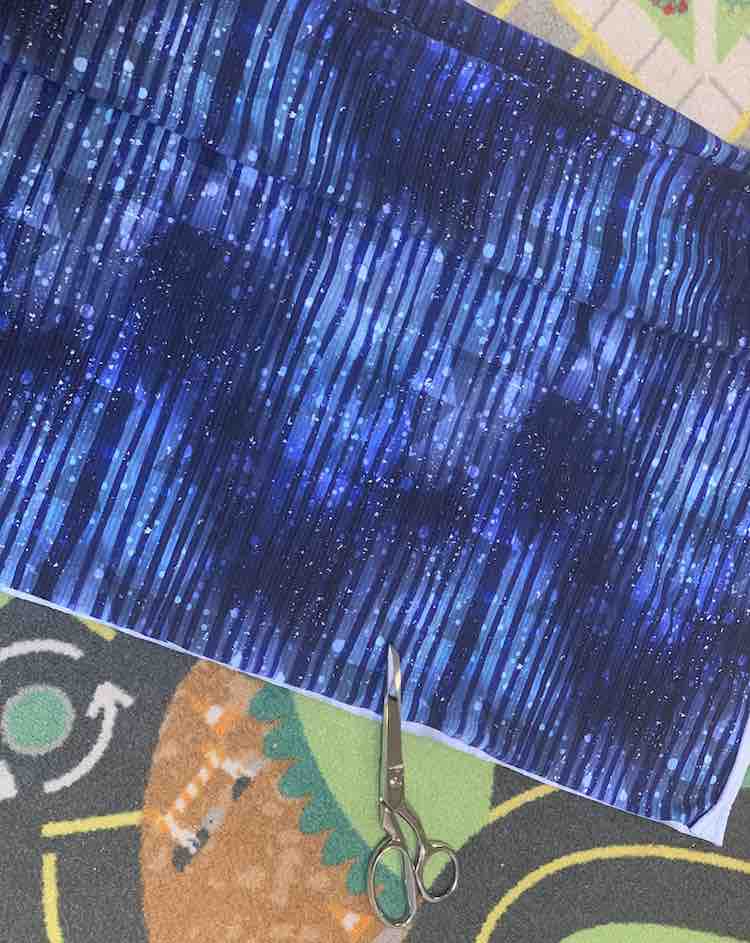
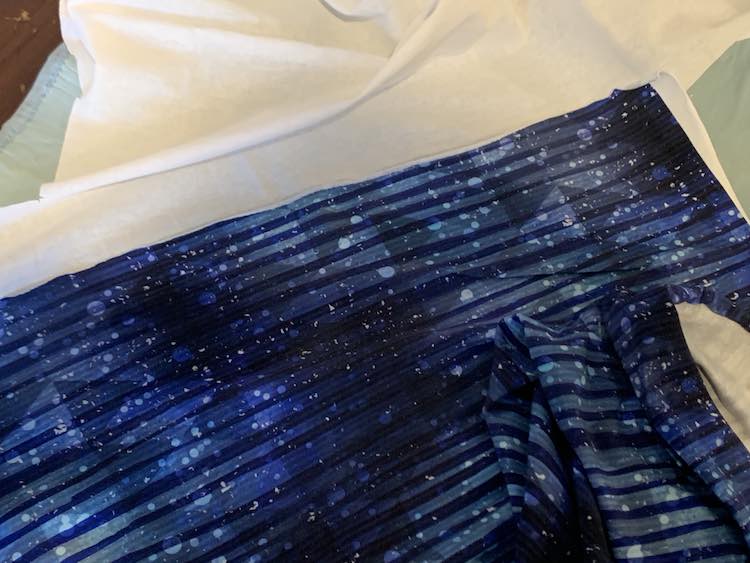
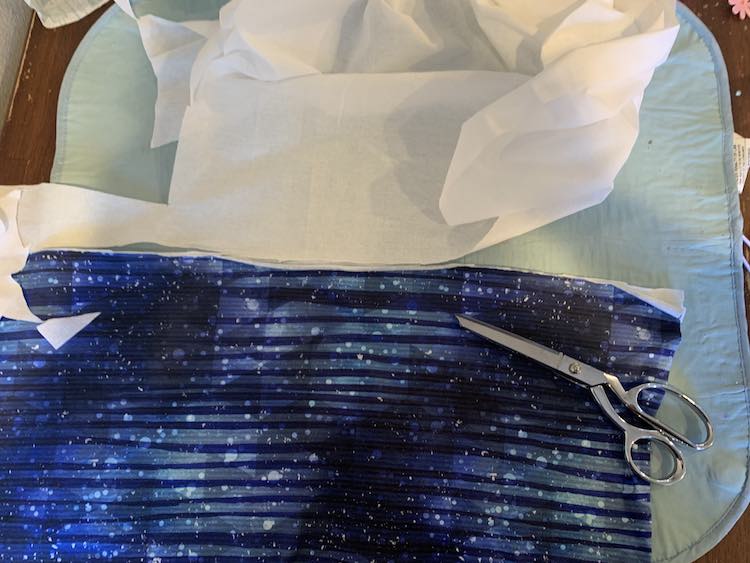
I wanted the pillows to be rectangular with a zipper hidden in the back so I could easily remove the insert when I needed to wash the pillow covers. For the zippers themselves I had chosen my only two blue separating ones which also happened to be longer than the width of my fabric so I was able to easily have them run horizontally through the center back with the excess trimmed off at either end. To accomplish this I simply chose to attach either side of the zipper tape to the long ends of my rectangular fabric so, once the zipper was done up, I’d have a long tube with a zipper running down the length of it. I then made sure the zipper was partly opened, turned the pillow the wrong way out, flatten the pillow so there were two folds with the zipper centered horizontally on the back, and then finally sew either end closed. Since the fabric is knit and thus a bit stretchy I realized I needed to first add interfacing to the long edges of the fabric before sewing the zipper on. I was running low on interfacing and didn’t want to waste any by eyeballing the pieces I’d need so I instead chose to partially attach the fabric to the edge of the main piece of interfacing, trim around the edge, and then finally finished pressing it to make sure it was fully secured. Since the fabric is cotton spandex the edges were curling badly so I had to be careful to uncurl the fabric while pressing it down. I then repeated these steps so both pieces of fabric were interfaced on their two longest sides. I next used my double-sided wash away tape to attach my zipper in place making sure the tape was placed closer to the edge of the fabric rather than close to the zipper itself so it wouldn’t show later after topstitching. That said if the tape does show through you can grab a wet washcloth to rub it away since it easily dissolves. I then sewed that side of the zipper on, finger pressed it open, and topstitched it down. After I brought the other interfaced side of the fabric around, while making sure the fabric wasn’t twisted and was right sides together, and used the same steps to sew the other side of the zipper on. Once I had sewn both sides of the zipper to the fabric I zipped it closed and confirm it was in fact zippable and the fabric was lined up properly at either end.
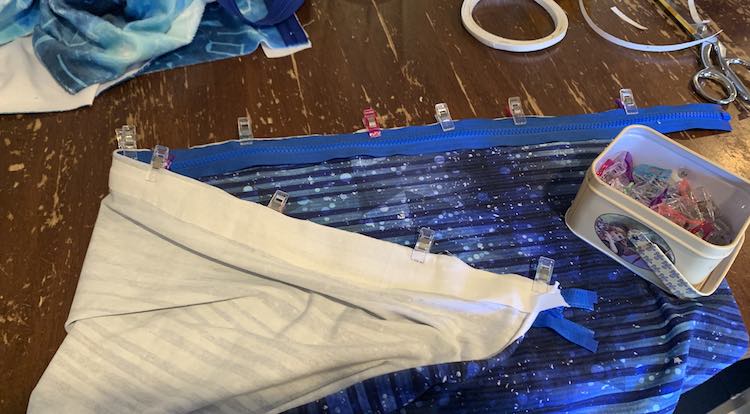
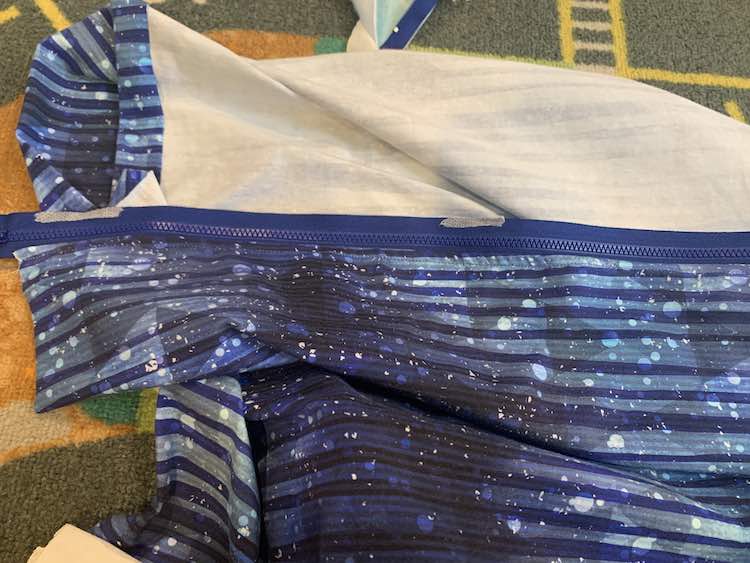
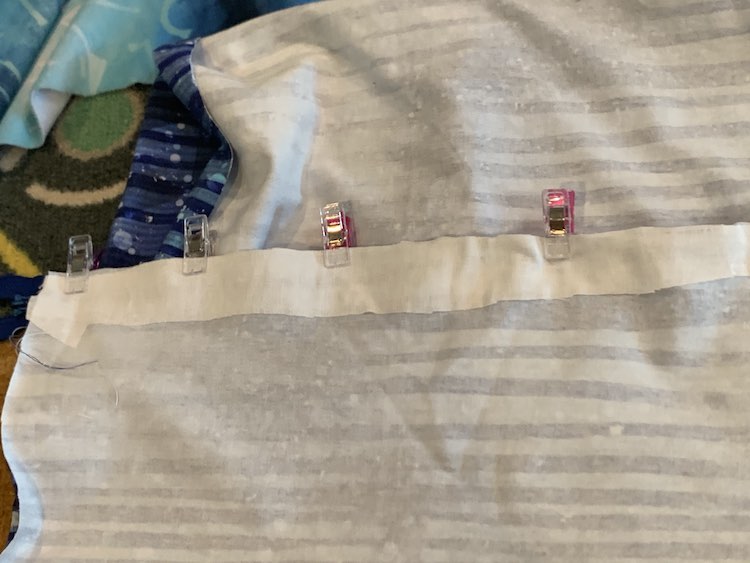
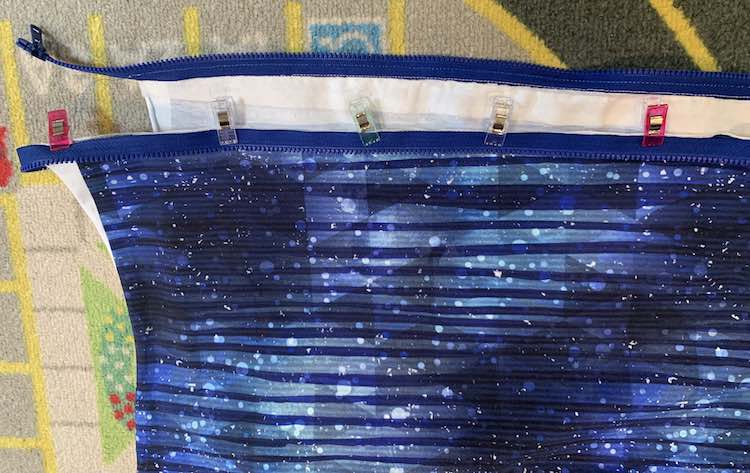
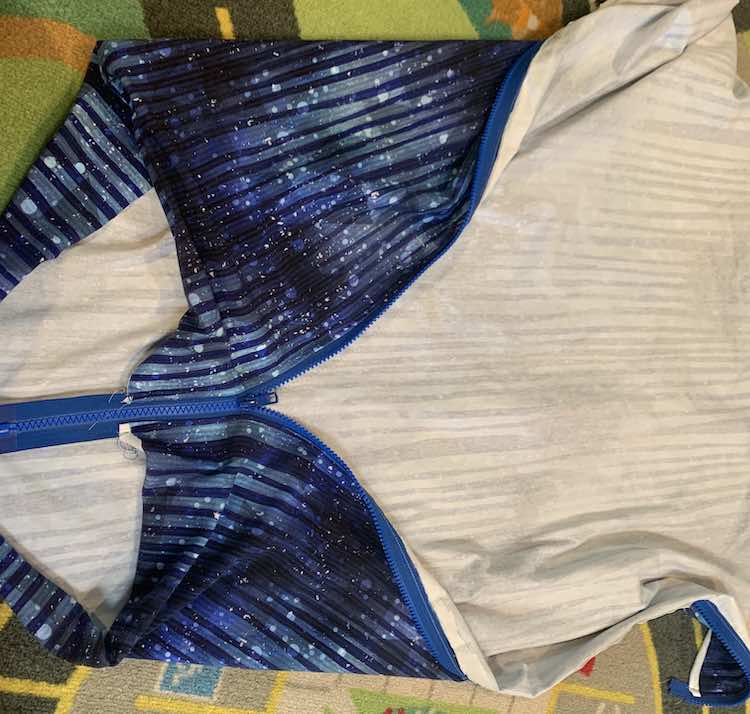
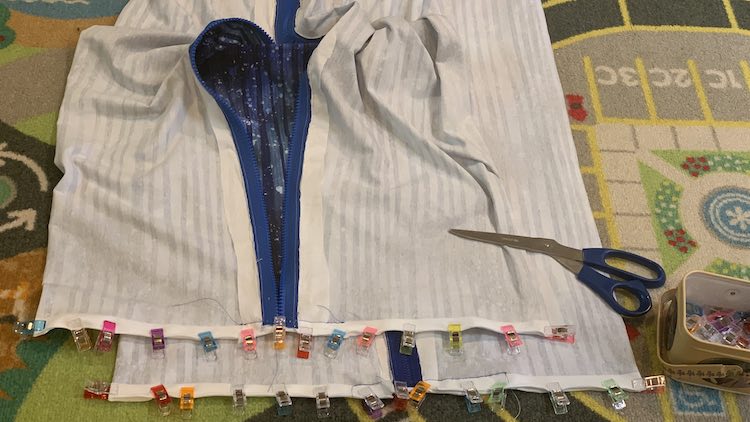
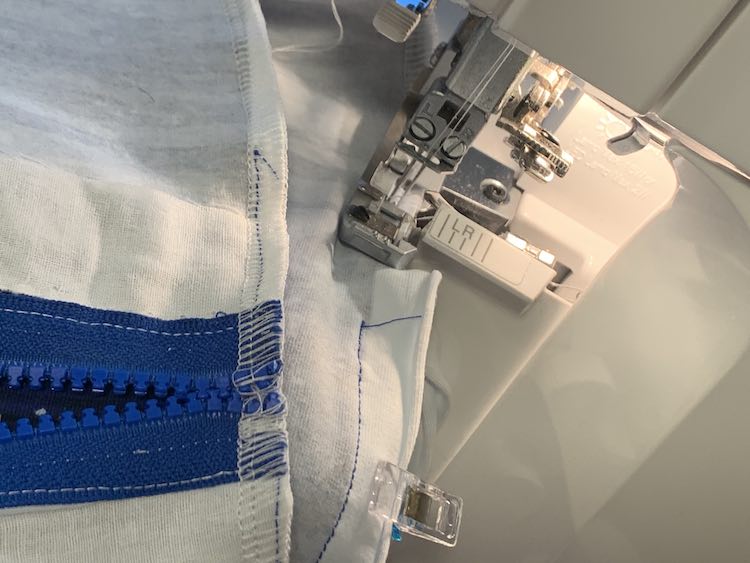
Once the zipper was done it was time to sew the sides closed. I first made sure the zipper was halfway open so I would be able to turn the pillow right side out, through the zipper gap, afterwards and be sure that the zipper pull wasn’t stuck outside of the pillow (that happened earlier this year with a purse I made). I knew I wanted the zipper to run horizontally along the center back of the pillow so to do this I laid the inside out pillow cover flat on the ground making sure the zipper was centered equidistant between the folds. Once I was happy with how it was laid out I used my sewing clips to secure the zipper to the other side of the fabric before adding more clips about an inch or so to either side of the zipper. Before adding more clips I next took the pillow covers to my sewing machine to secure the zipper, using a straight stitch, by sewing over either end of the zipper. Even though my zippers were plastic I had to sew carefully and did break my needle a couple of times. After the zipper was sewn down, with the zipper pull in the center, I used my regular scissors to trim the excess zipper tape on the outside of the stitching so my serger blade wouldn’t have to cut through it in the next step. I then triple checked that my zipper was halfway or so open, clipped the rest of the pillow’s sides down, and serged along either side of the pillow thus finishing both pillow covers.
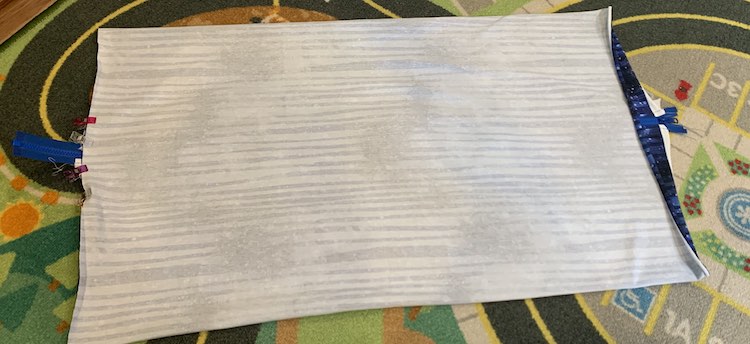
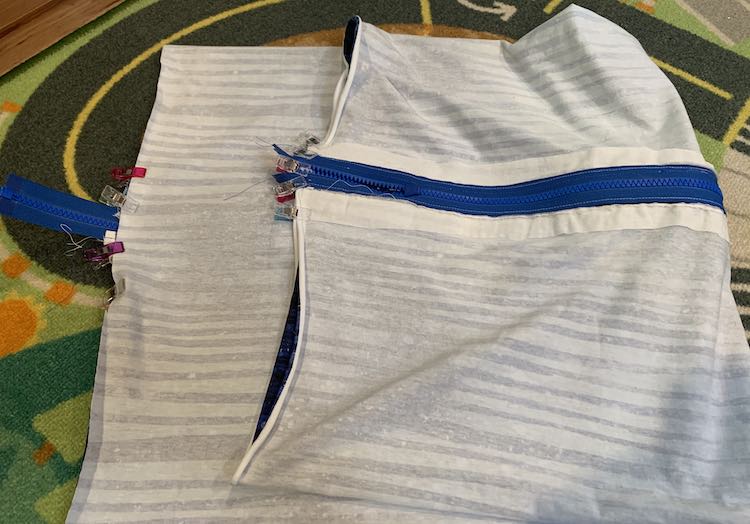
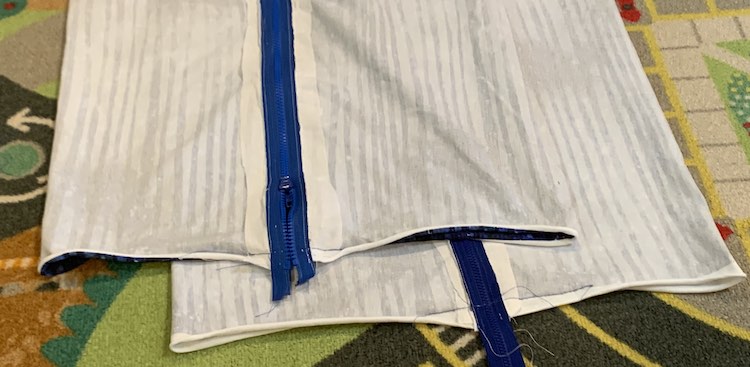
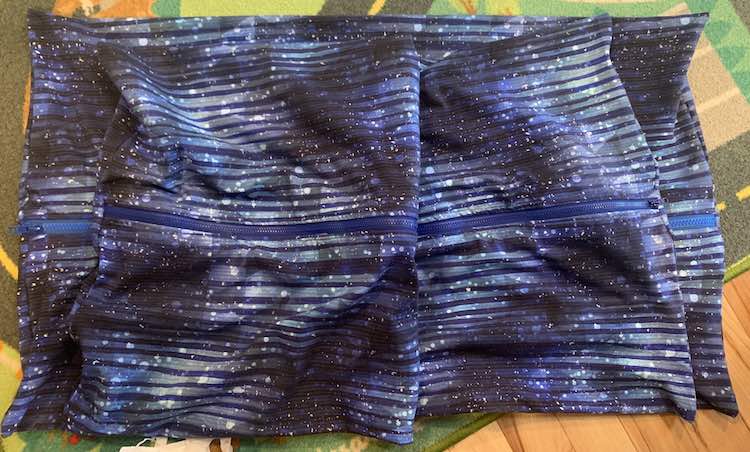
And with that I was done the two matching coordinating pillows and I love how they turned out. After making them I tried to put one of the standard Walmart pillows I had bought into them and found the covers were a bit too wide to support the pillow. I measured the finished casing and, based on looking up pillow sizes online, decided a King sized pillow may fit better as it’s longer than a standard sized one. I didn’t want to go back to a store, during the shelter in place, for a simple pillow and they seemed too pricey online for what I wanted it for. Luckily, a couple days later, I realized Matt and I had two older pillows so I grabbed those and, although they’re probably still standard sized, they are firmer and seem to work in the pillow covers, for now, so I was able to put my final completed bed set on our bed.
The Long Custom Stargate Pillow
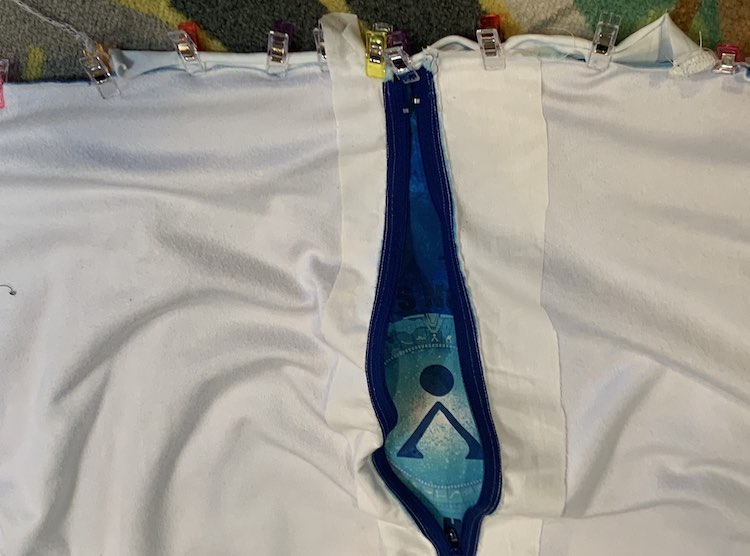
While zipper hunting I had found a zipper slightly shorter than the Stargate Home panel and chose to put it vertically down the center back of the pillow. Since it was a bit short I didn’t have to worry about trimming the excess zipper before serging over (or beside) the ends. This time I chose to create a long and skinny strip of fabric and sewed the zipper to the short ends creating a giant loop of fabric when the zipper was closed. Like before I then laid the completed fabric loop down, right sides together, and centered the zipper, and this time panel, between the two folds. Once I was happy with how it was laid out and attached the clips I then serged along the top and bottom of the pillow cover. This is just a quick general overview and since I took photos during this process I figured I’d share in more depth below.
I started this pillow by taking the cotton spandex panel and checked it against the height of the Stargate minky coordinate I bought. I saw the panel was twice as tall so I folded the coordinating fabric in half, lengthwise, and cut down the fold so I’d have two long pieces. I then sewed the short end of either coordinate to the sides of the panel so I ended up with one really long short strip of fabric the height-ish of the panel. I then switched to my sewing machine, which was threaded with a matching blue thread, and topstitched the serger seam down with a narrow zigzag stitch.
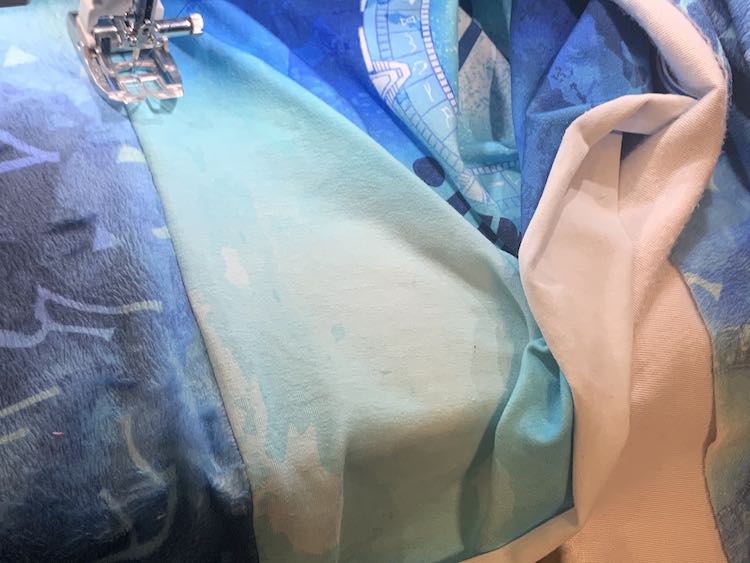
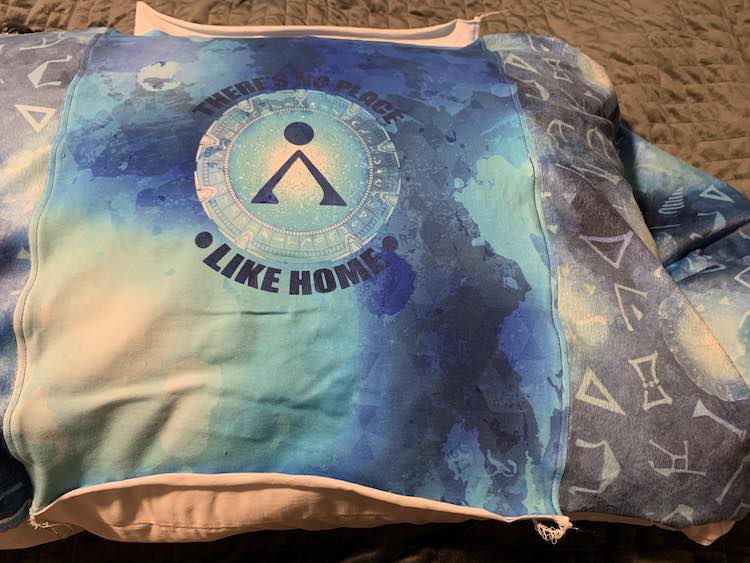
I then took the resulting long strip of fabric and interfaced both of the short ends before attaching a zipper to it creating, essentially, a really big loop of fabric. I turned the loop of fabric the wrong side out so the right sides would be together. I then laid it out on the floor so the panel and zipper were on top of each other, in the center, with the long ends stretching out to either side.
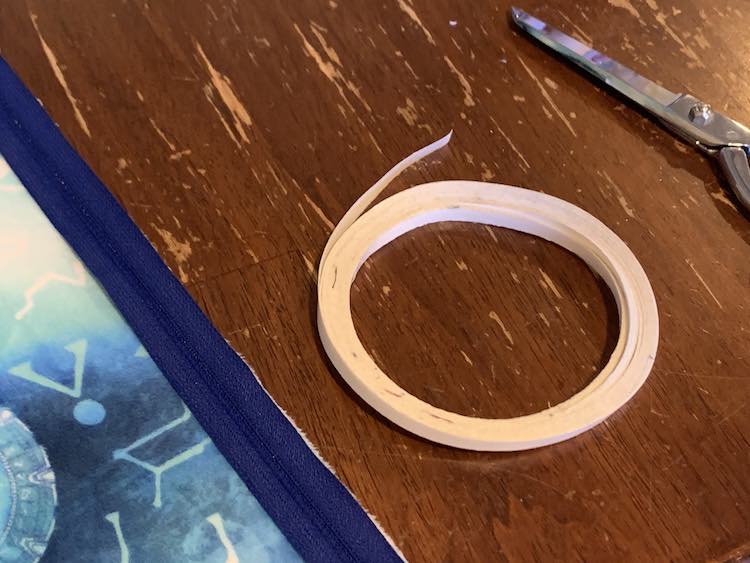
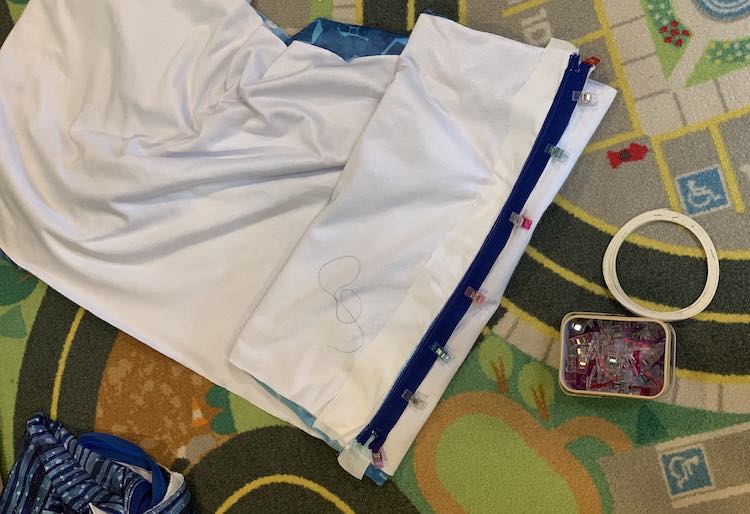
I folded the pillow in half making sure the closed zipper was centered below the middle of the panel. I then used my sewing clips to clip the center of the panel and the zippered areas together before moving out from the center and clipping the rest of the fabric together until I got to the fold at either end. I clipped along the top and bottom of the pillow. Since this zipper was slightly shorter than the fabric I didn’t have to worry about serging over the zipper teeth like the previous pillows so I also didn’t have to sew over the ends of the zipper. Instead, after making sure that the zipper was halfway open, I went straight to serging the top and bottom of the pillow cover closed.
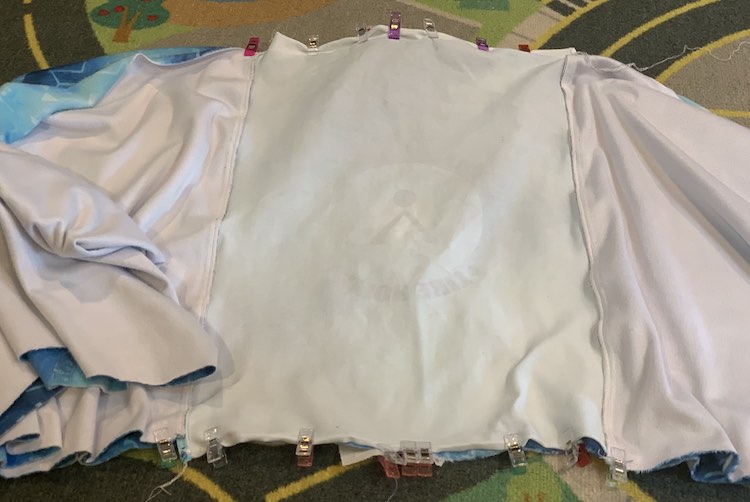
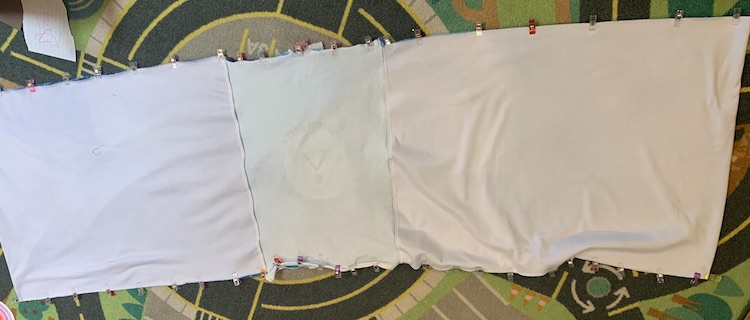
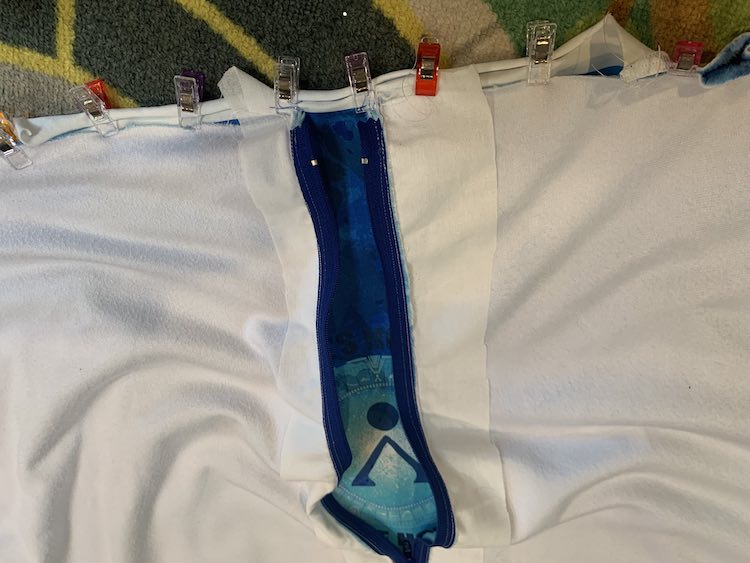
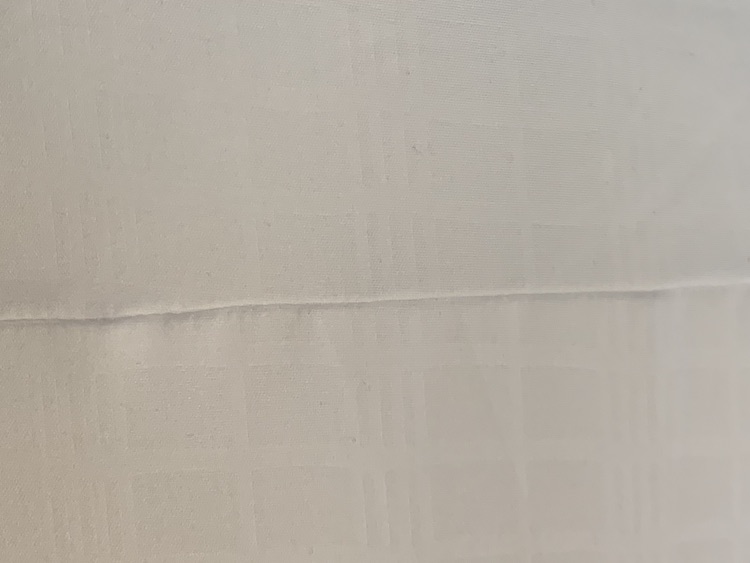
After tying off and trimming the serger thread and turning the pillow right side out I inspected the seam to make sure it was secure and didn’t show any of the panel’s white selvedge. And with that the long pillow cover was completed… although I still needed to put together a custom pillow to fit inside it.
Creating the Custom Pillow Insert
Around the time I started sewing the pillow covers I went to Walmart and came out with three standard pillows for under $3 each. Once I finished sewing the long Stargate pillow I zipped open the back and inserted one of the pillows into it. It was definitely too short but I was really testing the pillows height and it was perfect inside the cover. With the height already good the next issue to solve was the pillow length. I decided to eyeball the pillows by laying out all three, end to end, over the pillow cover and although they were longer than the cover itself I figured they’d be perfect once cut open and sewn back together since I’d be loosing length with the seam allowances. I decided to attach all three pillows together, along the sides, so I’d have one long custom pillow for inside my cover. To do this I took two of the pillows and cut open only one end, the side with the tag so I could easily remove it, resulting in essentially a fabric sack filled with fluffy stuffing. I then took the third pillow and cut off both ends before pulling the stuffing out. I figured the two pillows with one side opened could be the left and right side of the final pillow with the last one becoming the center of it; hence why I removed the stuffing.
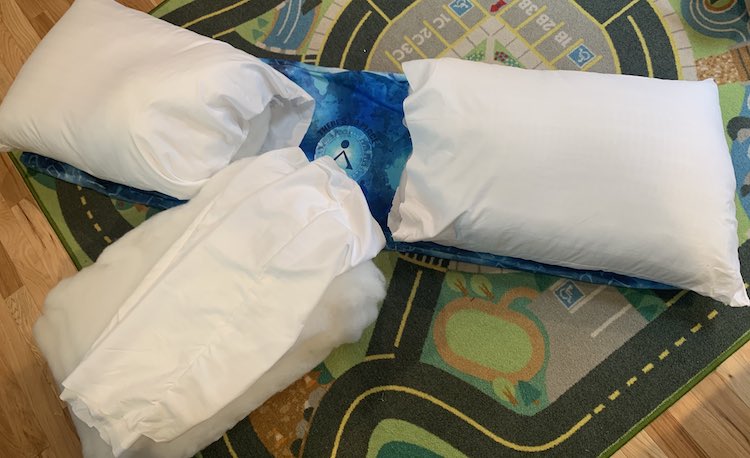
Sewing the center pillow to the first side was simple. I turned the pillow, with both ends opened, inside out and stretched it over the first pillow so they’d be right sides together with the open ends lined up. I then clipped the two open ends together, making sure the top and bottom seam of the pillow lined up, and then serged them together. I then grabbed the other side of the center pillow, the only hole left, and pulled it so the center pillow would come off of the first pillow making, basically, a longer pillow with a hole at one end or, if I turned it with the hole in the top, a sack with stuffing in the lower half. I then stuffed the stuffing from the center pillow back into it creating a pillow twice as long as it was before with the one end open.
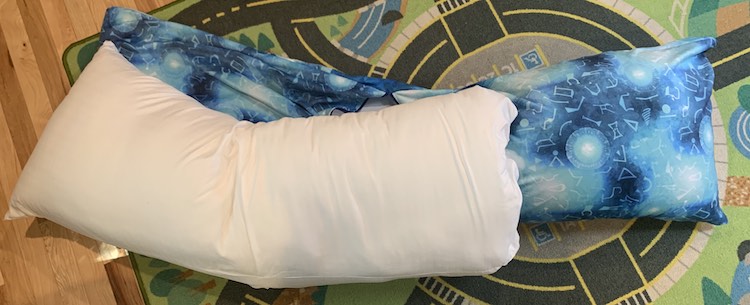
At this point I have a standard pillow opened at one side, a double-long pillow opened at one side, and a pillow cover that’s just a bit shorter than the two pillows if you lay them side-by-side. I knew I wanted to join the two pillows together but wasn’t sure how. Technically I could’ve cut the other end open on the standard unaltered pillow and removed the stuffing so I could follow the same steps as I did above. I chose not to as I didn’t want an obvious side seam, when closing the hole, that might show through the cover plus I was worried the stuffing might end up bunching weirdly if I had to re-stuff the pillow after the fact especially if it was through a smaller opening. By leaving the stuffing in I knew I couldn’t turn anything inside out so these pillows would be harder to join together. By laying out the two pillows end to end overtop of the pillow cover it looked like the pillow might end up being a bit too long so I knew I shouldn’t be worried about loosing too much length in the seam allowance when joining them together. I decided to shove the stuffing into either pillow, so it wouldn’t get in the way, and then serged the edge of both pillows to their ends wouldn’t unravel. I then placed the two pillows beside each other and pushed them together so their open ends overlapped, one pillow inside the other, before lining up the top and bottom seams and used my sewing clips to keep them together. Since the pillow looked like it might be too long for the cover I made sure to overlap the pillow ends by at least an inch resulting in a slightly shorter one. I then hand stitched the two pillows together using matching white thread. I noticed, at times, the thread pulled the pillow case fabric so it ended up gathering along the stitching so I made sure to frequently pull the fabric so it remained un-gathered and every five stitches or so tied a knot so it wouldn’t cinch the fabric in later. The knot also meant that, in the future, if part of my stitching rips I’d only have a small hole to fix rather than the whole thing. Also since I had serged the ends I didn’t have to worry about sections of the pillowcase unraveling.
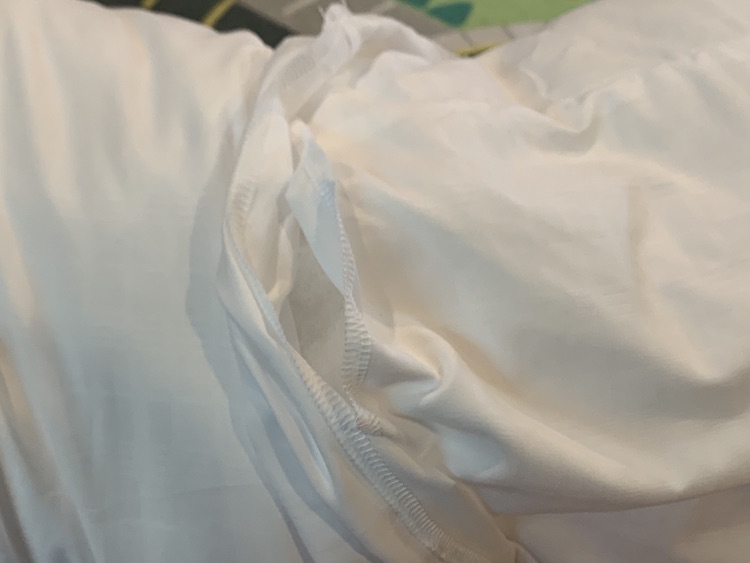
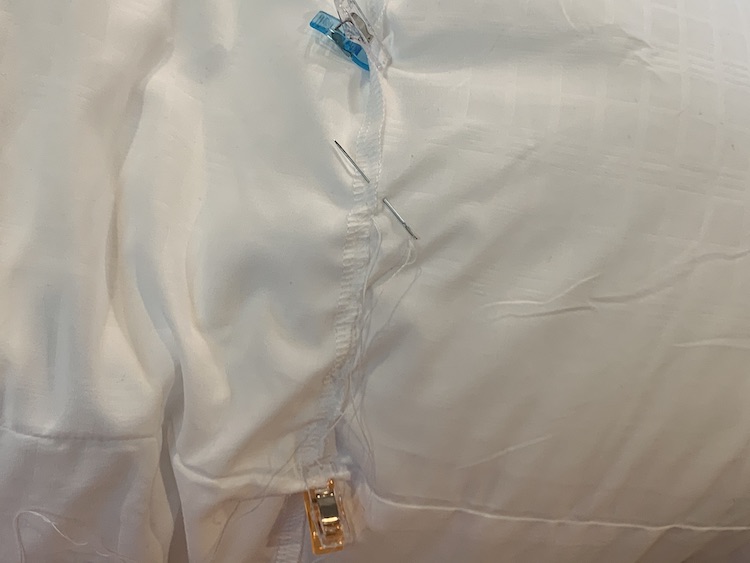
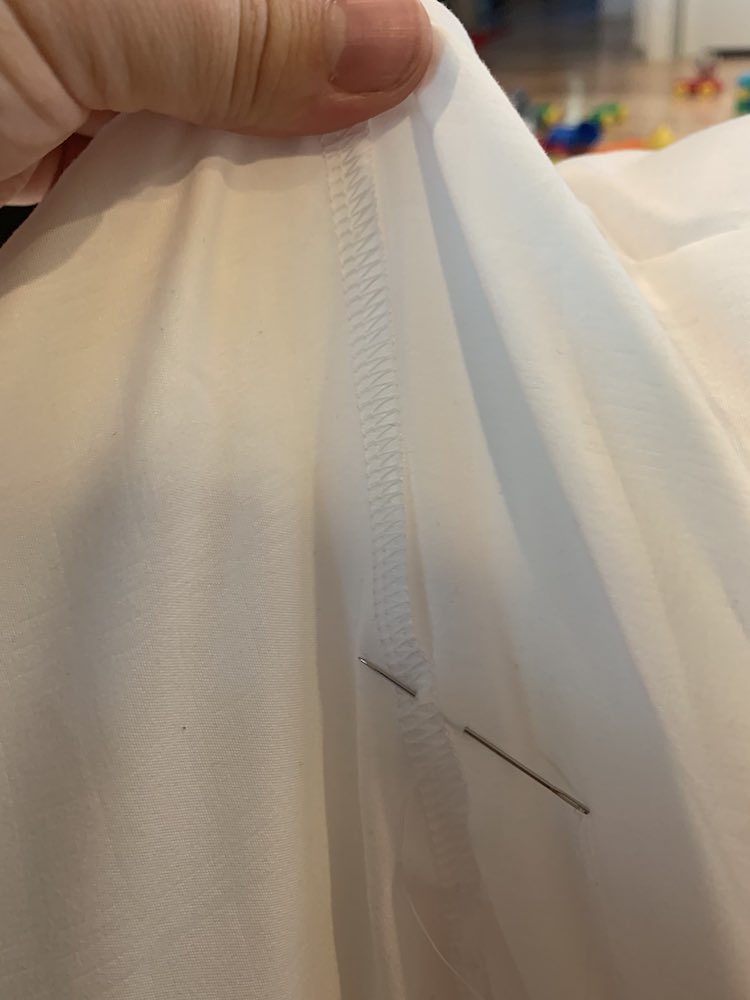
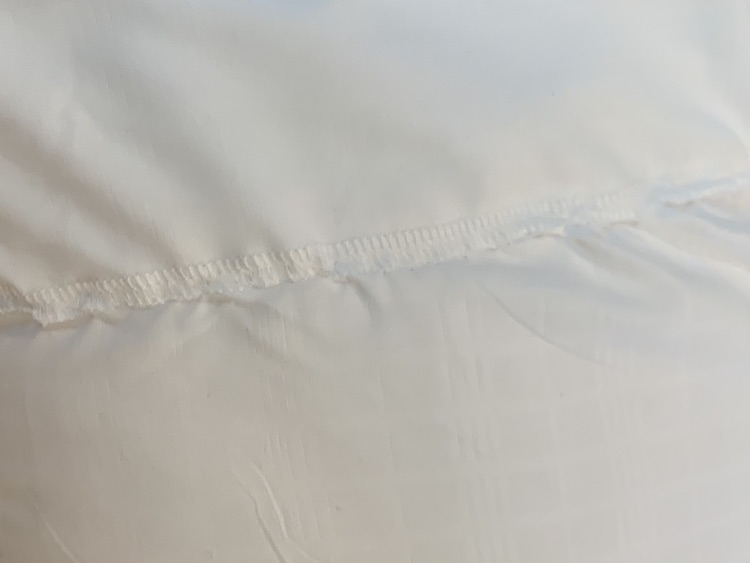
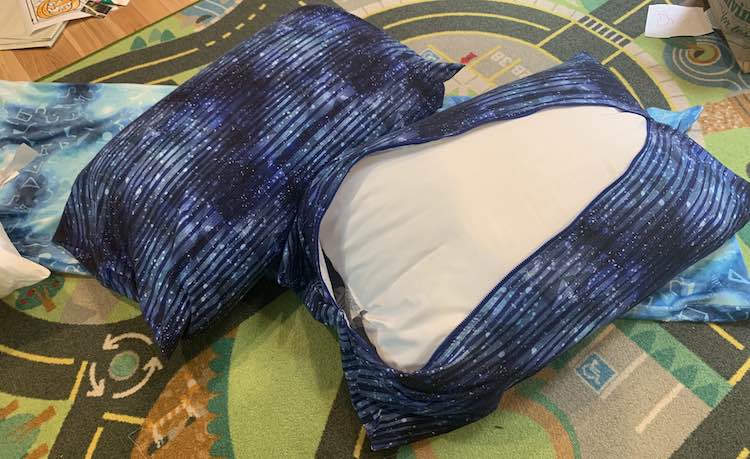
Once I was done hand sewing them together I smacked the pillow a bit to try to distribute the stuffing equally throughout the entire pillow. I then folded the finished pillow in half and started stuffing one end of the pillow into the pillow cover and, after getting about a foot into the cover, started stuffing the other end in. I figured it was better to stuff the two ends in equally and, once I got to the center, unfold the pillow, pushing the last bit in in, and zip it closed. Compared to the first seam the hand sewn one seems ungainly and obvious but inside the cover it’s one giant comfy pillow.

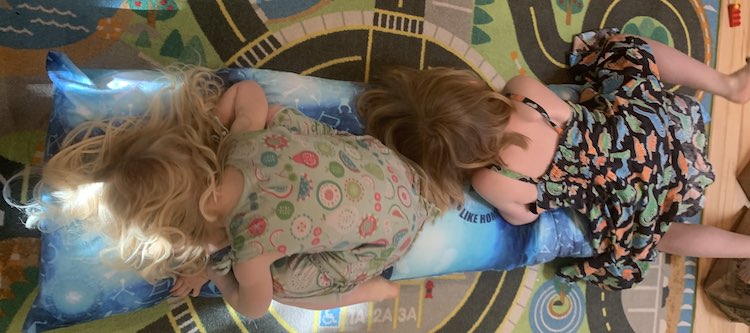
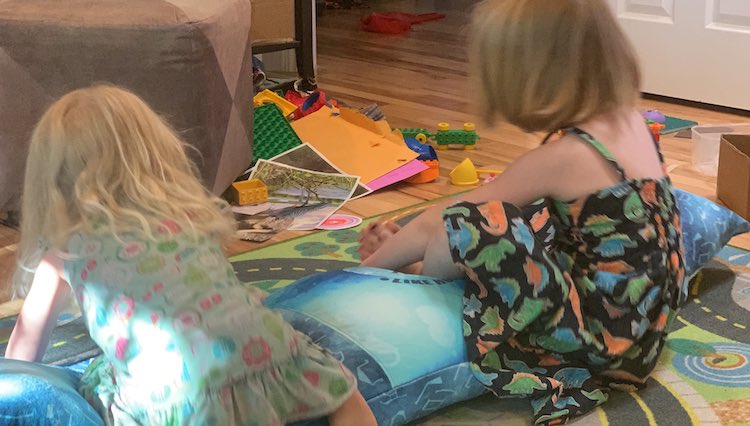
The kids absolutely loved the final pillow and after making them stand back so I could quickly snap the above photo I let the kids hug and play with the pillow before I moved it out of their way.
Zipper Troubleshooting
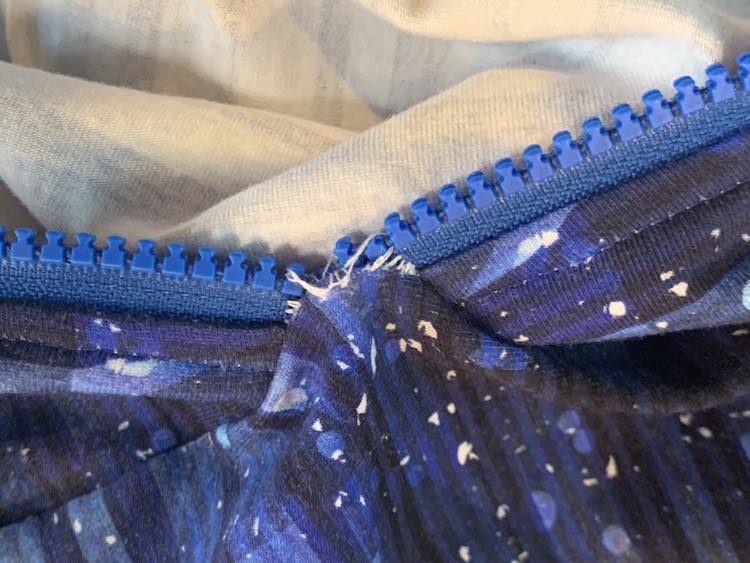
After I finished the matching pillows I quickly realized one of the ends of a zipper was trying to separate from the fabric so when the pillow was right side out you can see the stretching serger stitches. To fix this I turned the pillowcase inside out again and took it back to my sewing machine to stitch over the end of the zipper. I made sure my new stitches lined up with the serger’s inner line of stitches so they’d match and be reinforced. I also made sure to carefully go over the stitches several times. It fixed the zipper end perfectly.
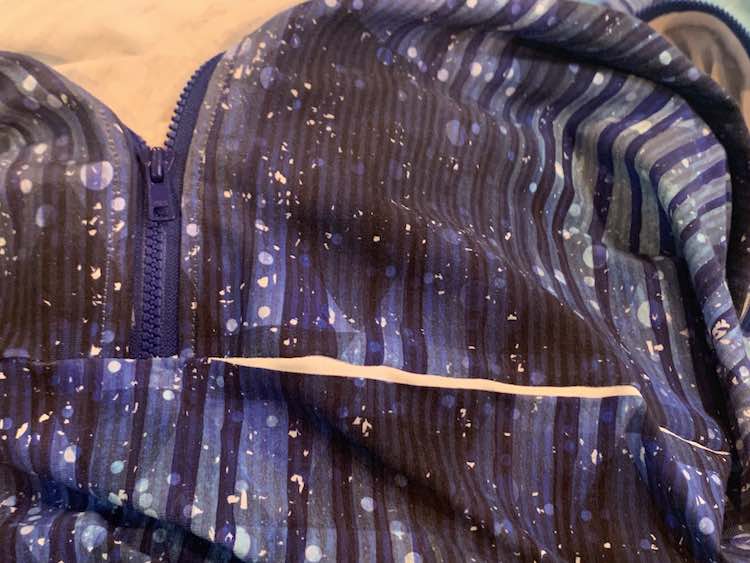
The other issue I noticed was when the white selvage wasn’t completely hidden in the seam allowance so it showed when the pillow cover was turned right side out. Since I wasn’t worried about exact measurements I just turned it wrong side out again, used a clip to mark where the shown selvage line started and ended, and re-serged over that section. After turning it right side out and confirming the selvage was hidden I made sure to unraveled the excess serger tails, tied them, and trimmed off the excess thread.
The Finished Set
And with that the bed set that I didn’t realize I absolutely needed was done. Both fabrics are so comfy and the double plush is so soft. I love sitting on the blanket and am so glad I decided to buy it and sew it up as the end result is amazing. I was never a person that wanted extra pillows on the bed but I’m so glad I have them now.
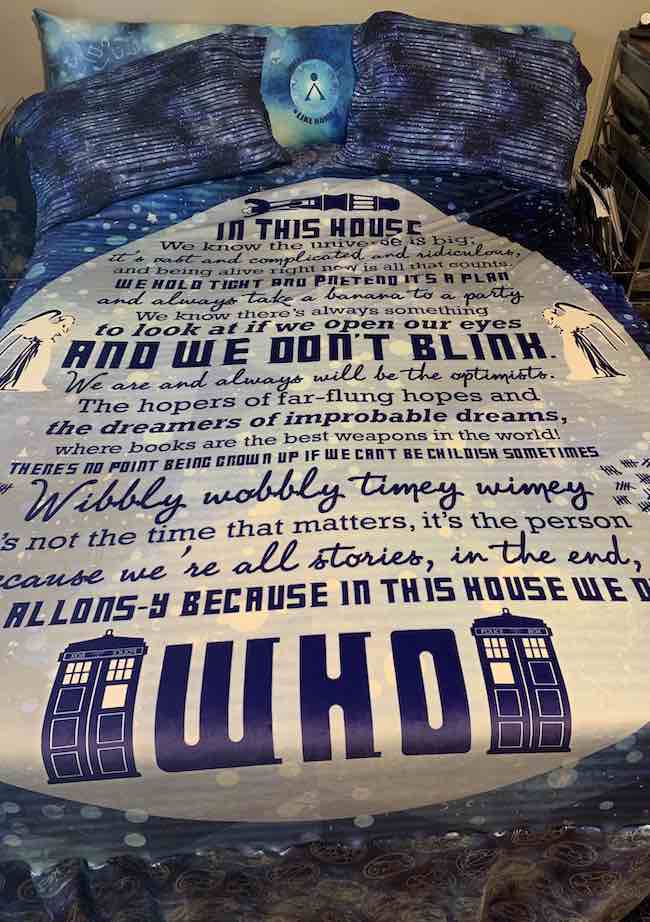
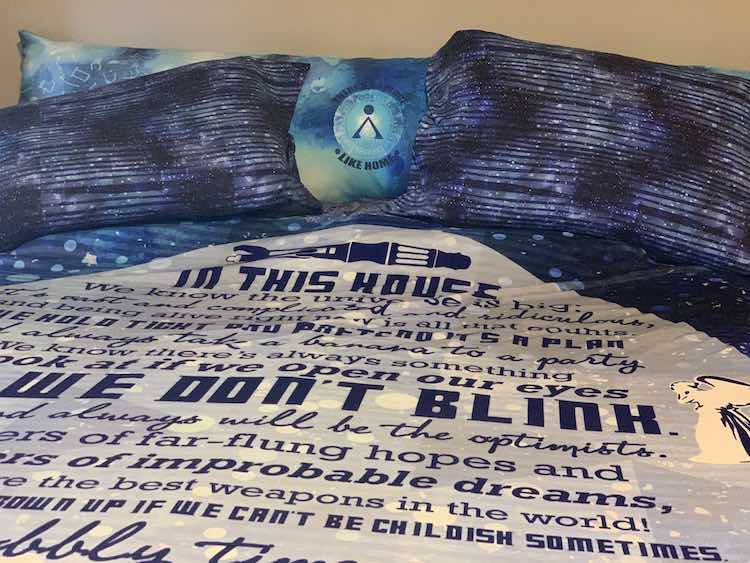
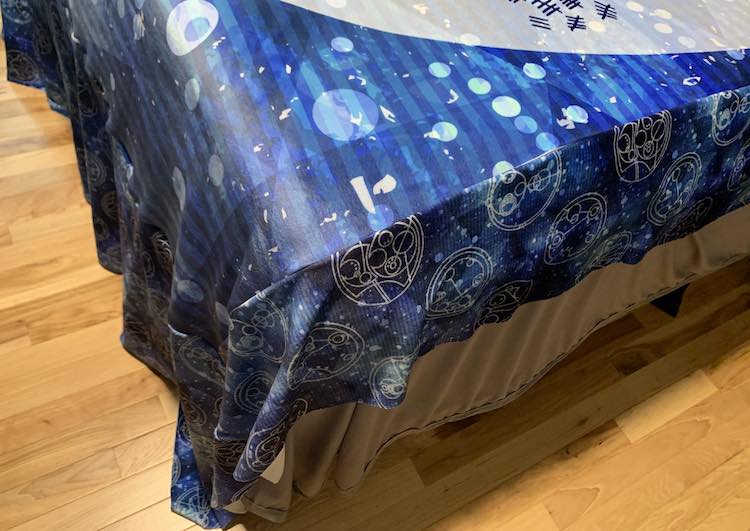
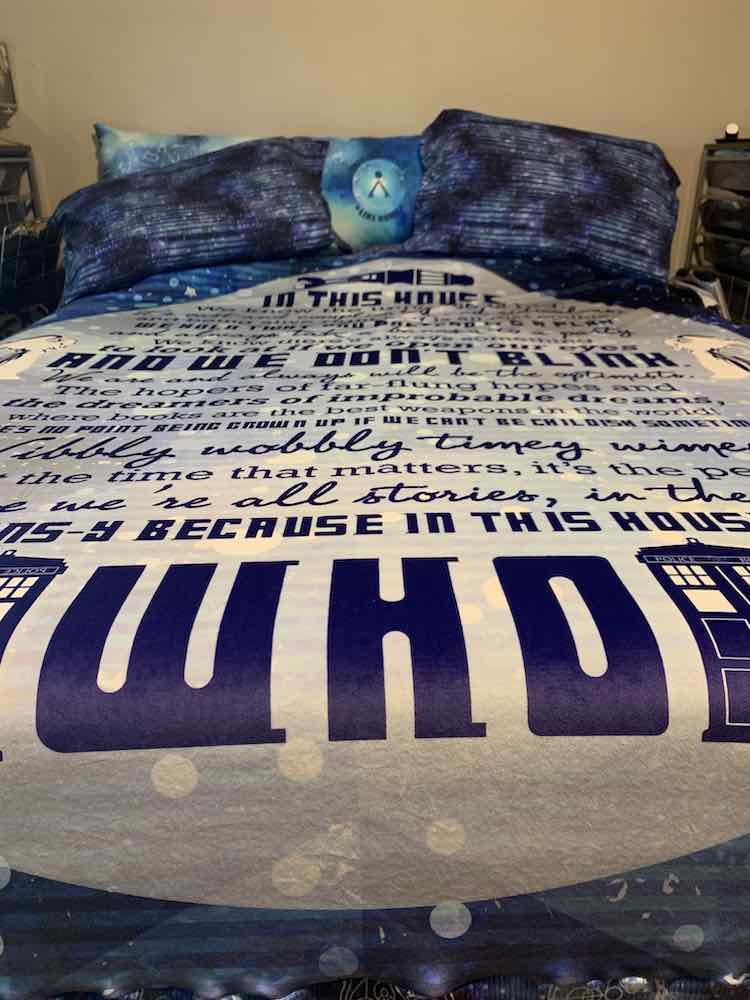
I’m so glad I jumped on the Travelers preorder through Moon Beam Textile Company even though I had to buy more to make it work once the fabric went to retail. If I had to order all of it at once the sticker shock may have made me not jump on it although, looking back, I’m so glad I did. I absolutely love it together on our bed.
Have you made a blanket set before? Where did you get your fabric and what did you do? What do you wish you did differently and what did you learn? I’d love to hear from you in the comments below. Hope you’re having an amazing day!
If you’re interested in getting any of my future blog updates I currently come out with a new one every Wednesday and share them to my Facebook page and Instagram account. If you’d rather you’re more than welcome to join my email list located right under the search bar or underneath this post.

