
The Stovetop Details On My Kids' Play Kitchen
Last week I posted about my homemade kitchen set and this week I want to show you how I decorated the kitchen stovetop with burners, burner covers, sink, and faucet.
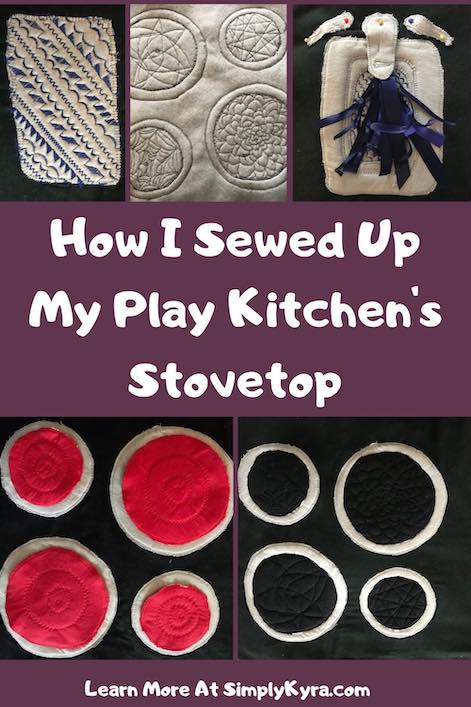
Just a warning the size of the kitchen top was a bit large so it was cumbersome while sewing as the excess material ended up getting bunched up, or later on rolled up, so it fit under in my machine while sewing.
While working on creating the burners and the sink I ended up starting both the burners’ drip trays and the sink at the same time as they were both grey. I then continued to work on the sink before going back to finish the burners and burner covers. I figured instead of jumping around, based on the felt and thread color, it would be easier to go over the burners first, followed by the burner covers, and then finally end with the sink and faucet. I wanted to give you a heads up as there may be the odd view of the sink as I go over the burners but I will explain how I made it afterward.
Burners
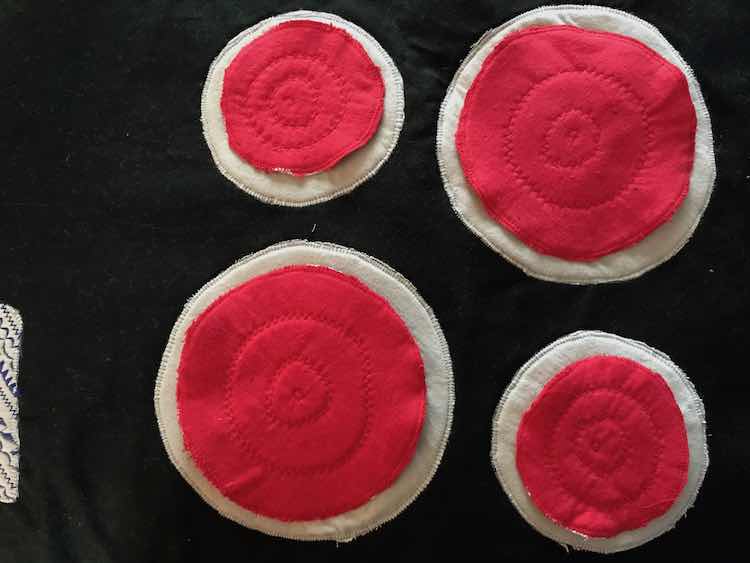
I grew up with an electric stovetop with coil burners and since we were living in an apartment with the same I decided to go with that. I chose to make the burner drip tray grey so started by making four circles out of my grey flannel. To simplify creating these circles I grabbed the lid from my smallest pot for the kids’ large burner drip tray and then grabbed one of the kids’ pots for their smaller burner drip tray. I chose the pot for the smaller tray as I wanted to be sure all the burners would work for all of their pots. I laid the item out on the flannel and traced around it with a disappearing ink pen before moving the item and doing it again. I did the same with the fusible fleece as I wanted to add it to the flannel for the burner trays so they would have more height and puff up from the black stove base. Once the circles were traced and cut I used my iron to attach the fusible fleece to the burner tray. Since I had all my cutting stuff out I went on to find something to use for slightly smaller circles as I wanted the black burner tops to be small enough to show the drip tray surrounding it. Additionally, the grey drip tray encircling the black burner would allow it to stand out from the black stove base surrounding it. Once I found those smaller items I used them to cut out four black circles (two small and two large), eight red circles (four small and four large), and 12 circles out of fusible fleece (6 small and 6 large). I cut out a matching circle out of fusible fleece for each flannel circle cut out as I wanted the black burners and red burner covers to be puffy so they appear more three dimensional than two. I then attached the fusible fleece to each circle so I ended up with two small black circles, two large black circles, four small red circles, and four large red circles. I wanted the red burner covers to be removable but still available to cover up the black burners to signify that that burner was turned on. For that to happen I knew I needed the burner cover to be double-sided hence the need for twice as many red circles than black.
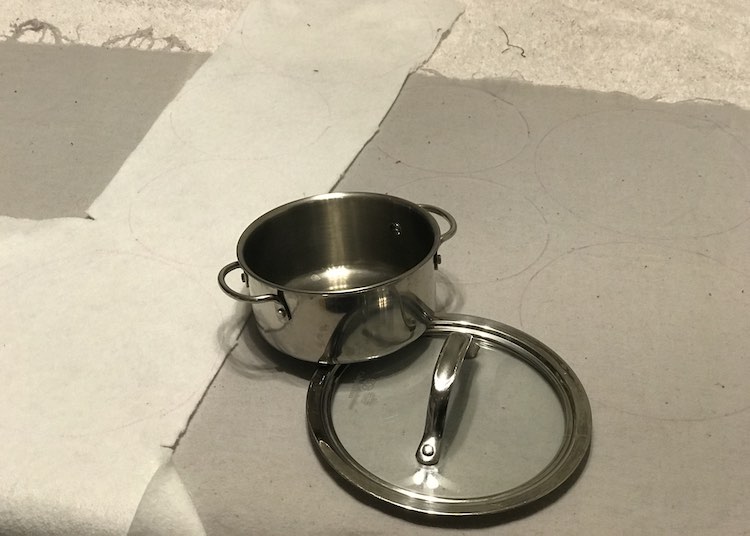
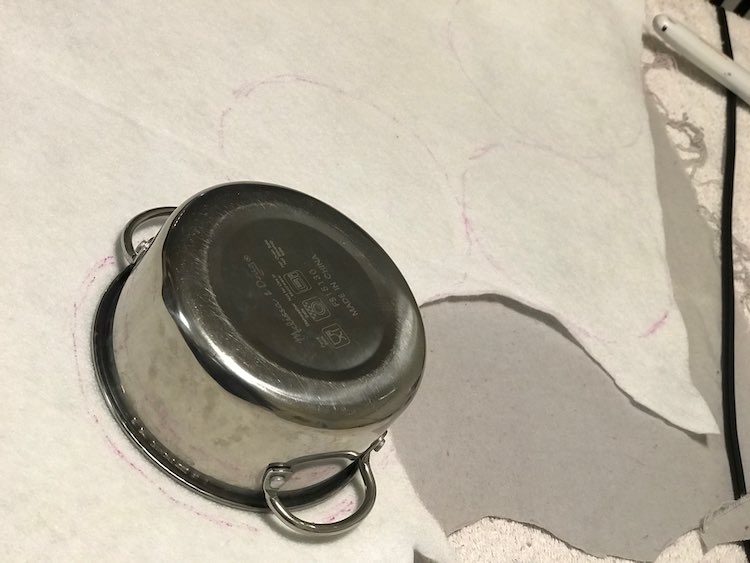
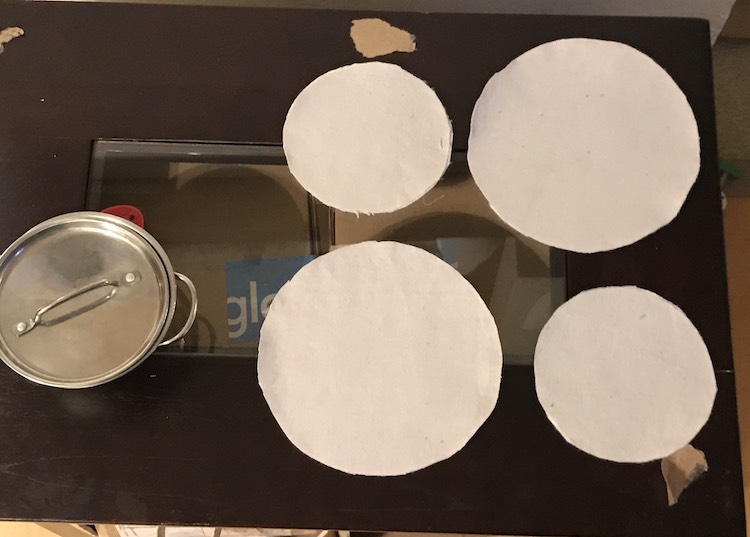
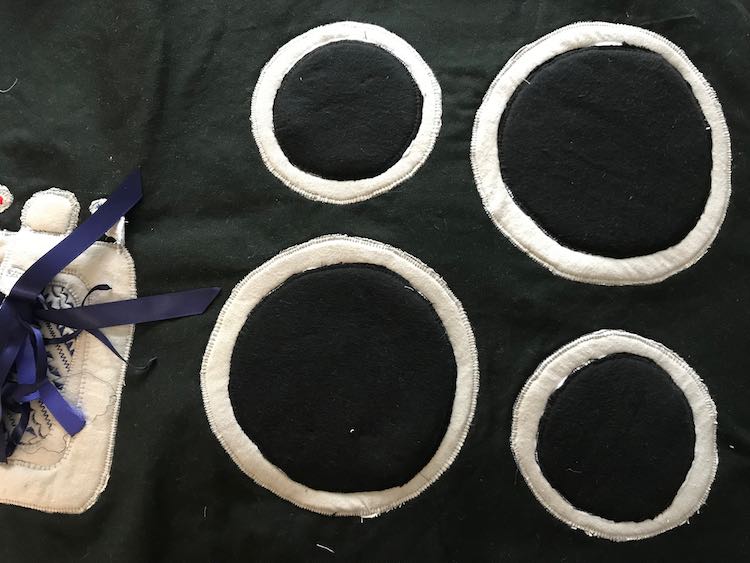
At this point I had already cut out the pieces for the kitchen sink so, after grabbing the base, I laid out the sink and used that to determine where I wanted the four drip trays. Once I was happy with how it was laid out I carefully pinned the drip trays and the base of the kitchen sink to the surface so they wouldn’t move. I then took the stovetop base to my sewing machine and went around each pinned item with a blanket stitch being careful to stay close to the edge without crossing into the black too much. I used grey thread to help it blend into the flannel and not pop too much.
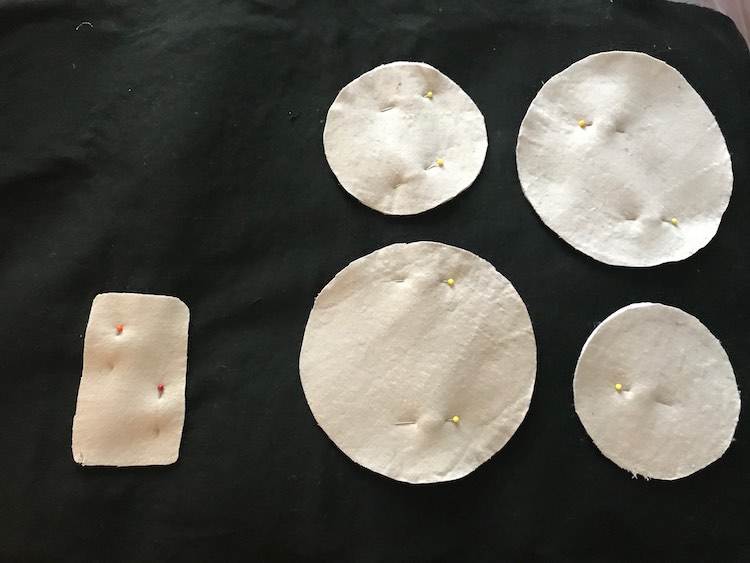
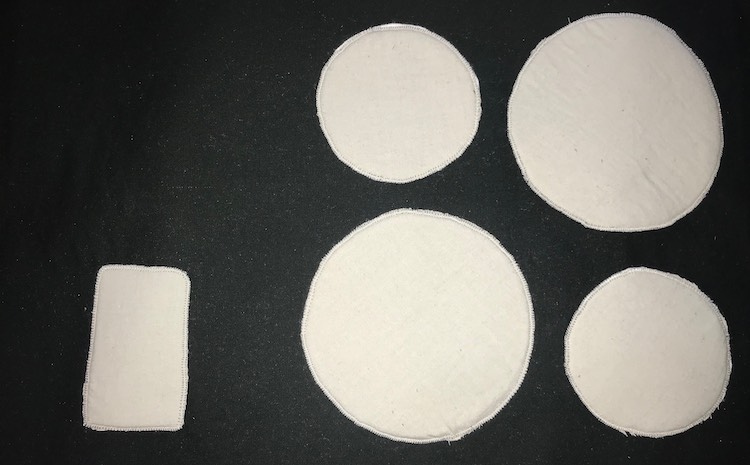
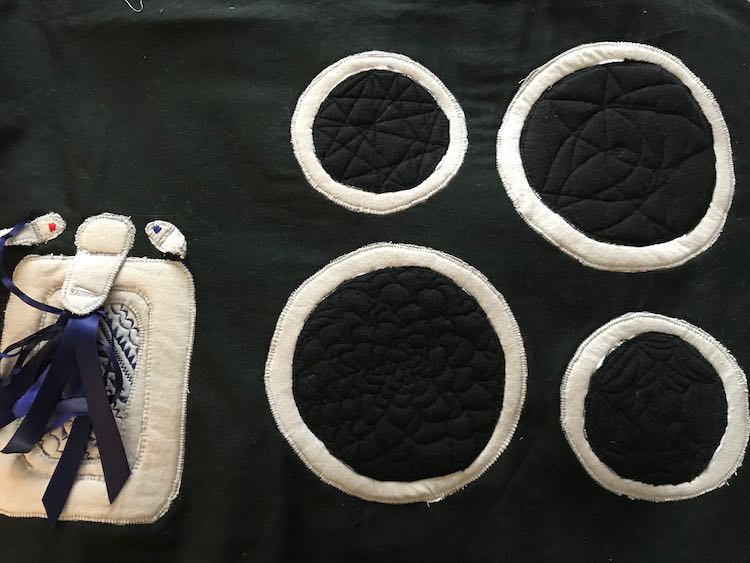
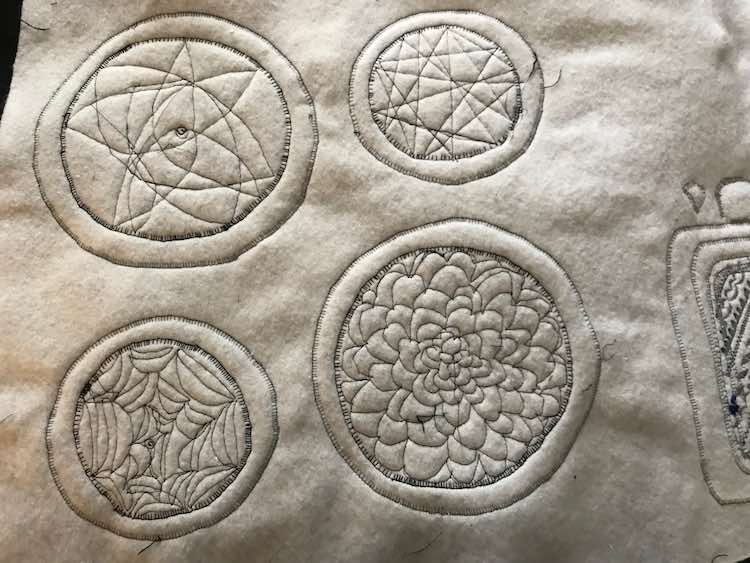
At this point I went on to work on the sink, since I had grey thread already loaded in my sewing machine, but I’ll continue telling you about the burners now so the post doesn’t jump around. I knew I wanted the burners themselves to be black with the grey drip tray encircling them which is why I cut the grey circles out to be larger than the black. With the grey drip trays sewn down I grabbed my four black burners and placed each one directly in the center of it’s matching drip tray and pinned it into place. After switching my sewing machine to black thread I used a blanket stitch to carefully stitch around each one. I loved how the fusible fleece under the grey drip tray and the fusible fleece under the black burner causes the burner to puff up but I knew I wanted something more for the burners. I considered sewing concentric circles or a spiral to emulate the burner coils but then decided on something else. A while before this I came across free motion quilting and had purchased a free motion presser foot and curved rulers but hadn’t gotten a chance to try them yet. The burners screamed to be decorated with free motion lines. I chose to stick with the black thread so the fusible fleece would make it pop and any mistakes wouldn’t be as obvious before attempting four different designs, one for each burner, and I had a blast. At this time I had jotted down that I used a ‘six inch celtic knot’ ruler but I’m unsure if I used it on all four burners or just one… plus I was playing around so I’m not sure exactly how I’d be able to duplicate them.
Burner Covers
With the burners done the next step was the burner covers. I wanted to make these standalone pieces so the person playing with the kitchen set could signal if the burner was on or off my covering up the burner with the cover, making it red and hot, or leaving the burner unadorned so it’s black and cold. Since this piece wasn’t being sewn down it needed to be double-sided which is why I cut out twice as many red flannel circles as the black circles and why I made them all the same size. This way the burner cover matches the size of the burner so the burner is hidden yet the drip tray isn’t. I, later, sew the burner cover together wrong sides together so if you’d rather sew them right sides together and turn right side out afterwards you’ll want to add the seam allowance to the red circles.
Earlier I added fusible fleece to each circle as I wanted the burner cover to look more three dimensional than two. I knew going in that if I sewed the two burner covers together with the right sides together it may be too hard to turn right side out since they were both attached to fusible fleece. Instead, I chose to attach the two circles together, wrong sides together, with some thin double-sided interfacing to keep them together before sewing them. Looking back this wasn’t required and I could’ve gotten away with just temporarily clipping them together. I then switched my sewing machine’s thread to red so it would blend into the flannel and sewed alongside the edge of each pair of circles sewing them together. I considered using free motion quilting but, instead, I chose to simplify the process and made three simple concentric circles on each burner cover.
Kitchen Sink
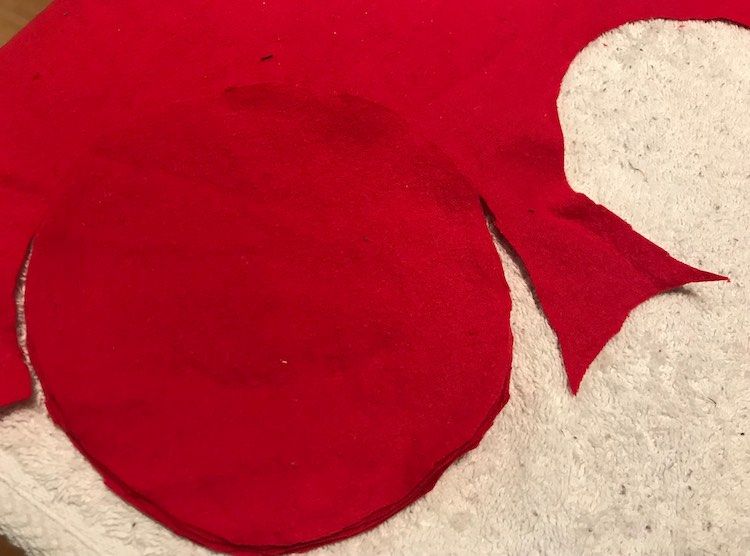
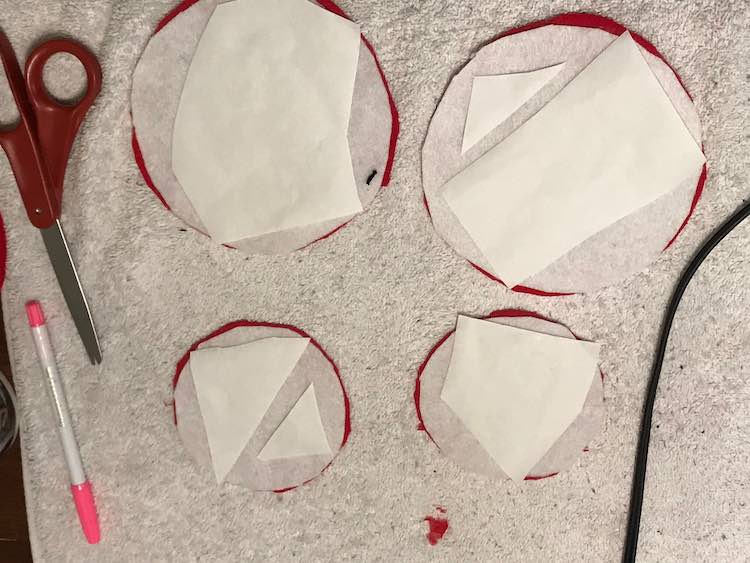
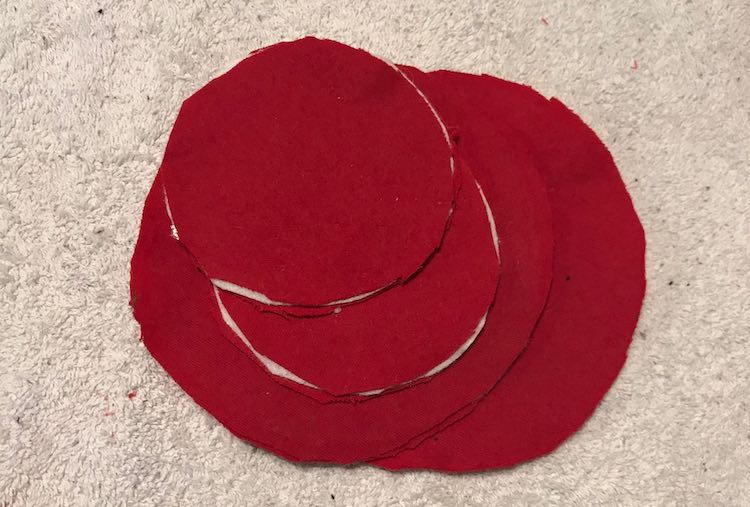
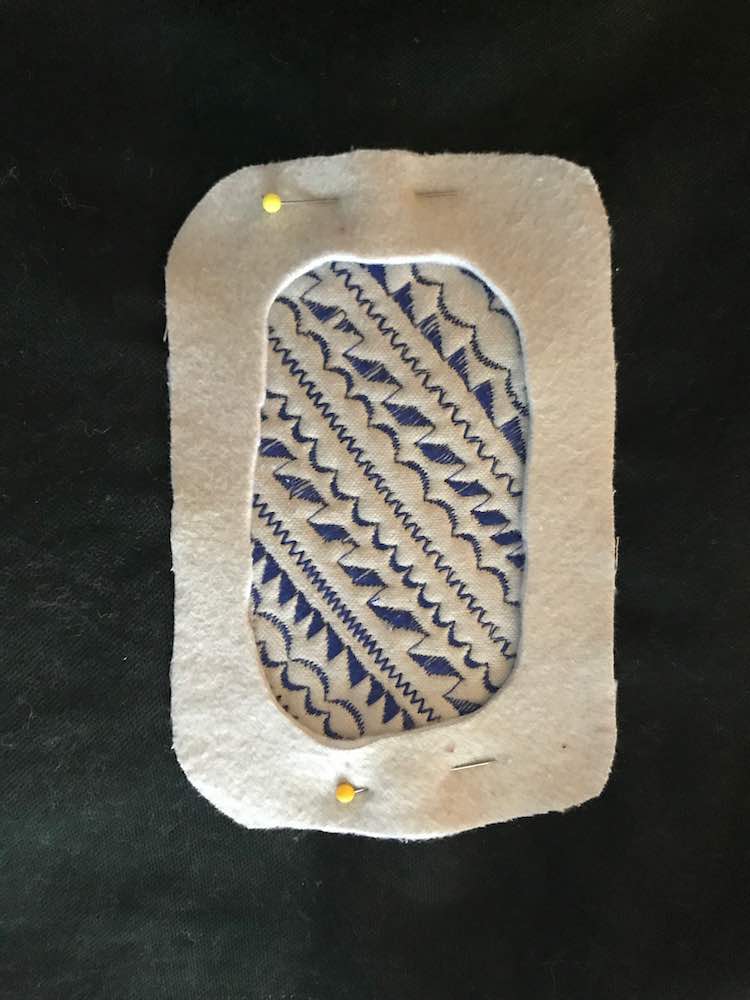
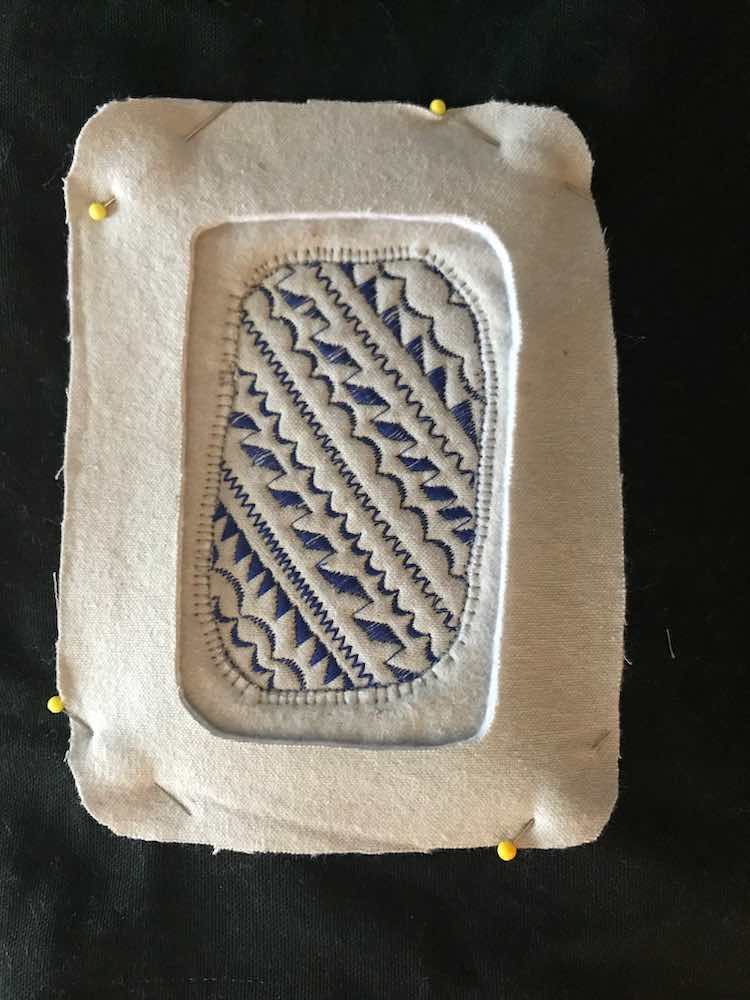
Since the kitchen sink was the same color as the drip trays I ended up cutting out the flannel at the same time and continued working on the sink, and finished it, before working on the rest of the burners. Going in I knew I wanted the sink to appear bowl-like so I decided to make it happen by adding stacked layers around the outside of the sink. I started by cutting out two rectangles, one slightly bigger than the other, with beveled corners. I then cut the center out of each, again curving the corners, so I ended up with two solid rectangles and two rectangular outlines. I set aside the smallest rectangle, as I didn’t need it, and created my sink by starting with the larger solid rectangle and stacking the other two outlined rectangles overtop.
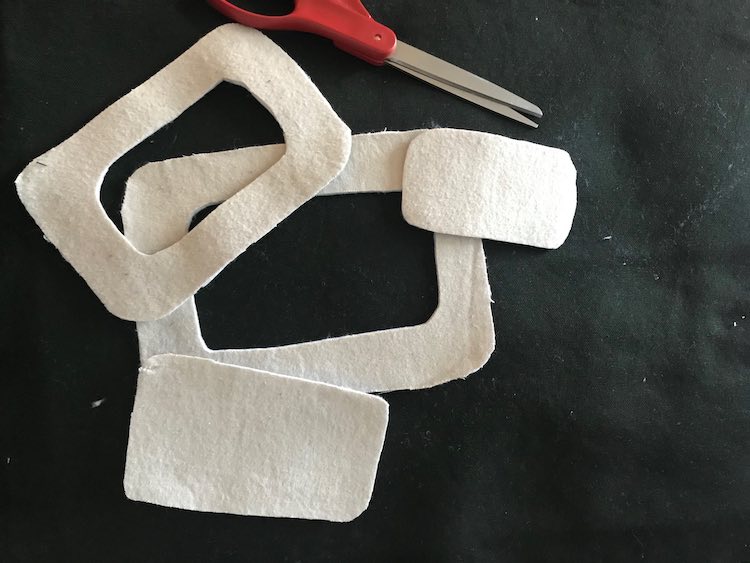
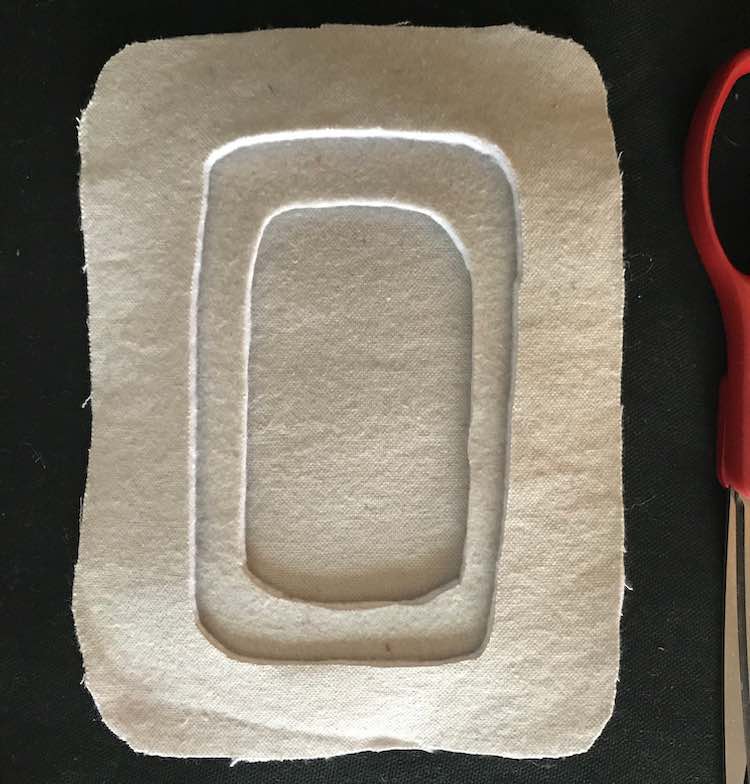
I knew I needed to start the sink by sewing the solid rectangle onto the stovetop base, making the sink bottom, but first I laid out all of the layers alongside the burner drip trays to make sure the layout worked. Once I liked how it looked I removed the two rectangular outlines and pinned down the solid rectangular piece.
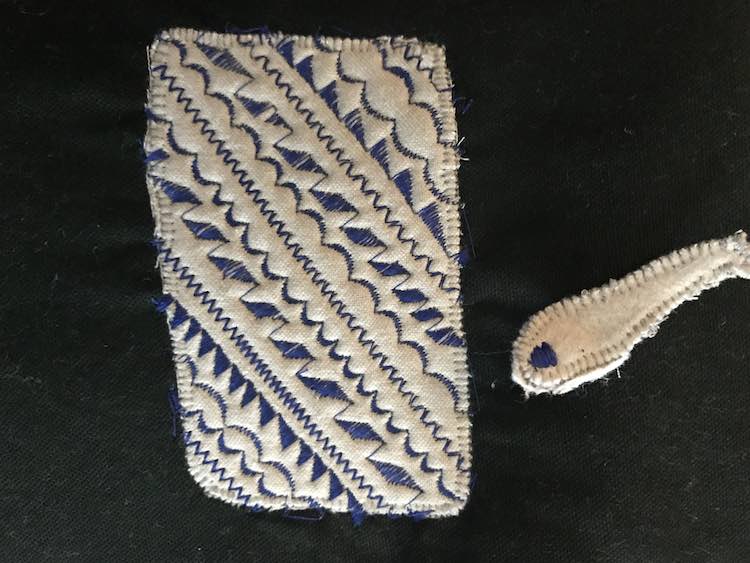
At this point I started thinking about the faucet. I knew I wanted the faucet’s knobs to feel moveable without the complication of them actually being moved as I knew that the more moving parts the stovetop included the higher chance of it breaking. I decided to make the faucet handles double-sided, like the burner covers, and attach them at only one end so the kids could move the handle tips up and down easily and maybe, even, slightly side to side. I wanted them to feel like they could actually turn the water flow on or off so this seemed like the best bet. Again, like the burner covers, I used two layers of flannel, cut to size, with fusible fleece sandwiched between it. Before I sewed around the outside I realized I wanted the end that connected to the stovetop base to be thicker so the faucet handles are higher up. I quickly cut out a couple more half circles and attached it to that end, with double-sided interfacing, before sewing around the entire handle, including that end, keeping it secure. I left the side that wasn’t touching the edge unsewn, for now, since it will be sewn down when I connect the handle to the base. I went on to do this a second time so I’d have two handles. After they were both done I realized the handle needed to indicate whether it correlates to cold or hot water so I changed the thread in my sewing machine and stitched back and forth on the one handle with red thread and then marked the other handle the same way with blue thread. I didn’t take any photos during this process though I do have a picture of one of the handles in the next photo below.
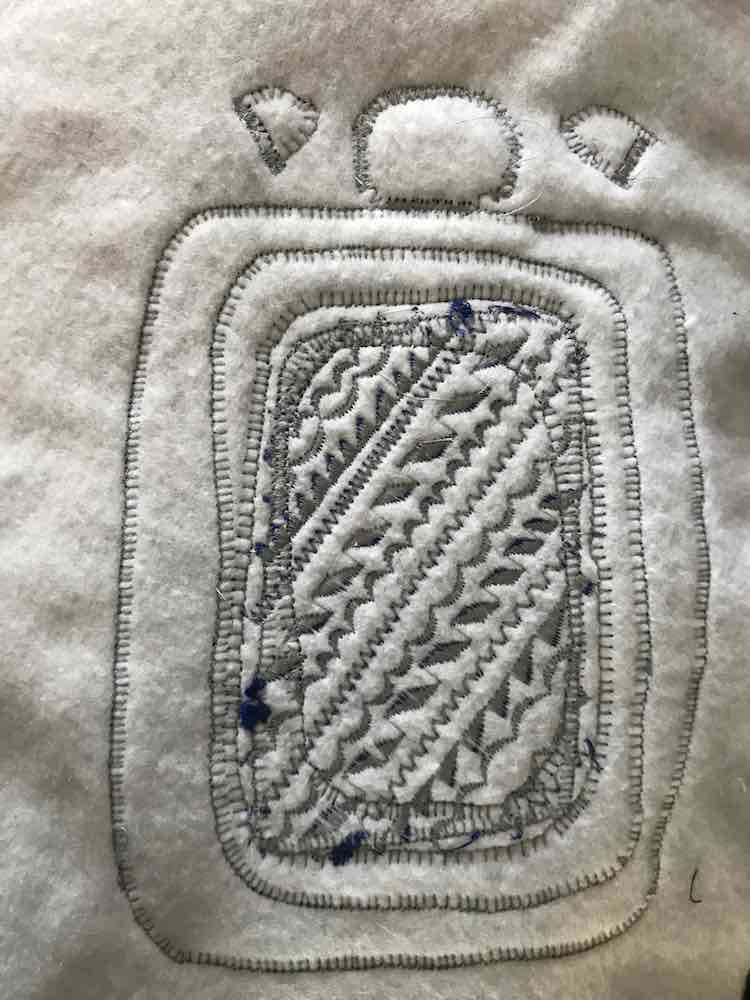
Once the sink base was sewn on I realized I wanted it to appear as if there was water sitting at the bottom of the sink. I figured the easiest way would be to switch to blue thread but I also wanted it more decorative than filling the whole thing up willy nilly with stitches. I chose a double-sided decorative stitch and, starting at the one corner, angled the fabric in my machine to sew the decorative stitches across the sink base until I reached the other corner so it was diagonally slashing the sink in half creating two triangular sections. Using this first line of stitching as my center line I kept choosing new decorative stitches and worked my way from that first line to the corner until there was no more room. I then moved to the other side of the center line and, while working to the last corner, mirrored the first half. I hoped the blue threads would indicate water in the sink whether the person playing wants it to be a skim of water sitting at the bottom of the sink or be a sink full of soapy water to wash dishes in. Either way it’s a starting point that makes it completely up to them. I also loved, since the grey sink bottom was interfaced, the 3D aspect added to the bottom of the sink. Everywhere I sewed created a dip in the sink base and the interface bubbled up between the stitching creating a neat effect. While sewing the lines I wasn’t too concerned if I happened to sew a bit past the sink edge since I still had to add the rectangular outlines to grade the edge of the sink out which would cover up any minor mistakes.
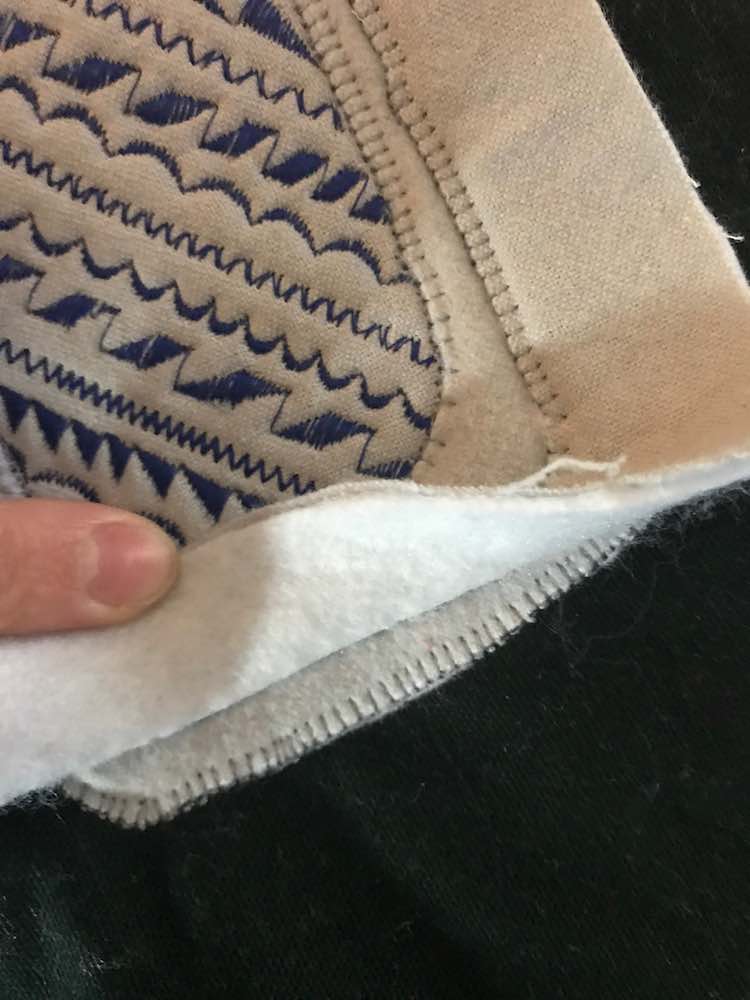
Once the sink base was finished I added the smaller rectangular outline, centered, on top of it and pinned it in place before sewing around the inner and outer edge. Technically, I didn’t have to sew around the outer edge as sewing down the next outline will cover up the edge. Once the smaller one was secured I grabbed the next larger rectangular outline and centered it above the first before pinning it in place. Again, I used a blanket stitch to sew the inner edge before pausing to consider adding more rectangular outlines to the sink to make it taller. I ended up deciding to stop at the two layers so I used the blanket stitch to sew around the outside of the top rectangle which hid the edge of the lower rectangle from view.
Faucet
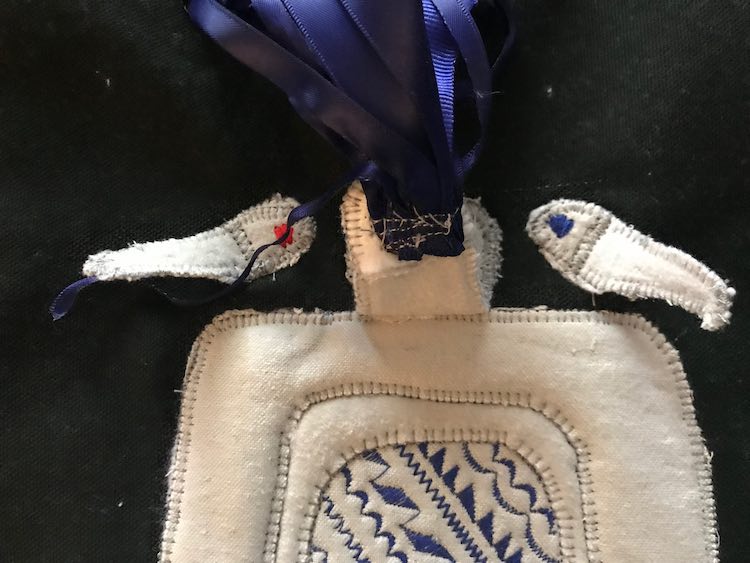
Like the faucet handles mentioned above, in the sink section, I wanted the faucet spout to be double-sided. I, again, cut two pieces of grey flannel, about the size and shape of a spout, and attached fusible fleece to both pieces. I wanted the base and tip of the faucet to have extra depth so I added a small circle of extra fusible fleece to the tip of the faucet and a larger piece of flannel and fusible fleece at the base. There’s an image further below that will show the underside of the faucet allowing you to see what I did. Once I had all the pieces cut and interfaced I stacked them up, used double-sided interfacing to hold them in place, and sewed along the outside to hold them together. With the faucet and handles created I realized that I wanted to make the water in the sink more obvious so I found some blue ribbon, leftover from our wedding invitations years ago, to replace a flow of water from the faucet spout. I had two different ribbon widths and cut several strips, of similar length, from them. I didn’t want the ribbons to unravel with play so I took my lighter and carefully melted either end of each cut ribbon to fuse the end in place. I knew it would be easiest to sew them to the faucet spout if the ribbon were all in one place so I stacked all the ribbon and, so they wouldn’t shift later, sewed through the middle of them. I then centered the stack under the spout and sewed through the ribbons again so they’d be attached to the faucet spout.
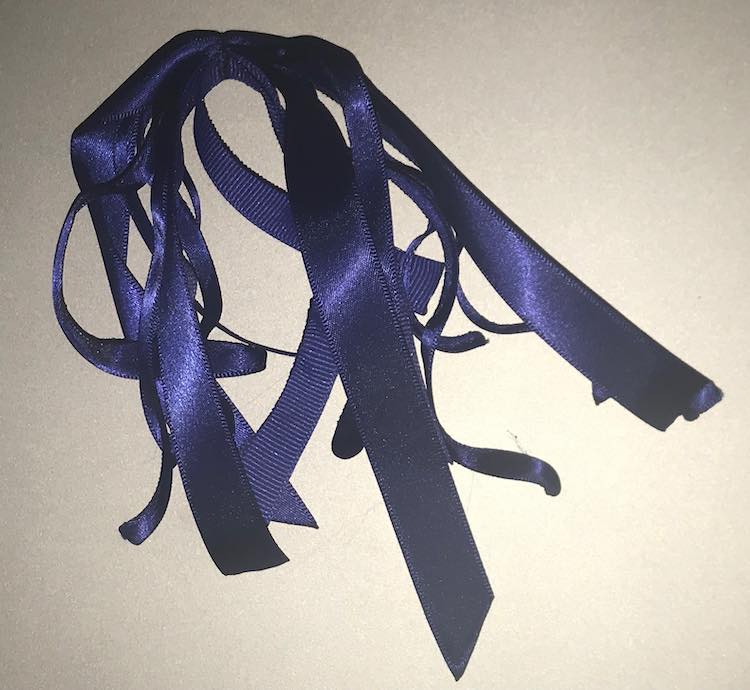
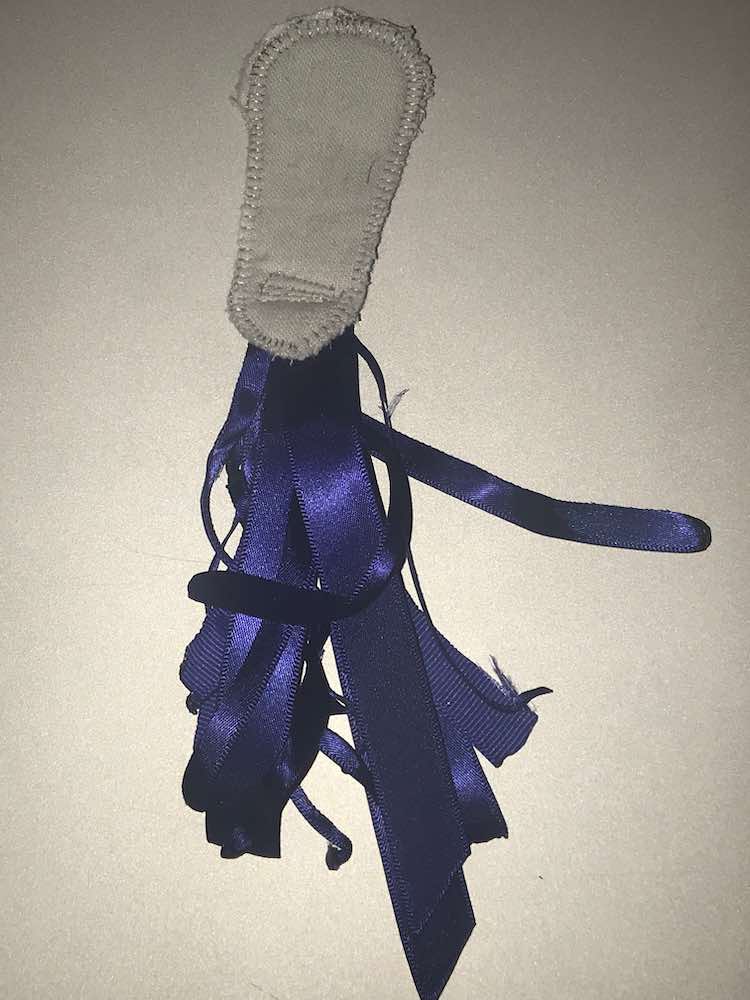
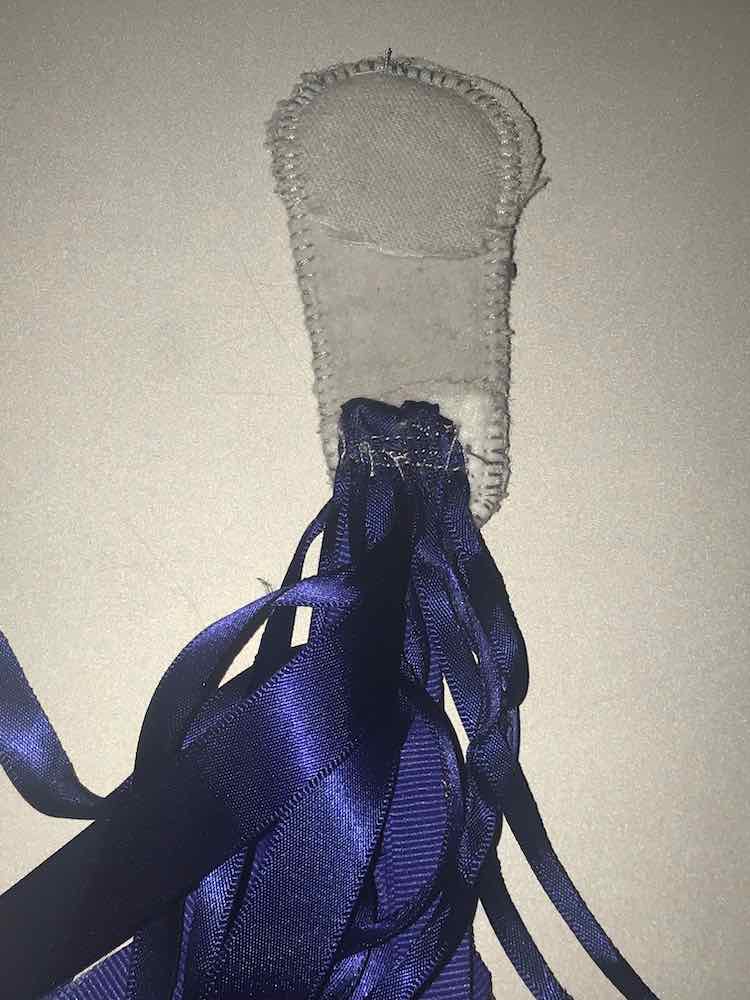
With the faucet and handles ready I laid them out above the sink on the main fabric. I wanted the handles to be angled towards the sink so they’d be easier to reach with little hands. Once I was happy with their layout I pinned them in place. Since I wanted them to seem moveable I only sewed them at the one end so the end of the handles and tip of the spout could be lifted and moved slightly. .
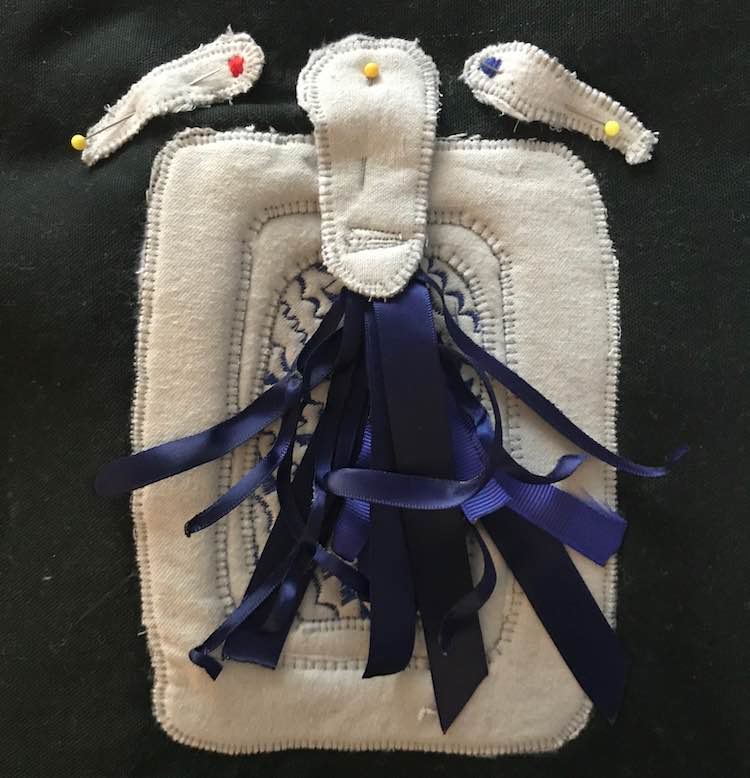
And with that the stovetop design was done. All that was left to do was finish the stovetop base so it could be attached to the top of the kitchen set, a repurposed end table, using bias tape and snaps. If you’d love to learn more about how I made this base and how I finished it you can check out the previous post where I introduced this idea to you.
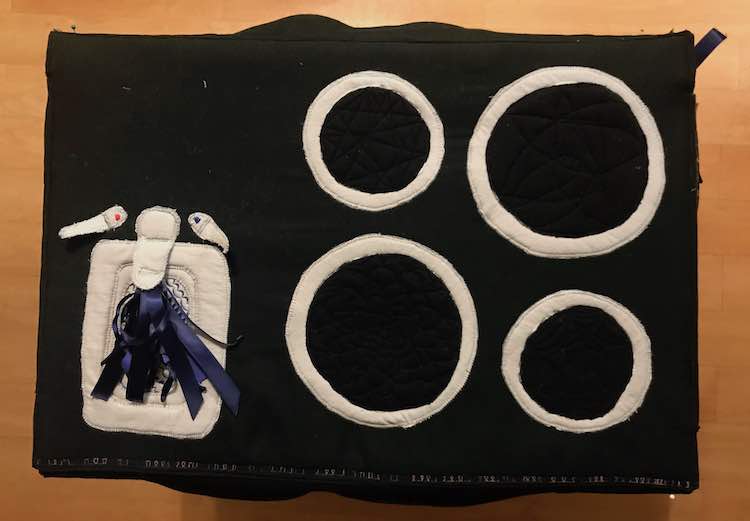
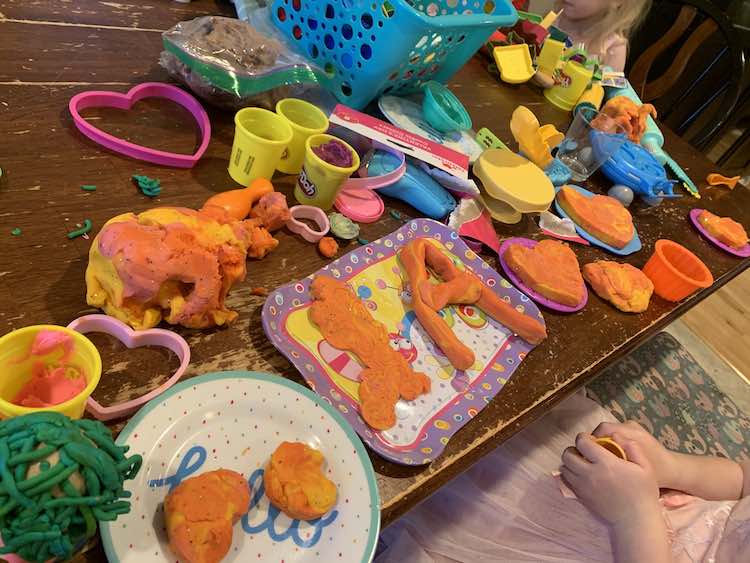
I absolutely love how the stovetop and sink came together for our play kitchen. I love how excited the kids were to use it… at first. Over time the kids stopped using the kitchen set until after we visited a friend’s house where the kids took their playdough creations to their kitchen set to bake them. We came home and the kids played for hours baking up a storm. When we moved last year the kitchen set was an amazing resource to keep them busy since we discovered the playdough play. I made sure to keep the kitchen set available along with playdough and a smaller assortment of pots, plates, and playdough toys. The kids constantly used the playdough and kitchen set making many creations while the rest of the apartment was packed up. After we finished moving and their toys were unpacked the kitchen set was, once again, slowly forgotten… yet the odd time when playdough gets pulled out again, like right now while I edited this post, the kitchen set is remembered and their cookies are baked.
I’d love to hear about your play kitchen and what you made for it. How do you keep them interested in playing or do they naturally just love the kitchen set? Did you find a simple way to change it up? Feel free to share these in the comments below, on my Facebook page, or through Instagram. I hope you have a great day!
∞ If you want to learn more about how I created the stovetop base and finished it off you can check out part one from last week: Play Kitchen ∞
Did this save you time?

