

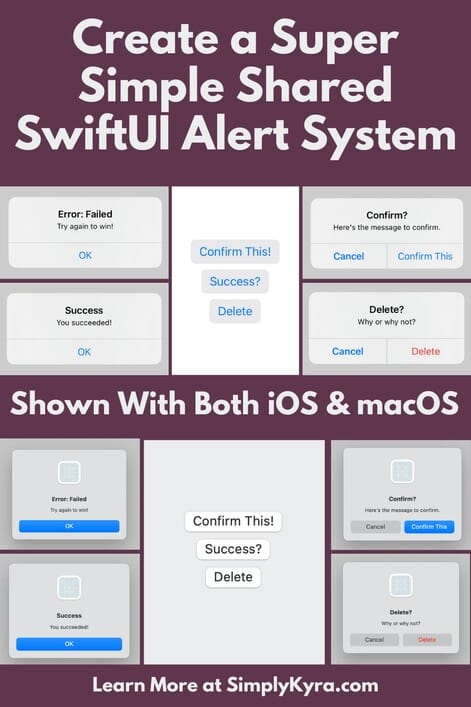
Create a Super Simple Shared SwiftUI Alert System

While creating my current multi-platform app I've noticed my alert system changes with new bugs or requirements put on the system. With the last update I realized I should share my current system with you in case you're having similar issues.
Previous Way
Over time the alert system I've created in my multi-platform app had become more and more complicated with updates to its requirements and working around minor issues I'd noticed. I started with a simple success or error message, then realized I needed to confirm a user choice, then confirm a deletion, then realized a single view needed two separate confirmations! I also set this up with a single alert on each view which sometimes conflicted with other alerts on other views so I had to move around the alert modifier hoping it would work this time and not conflict with something else.
Here, at the peak, I was happy to have created a shared AlertIdentifier so each view had a bit less code. The shared alert struct was:
/// Allows us to use one type of alert and treat it as we'd like
public struct AlertIdentifier: Identifiable {
    public var id: Choice
    public var alertTitle: String
    public var alertMessage: String
    public var alertButton: String?

    public init(id: Choice, alertTitle: String, alertMessage: String, alertButton: String? = nil) {
        self.id = id
        self.alertTitle = alertTitle
        self.alertMessage = alertMessage
        self.alertButton = alertButton
    }

    public enum Choice {
        case success // Success!
        case error // Error in process
        case confirmation // Confirm something before proceeding
        case confirmationSecondary // Confirm another thing before proceeding
        case delete // Delete something
    }
}
Then on each view that needed an alert I'd create an optional instance of the AlertIdentifier using: @State var showingAlert:AlertIdentifier?. With that created I'd next add an alert modifier that would appear when that optional showingAlert element was set. Here I needed to make sure each needed alert type was set along with, as I normally wasn't using all of them, a default condition with a fatalError mentioning the file I was in so I could go fix it in case I ever didn't fully hook it up. Here's the alert modifier:
.alert(item: $showingAlert, content: { alert in
    switch alert.id {
    case .error, .success:
        print("In success and error!")
        return Alert(title: Text(alert.alertTitle), message: Text(alert.alertMessage), dismissButton: .none)
    default:
        fatalError("Have mis-managed alert in the ViewName - \(alert.id): \(alert.alertTitle)")
    }
})
Then whenever I needed that alert to show in the code I could simply set the showingAlert to its needed AlertIdentifier. Here's the success message:
showingAlert = AlertIdentifier(
                id: .success,
                alertTitle: "Success!",
                alertMessage: "You succeeded!")
I liked how this constrained things a bit as I'd have to go in and update this shared AlertIdentifier struct if I needed another choice, like that secondary confirmation, to use in a new view but I hated how messy it felt like it was getting. That said I ignored this and whenever I had an issue with the alert not popping I'd move the non-working alert modifier up and down until it worked again.... and that was fine until I noticed an issue that couldn't be ignored anymore.
My Breaking Point
My breaking point came when I was testing my app on different devices and I realized that although I had no issues on my phone or iPad the Mac version of my app didn't have any alert show up whenever it cam from a Form or... I just realized now it could've been the fact it was on a sheet. Regardless of the cause this issue made me realized I needed to do something and I looked online for a solution.
Although I didn't find anything specific to my cause I did come across a reply to this Hacking with Swift Forum question SOLVED: iOS 17 Issue with Alerts that worked in iOS 16 that showed how they created an alert management system.
Although I didn't use the code itself looking over the first bit made me realize how I could set up my own version.
Solution Explained
My own version of the alert management system has a similar AlertIdentifier with a success, error, destructive, and confirmation setting. That said, I've also generalized it by expanding beyond the previous id choice, alert title, alert message, and the optional alert button caption by adding a confirmation method that can be passed in: confirmationMethod: @escaping () -> Void. There are also two initializers so you can use the larger one for the confirmation and/or destructive alerts where you're confirming an action before then executing it through the passed in confirmation method or you can use the simpler initializer akin to the old way where the id choice, title, and message are ted and the optional button caption and method remains unset and unused.
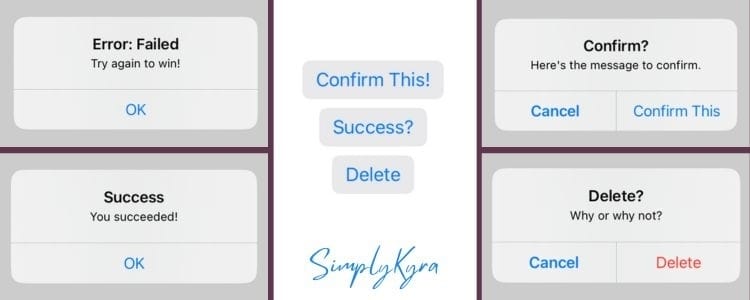
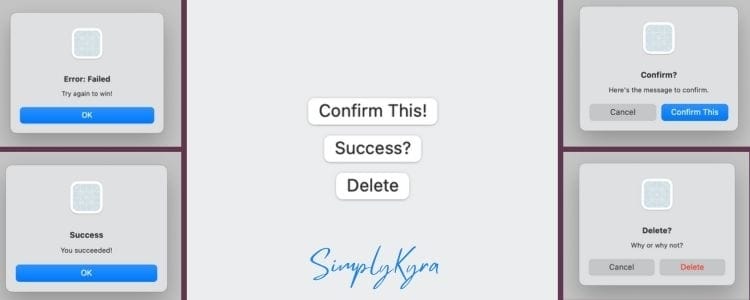
Appearance
In my sample code below I create a set of three buttons letting you test the ability to confirm an action, show a success or failure, and/or confirm a delete. Below you can see how it looks in iOS and macOS with the buttons in the center of the collage and the resulting alerts arranged on the left (failure and success) and right (confirmation and deletion) sides.
Solution Code
AlertIdentifier
My previous AlertIdentifier struct worked great for the success and error messages using the id showing success or error along with the title and messages strings. To generalize it I realized I needed to update the confirmation choice by adding the ability to pass in the method that needs to be executed when the choice is confirmed. I also wanted the ability to pass in an optional string for the label on the confirmation button... if it isn't passed in I default it to the title of the alert. The destructive choice, used for confirming a deletion, was simple as I could piggy back on the confirmation process but change the confirm button, later, to destructive to show the red color. Essentially this meant I needed two initializers where one is for deletion and confirmation where the method and caption is passed in with the it, title, and message. The other initializer only passes in this three and defaults the other two as they won't be used. This results in the following code:
public struct AlertIdentifier: Identifiable {
    public var id: Choice
    public var alertTitle: String
    public var alertMessage: String
    public var alertButtonCaption: String?
    // Use two init so the confirmation method can essentially be optional
    public var confirmationMethod: () -> Void

    // For the confirmation entries with a confirmation button/method and one cancel
    public init(id: Choice, alertTitle: String, alertMessage: String, alertButtonCaption: String? = nil, confirmationMethod: @escaping () -> Void) {
        self.id = id
        self.alertTitle = alertTitle
        self.alertMessage = alertMessage
        self.alertButtonCaption = alertButtonCaption ?? alertTitle
        self.confirmationMethod = confirmationMethod
    }

    // For the general success or error ones
    public init(id: Choice, alertTitle: String, alertMessage: String, alertButtonCaption: String? = nil) {
        self.id = id
        self.alertTitle = alertTitle
        self.alertMessage = alertMessage
        // No confirmation methods/buttons but will set
        self.alertButtonCaption = alertButtonCaption ?? alertTitle
        self.confirmationMethod = {}
    }

    public enum Choice {
        case success // Success!
        case error // Error in process
        case destructive // Need destructive caption for confirmation when deleting
        case confirmation // Confirm something before proceeding (can be used for deletion)
    }
}
AlertController
Since I wanted to use the AlertIdentifier struct in one main place and I wanted to set it from so many places with it to pop up immediately I added an AlertController struct and made it an ObservableObject. Here the above AlertIdentifier is published when set but is initialized to nil.
public class AlertController: ObservableObject {
    @Published public var myAlert: AlertIdentifier?

    public init() {
        self.myAlert = nil
    }
}
Hook It Up
Since I want the alerts to show up every I head to my main and declare the AlertController there and, so I can set it from other locations, make sure to add it to the environment : .environmentObject(alertController). With that done I now need to make the alert show up whenever the AlertIdentifier is set. I set this up the same was as before with the alert modifier but now set the item to $alertController.myAlert. In the switch statement I'm able to handle the success and error with the same alert so combine them together. Although the confirmation and destructive options are also the same except for the primary button type (default versus destructive) I kept them separate though I now wonder if I could combine them in the same case statement and set the button type with a if else statement. Anyway like before I add a default with a message on where this was but then comment it out as all the switch cases are handled.
@main
struct TestMupltiplatformApp: App {
    @StateObject private var alertController = AlertController()

    var body: some Scene {
        WindowGroup {
            ContentView()
                .environmentObject(alertController)
                .alert(item: $alertController.myAlert, content: { alert in
                    switch alert.id {
                    case .error, .success:
                        print("In success and error!")
                        return Alert(title: Text(alert.alertTitle), message: Text(alert.alertMessage), dismissButton: .none)
                    case .confirmation:
                        print("in confirmation")
                        // Confirm the upload
                        return Alert(title: Text(alert.alertTitle),
                                     message: Text(alert.alertMessage),
                                     primaryButton: .default(Text(alert.alertButtonCaption ?? alert.alertTitle), action: {
                            print("Submitted")
                            alert.confirmationMethod()
                        }), secondaryButton: .cancel())
                    case .destructive:
                        print("in destructive. If we want the confirmation be destructive.")
                        return Alert(title: Text(alert.alertTitle),
                                     message: Text(alert.alertMessage),
                                     primaryButton: .destructive(Text(alert.alertButtonCaption ?? alert.alertTitle), action: {
                            print("Submitted destructive")
                            alert.confirmationMethod()
                        }), secondaryButton: .cancel())
//                    default:
//                        fatalError("Have mis-managed alert in the main alert - \(alert.id): \(alert.alertTitle)")
                    }
                })
        }
    }
}
Now Set It
With the alertController now set in the environment I can now grab it in whichever view needs to have an alert and, when assigned an alertIdentifier, have the alert show! To do this I get the alertController with: @EnvironmentObject var alertController: AlertController. And then, in this example, created three buttons to show all four choice types with print statements to show where the code could go. I may have had a bit of fun and combined the error and success into one button with your alert determined by a random boolean. Anyway the code is here:
struct ContentView: View {
  @EnvironmentObject var alertController: AlertController

  var body: some View {
      VStack {
          Button(action: {
              alertController.myAlert = AlertIdentifier(
                id: .confirmation,
                alertTitle: "Confirm?",
                alertMessage: "Here's the message to confirm.",
                alertButtonCaption: "Confirm This",
                confirmationMethod: methodOnceConfirmed)
          }, label: {
              Text("Confirm This!")
          })

          Button(action: {
              runCheck(check: Bool.random())
          }, label: {
              Text("Success?")
          })


          Button(action: {
              alertController.myAlert = AlertIdentifier(
                id: .destructive,
                alertTitle: "Delete?",
                alertMessage: "Why or why not?",
                alertButtonCaption: "Delete",
                confirmationMethod: methodOnceDeleted)
          }, label: {
              Text("Delete")
          })
      }
      .buttonStyle(BorderedButtonStyle())
  }

  private func runCheck(check:Bool) {
    if check {
        alertController.myAlert = AlertIdentifier(
                id: .success,
                alertTitle: "Success",
                alertMessage: "You succeeded!")
    } else {
        alertController.myAlert = AlertIdentifier(
                id: .error,
                alertTitle: "Error: Failed",
                alertMessage: "Try again to win!")
    }
  }

  private func methodOnceConfirmed() {
      print("Confirmed")
  }

    private func methodOnceDeleted() {
        print("It's done")
    }
}
One Minor Issue... and It's Solution
I wanted to warn you that after I finished this I noticed that the alert worked great in the Navigation views but it wouldn't show up on any opened sheets. In those cases I decided to treat the alerts as I did before and rather than use the alertController in the environment I instead created an alert using State: @State var showingAlert:AlertIdentifier?. When creating the new AlertIdentifier I assigned it to the showingAlert variable rather than to the alertController in the environment:
showingAlert = AlertIdentifier(
                id: .success,
                alertTitle: "Success!",
                alertMessage: "You succeeded!")
Since the alert wasn't hooked into the main one I next had to handle how it was used in the view so I added the alert modifier and only handled the cases used in this exact view with a default showing a fatalError and a message in case I added more cases in the future without updating this part. This is comparable to how I handled my alerts in every view previously to the above situation.
.alert(item: $showingAlert, content: { alert in
    switch alert.id {
    case .error, .success:
        print("In success and error!")
        return Alert(title: Text(alert.alertTitle), message: Text(alert.alertMessage), dismissButton: .none)
    default:
        fatalError("Have mis-managed alert in the ViewName - \(alert.id): \(alert.alertTitle)")
    }
})
And with that my alert system was a go and I haven't need to worry about moving the alert modifier up and down in my code to have it show up! I hope this can help you and if so I'd love to know how and, if any, what changes you made to it. Maybe your updates can help me in the future or someone else reading this.
Regardless I hope you’re having a good day and a great week!
If you’re interested in getting any of my future blog updates I normally share them to my Facebook page and Instagram account. You’re also more than welcome to join my email list located right under the search bar or underneath this post.
Did this save you time?